Product Overview
The GROHE GD2 Dual Flush Valve Set is an adjustable conversion kit designed for flushing cisterns, specifically for use with GROHE Rapid SL 38528 and cistern 38661. This kit allows for both full (6-9 liters) and half flush options, promoting water conservation. It consists of a valve seat and a dual flush discharge valve (AV1).
Set Contains:
- 1x Dual flush valve set
Key features include:
- High Pressure compatibility (Over 1.0 Bar)
- Designed for flushing cistern 38661000
- Compatible with Rapid SL 38528000
- Includes valve seat
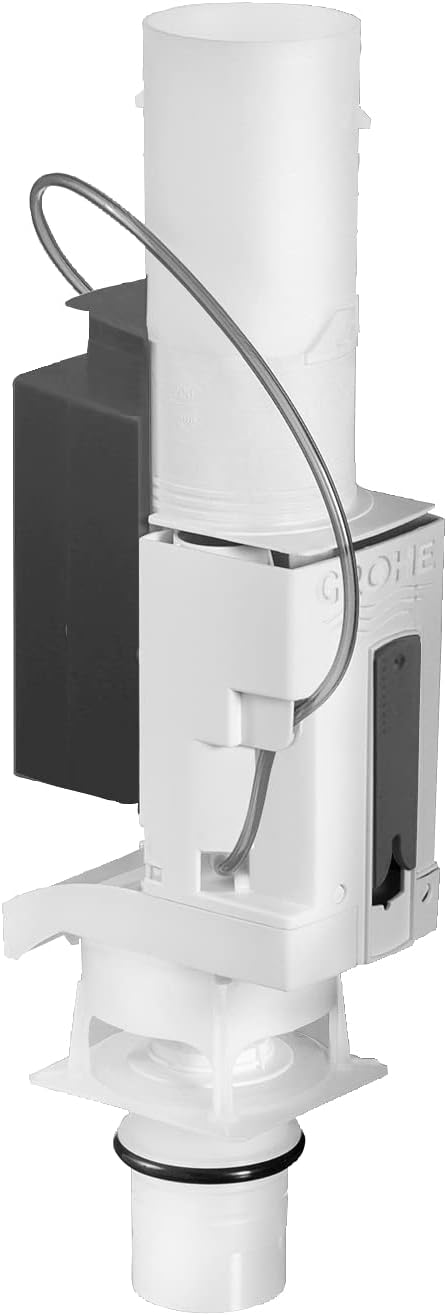
Image: The complete GROHE GD2 Dual Flush Valve Set, including the main valve body and associated components.
Components
The GROHE GD2 Conversion Kit includes the following primary components, as illustrated in the diagram:

Image: An exploded diagram illustrating the individual components of the dual flush valve set, labeled 1.1 (overflow tube), 1.2 (dual flush discharge valve), 1.3 (valve seat), and 2 (cistern opening/drain connection) for assembly reference.
Specifications
| Attribute | Value |
|---|---|
| Brand | GROHE |
| Model Number | 38736000 |
| Material | Stainless Steel, Brass |
| Color | Silber |
| Capacity | 6 Liters (adjustable) |
| Item Weight | 0.36 Kilograms (12.7 ounces) |
| Product Dimensions | 0.39 x 0.39 x 0.39 inches |
| Manufacturer | Grohe |
| Warranty | 5 Year Manufacturer's Warranty |

Image: A visual representation of the product's dimensions, indicating a height of 15 inches (37 cm).
Setup and Installation
This conversion kit is specifically designed for use with GROHE Rapid SL 38528 frames and flushing cistern 38661. For optimal performance and to ensure proper function, professional installation is highly recommended.
Required Tools (Not Included):
- Adjustable wrench
- Screwdriver (flathead and Phillips)
- Plumber's tape or thread sealant
Installation Steps:
- Preparation: Before beginning, ensure the main water supply to the toilet cistern is completely turned off. Flush the toilet to drain the cistern of all water.
- Remove Old Valve: Carefully disconnect and remove the existing flush valve assembly from the cistern. Clean any residue from the cistern opening.
- Install Valve Seat: Place the new valve seat (part 1.3 in the component diagram) into the cistern opening. Ensure it is properly aligned and creates a secure, watertight seal.
- Assemble Dual Flush Valve: Connect the dual flush discharge valve (part 1.2) to the installed valve seat. Follow any specific alignment indicators on the valve.
- Secure Valve: Ensure the entire valve assembly (part 1) is correctly seated and firmly secured within the cistern. Some models may require a securing nut from underneath.
- Connect Overflow Tube: Attach the flexible overflow tube (part 1.1) to the designated connection point on the main valve body. Ensure it is routed correctly to prevent kinks.
- Test: Slowly turn the water supply back on, allowing the cistern to refill. Carefully inspect all connections for any signs of leaks. Perform several test flushes (both full and half) to ensure proper operation and water level adjustment.

Image: Auxiliary components, possibly installation brackets or guides, that may be used during the setup process to secure the valve within the cistern.
Operating Instructions
The GROHE GD2 Dual Flush Valve is designed to offer two distinct flushing volumes, allowing for efficient water usage based on the waste type.
Dual Flush Operation:
- Full Flush (6-9 Liters): To activate a full flush, fully depress the larger button on your flush plate or fully push the flush mechanism. This option is suitable for solid waste.
- Half Flush (Adjustable): For a reduced flush, suitable for liquid waste, press the smaller button or partially depress the flush plate. This conserves water.
The flush volume for both full and half flush can be adjusted during installation to optimize water usage according to local regulations or personal preference.
Maintenance
Regular maintenance helps ensure the longevity and optimal performance of your GROHE GD2 Dual Flush Valve.
Cleaning:
- For external components, use a soft cloth with mild soap and water. Avoid abrasive cleaners, scouring pads, or harsh chemicals (e.g., bleach, ammonia-based cleaners) as these can damage the finish and internal seals.
- In areas with hard water, mineral deposits may accumulate on internal parts. Periodically inspect the valve and gently clean any buildup using a non-corrosive descaling solution designed for plumbing fixtures.
Inspection:
- Annually inspect all rubber seals and gaskets for signs of wear, cracking, or deterioration. Worn seals are a common cause of leaks and should be replaced promptly.
- Ensure that the flush mechanism moves freely and smoothly without any sticking or obstruction. Lubricate moving parts with silicone grease if necessary.
For more detailed cleaning procedures or part replacement, it is advisable to consult the official GROHE service manual or contact a qualified plumbing professional.
Troubleshooting
This section addresses common issues you might encounter with your GROHE GD2 Dual Flush Valve and provides potential solutions.
| Problem | Possible Cause | Solution |
|---|---|---|
| Continuous running water | Worn or misaligned flapper/seal; debris under seal; faulty fill valve | Turn off water supply. Inspect and clean the valve seal for debris. Ensure the seal is properly seated. If worn, replace the seal. Check the fill valve for proper shut-off. |
| Weak or incomplete flush | Low water level in cistern; partial obstruction in valve; flush plate not fully activating valve | Check the water level in the cistern and adjust the fill valve if it's too low. Inspect the flush valve for any blockages or debris. Ensure the flush plate linkage is correctly adjusted to fully activate the valve. |
| Flush plate not returning to original position | Mechanism obstruction; faulty spring or linkage in flush plate | Ensure the flush plate mechanism is clear of any debris or obstructions. Check the springs and linkages behind the flush plate for damage or misalignment. Consult a professional if internal components are faulty. |
| Water leaking from cistern base | Loose valve seat nut; damaged valve seat gasket | Turn off water supply and drain cistern. Tighten the large nut securing the flush valve to the cistern. If leak persists, replace the valve seat gasket. |
If you are unable to resolve the issue using these steps, it is recommended to contact GROHE customer support or a certified plumbing professional.
Warranty and Support
GROHE stands behind the quality of its products. This GROHE GD2 Dual Flush Valve Set is covered by a 5-year manufacturer's warranty. This warranty covers defects in materials and workmanship under normal use and service from the date of purchase.
For warranty claims, technical assistance, or to inquire about replacement parts, please contact GROHE customer support. When contacting support, please have your product model number (38736000) and proof of purchase readily available.
Contact Information:
- Official Website: For the most up-to-date contact details, FAQs, and product information, please visit the official GROHE website: www.grohe.us
- Phone Support: Refer to the GROHE website for specific regional customer service phone numbers and operating hours.
GROHE is committed to providing high-quality products and support to its customers.