
1. Product Overview
The Shop Fox W1670 is a 1/2-horsepower floor radial drill press designed for versatile drilling operations. Its radial arm design allows for drilling at various angles by tilting the head and the table. This design also facilitates horizontal boring and accommodates workpieces up to 34 inches wide for center boring.
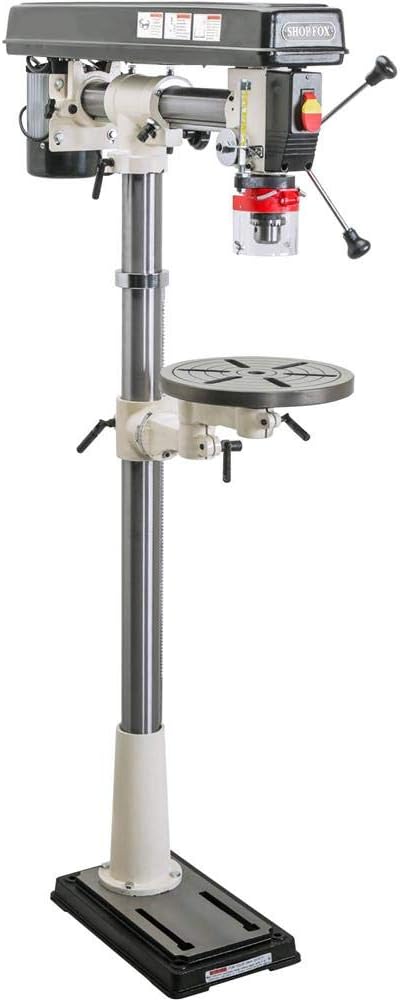
Figure 1: Overall view of the Shop Fox W1670 Floor Radial Drill Press.
2. Safety Information
Operating any power tool requires adherence to strict safety guidelines to prevent injury. Read and understand all instructions before operating this drill press.
- Always wear appropriate personal protective equipment, including safety glasses or a face shield, and hearing protection.
- Ensure the workpiece is securely clamped to the table before drilling. Never hold the workpiece by hand.
- Keep hands and fingers clear of the rotating drill bit and chuck.
- Disconnect power before making adjustments, changing bits, or performing maintenance.
- Maintain a clean and well-lit work area. Cluttered areas invite accidents.
- Do not operate the drill press in damp or wet conditions.
- Ensure the drill press is properly grounded.
- Mount the drill press securely to a stable surface or the floor to prevent tipping during operation.
3. Components and Features
Familiarize yourself with the main components of your drill press:
- Motor: Provides power for drilling operations.
- Head Assembly: Contains the motor, spindle, and chuck. It can tilt for angled drilling.
- Radial Arm: Allows the head assembly to move horizontally, increasing the drilling capacity.
- Column: The main vertical support for the head and table.
- Table: A circular work surface that can be adjusted vertically, tilted, and rotated 360 degrees.
- Base: Provides stability for the entire unit.
- Chuck: Holds the drill bits. This model includes a JT33 keyed drill chuck.
- Depth Stop: Allows for precise control over drilling depth.
- Speed Adjustment: Belt-driven system for changing spindle speeds.

Figure 2: Head assembly with power switch and depth stop.

Figure 3: Precision ground cast iron table with slots for clamping.

Figure 4: Belt housing for adjusting spindle speeds.
4. Setup and Assembly
The Shop Fox W1670 requires assembly before use. While specific detailed instructions are typically provided with the product, general steps include:
- Unpacking: Carefully remove all components from the packaging. Inspect for any shipping damage.
- Base Assembly: Secure the column to the heavy-duty base.
- Table Assembly: Attach the table support and table to the column. Ensure the rack-and-pinion elevation controls are correctly installed.
- Head Assembly: Mount the head assembly, including the motor and radial arm, onto the top of the column.
- Chuck Installation: Press the JT33 keyed drill chuck onto the spindle shaft. This may require a press or careful tapping.
- Secure Mounting: For optimal stability and safety, it is highly recommended to bolt the drill press base to the floor or a substantial workbench using appropriate fasteners. Alternatively, mount the base to a 3/4" plywood sheet for increased footprint and stability if floor bolting is not feasible.
- Lubrication: Before first use, clean and lubricate all moving parts, especially the spindle and column, with a lightweight machine oil.
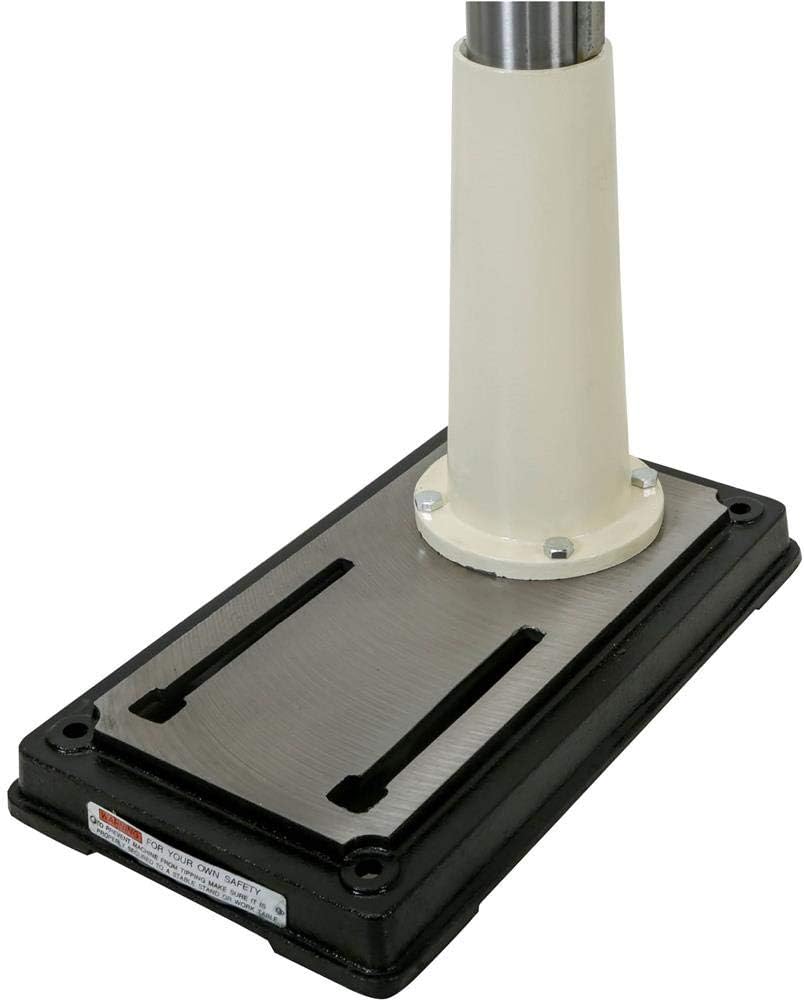
Figure 5: The sturdy base of the drill press, designed for secure mounting.
5. Operating Instructions
Follow these steps for safe and effective operation of your drill press:
- Select Drill Bit: Choose the appropriate drill bit for your material and task. Insert it firmly into the chuck and tighten with the chuck key.
- Adjust Spindle Speed: Open the belt housing (Figure 4) and adjust the belt position on the pulleys to achieve the desired spindle speed. Refer to the speed chart inside the housing for guidance. Close the housing securely.
- Position Workpiece: Place your workpiece on the table and secure it with clamps. Ensure the drilling point is directly under the drill bit.
- Adjust Table Height: Use the rack-and-pinion crank to adjust the table height so the drill bit can pass through the workpiece without hitting the table.
- Adjust Table/Head Angle (if needed):
- The table can tilt 90 degrees in both directions and swing 360 degrees. Loosen the locking mechanism, adjust, and re-tighten.
- The head can tilt 45 degrees left and 90 degrees right. Loosen the locking mechanism on the radial arm, adjust the head angle, and re-tighten.
- Set Depth Stop: Adjust the depth stop to control how deep the drill bit penetrates the workpiece. This prevents drilling too deep.
- Power On: Turn on the drill press using the power switch.
- Drill: Slowly lower the drill bit into the workpiece using the feed handles. Apply steady, even pressure. Do not force the drill.
- Power Off: Once drilling is complete, raise the drill bit clear of the workpiece and turn off the drill press. Wait for the spindle to stop completely before removing the workpiece.
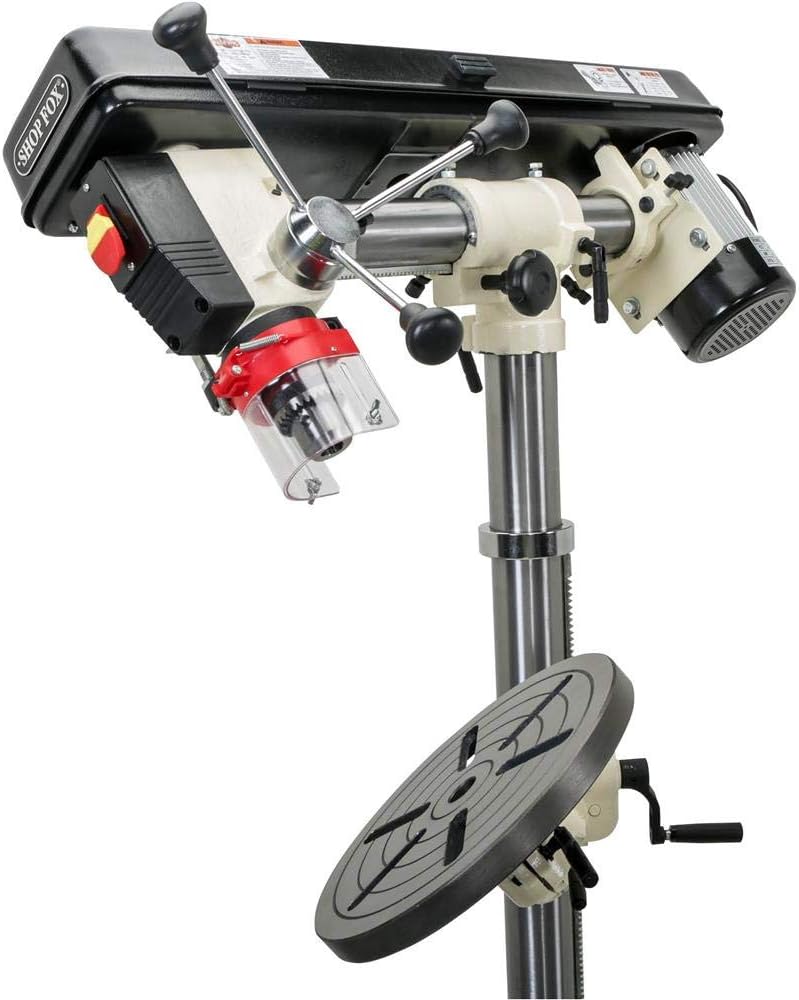
Figure 6: The head assembly can be tilted for angled drilling operations.

Figure 7: The chuck holds the drill bit, and the depth stop ensures consistent drilling depth.
6. Maintenance
Regular maintenance ensures the longevity and safe operation of your drill press.
- Cleaning: After each use, clean the drill press to remove dust, chips, and debris. Use a brush or vacuum; never use compressed air directly on moving parts as it can force debris into bearings.
- Lubrication: Periodically lubricate the column, spindle, and other moving parts with a light machine oil to ensure smooth operation and prevent rust.
- Belt Inspection: Regularly check the drive belts for wear, cracks, or tension. Replace worn belts and adjust tension as needed.
- Chuck Maintenance: Keep the chuck jaws clean and free of debris. Lubricate the chuck jaws occasionally.
- Fastener Check: Periodically check all nuts, bolts, and screws for tightness. Re-tighten as necessary.
7. Troubleshooting
This section addresses common issues you might encounter during operation.
- Drill Press Stalls During Operation:
- Check if the motor is receiving adequate power (110V, 5A).
- Ensure the drive belt is properly tensioned and not slipping.
- Reduce feed pressure. Excessive force can cause stalling.
- Verify the correct spindle speed is selected for the material and drill bit size.
- Drill Bit Not Running True/Wobbling:
- Ensure the drill bit is properly seated and tightened in the chuck.
- Inspect the drill bit for damage or bending.
- Check the chuck for damage or excessive runout.
- Excessive Vibration or Noise:
- Verify all mounting bolts are tight, especially the base to the floor/workbench.
- Check belt tension and condition.
- Ensure the motor and head assembly are securely fastened.
- Difficulty Adjusting Table or Head:
- Ensure all locking levers are loosened before attempting adjustment.
- Clean and lubricate the column and radial arm mechanisms.
8. Specifications
| Feature | Specification |
|---|---|
| Model Number | W1670 |
| Motor | 1/2 HP, 110V, 5A |
| Overall Height (Floor Model) | 64-1/2" |
| Spindle Travel | 3-1/4" |
| Number of Speeds | 5 |
| Range of Speeds | 550, 880, 1,520, 2,490, 3,470 RPM |
| Drill Chuck | 5/8" (JT33 keyed) |
| Maximum Chuck Size | 16 mm |
| Swing | 34" maximum |
| Table Size | 12-1/4" diameter |
| Table Swing | 360 degrees |
| Table Tilt | 90 degrees in both directions |
| Table Material | Precision ground cast iron |
| Head Tilt | 45° left / 90° right |
| Drilling Capacity (Wood) | 0.5 Inches |
| Drilling Capacity (Metal) | 0.5 Inches |
| Item Weight | Approximately 1 pound (Note: This weight seems incorrect for a floor drill press, refer to product packaging for actual weight) |
| Color | Black, Silver, White |
| Included Components | JT33 keyed drill chuck, rack-and-pinion elevation controls |
9. Warranty and Support
For information regarding warranty coverage, technical support, or replacement parts, please contact Shop Fox customer service directly. Keep your purchase receipt and model number (W1670) readily available when contacting support.