Introduction
This manual provides essential information for the safe and efficient operation of your Güde 71-Piece Pneumatic Tool Set, model 40401. This comprehensive set includes a variety of air-powered tools and accessories designed for a wide range of tasks, from automotive maintenance to general workshop applications. Please read these instructions carefully before initial use and keep them for future reference.

Image: The Güde 71-Piece Pneumatic Tool Set, showcasing the main tools and a selection of accessories neatly organized within its robust carrying case.
Safety Instructions
Always observe general safety regulations when working with pneumatic tools. Failure to follow these instructions may result in serious injury or property damage.
- Personal Protective Equipment: Always wear safety glasses, hearing protection, and appropriate work gloves.
- Air Supply: Ensure the air compressor is properly maintained and delivers clean, dry air at the correct pressure (maximum 6 bar for this set).
- Disconnect Air: Always disconnect the air supply before changing accessories, performing maintenance, or when the tool is not in use.
- Secure Workpiece: Always secure the workpiece firmly to prevent movement during operation.
- Tool Condition: Inspect tools and accessories for damage before each use. Do not use damaged equipment.
- Work Area: Keep the work area clean, well-lit, and free from obstructions.
- Children and Bystanders: Keep children and bystanders away from the work area.
- Proper Use: Use the correct tool for the job. Do not force small tools or attachments to do the work of a heavy-duty tool.
Package Contents
Your Güde 71-Piece Pneumatic Tool Set includes the following main components and a variety of accessories:
- Pneumatic Impact Wrench
- Pneumatic Ratchet Wrench
- Pneumatic Chisel Hammer
- Pneumatic Straight Grinder
- Blow Gun
- Various Sockets for Impact Wrench
- Chisels for Chisel Hammer
- Grinding Stones and Sanding Drums for Straight Grinder
- Assorted Nozzles and Adapters for Blow Gun
- Quick Connectors
- Oil Bottle
- PTFE Thread Seal Tape
- Hex Key
- Storage Case

Image: A detailed view of the five primary pneumatic tools included in the set, separated from their case.
Setup
- Air Compressor Connection: Connect your air compressor to the main air supply line. Ensure the compressor is capable of providing the required air pressure and volume for your tools (refer to specifications).
- Air Line Preparation: Install an air filter/regulator/lubricator unit (FRL unit) between the compressor and the tool for optimal performance and longevity. This unit filters moisture, regulates pressure, and provides lubrication.
- Attaching Quick Connectors: Apply PTFE thread seal tape to the threads of the quick connectors before attaching them to the air inlet of each tool. This ensures an airtight seal.
- Lubrication: Before first use and regularly thereafter, add a few drops of pneumatic tool oil into the air inlet of each tool. This is crucial for internal component lubrication.
- Pressure Setting: Set the air compressor's regulator to the recommended operating pressure (maximum 6 bar). Do not exceed the maximum operating pressure.

Image: Accessories for air line connection and lubrication, including quick connectors, an oil bottle, and PTFE tape.
Operating Instructions
General Operation
- Ensure the air hose is securely connected to the tool and the air supply.
- Always select the appropriate accessory for the task.
- Hold the tool firmly with both hands if necessary, maintaining good balance.
- Start the tool and apply it to the workpiece.
- After use, disconnect the air supply and store the tool properly.
Pneumatic Impact Wrench
Ideal for tightening and loosening stubborn fasteners, such as lug nuts during tire changes.
- Select the correct size impact socket and attach it securely to the wrench's square drive.
- Connect the air supply.
- Place the socket onto the fastener.
- Press the trigger to operate. Most impact wrenches have a forward/reverse selector.
- For tightening, use a torque wrench for final specification to prevent over-tightening.
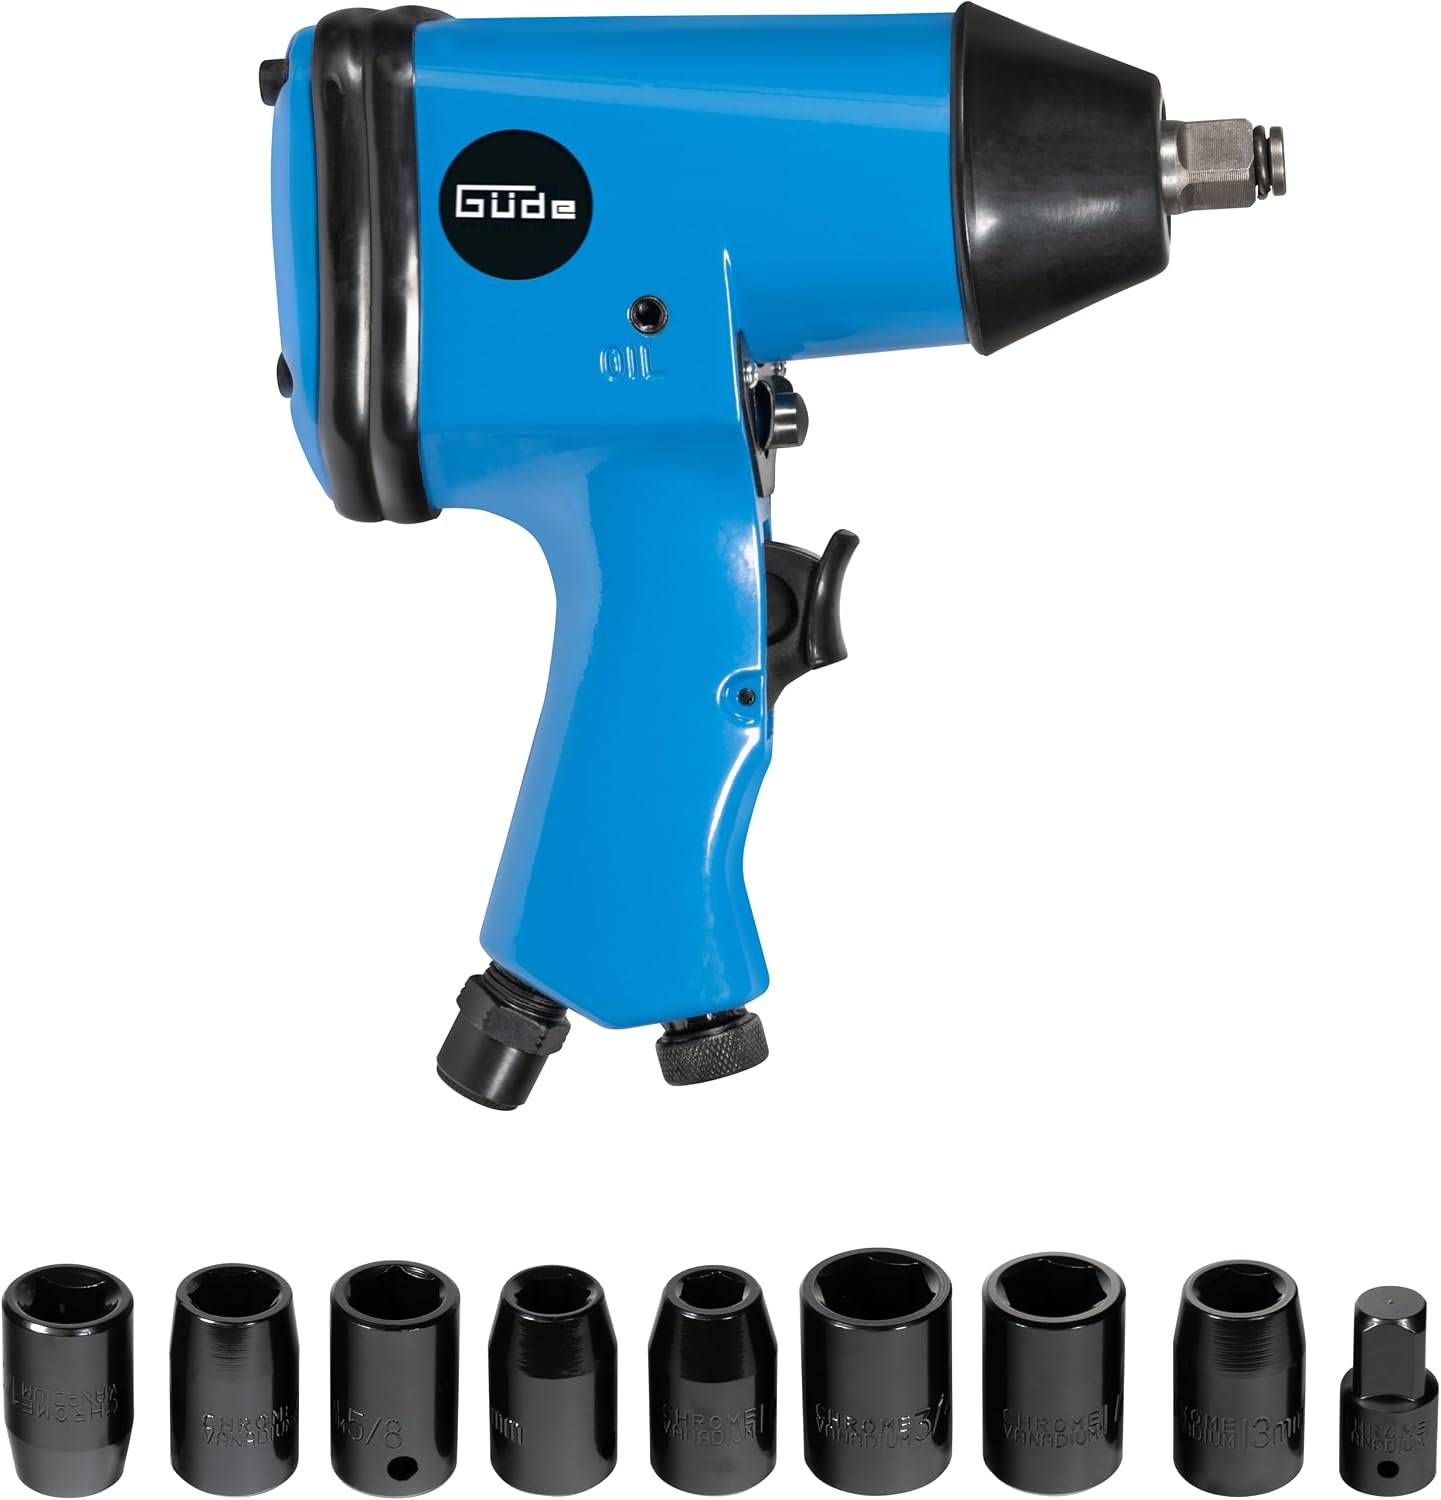
Image: The pneumatic impact wrench shown with various sockets, suitable for automotive tasks like tire changes.

Image: The impact wrench in action, used for changing a car tire, highlighting its application for annual tire changes.
Pneumatic Ratchet Wrench
Suitable for fastening and loosening bolts and nuts in tight spaces where an impact wrench might not fit.
- Attach the appropriate socket to the ratchet head.
- Connect the air supply.
- Position the socket onto the fastener.
- Press the trigger to operate. Use the directional switch for forward or reverse rotation.

Image: The pneumatic ratchet wrench, designed for assembly and repair work in tight areas.
Pneumatic Chisel Hammer
Used for demolition, cutting, and chiseling tasks on various materials.
- Insert the desired chisel into the tool's chuck and secure it with the spring retainer.
- Connect the air supply.
- Hold the tool firmly and position the chisel against the workpiece.
- Press the trigger to activate the hammering action.
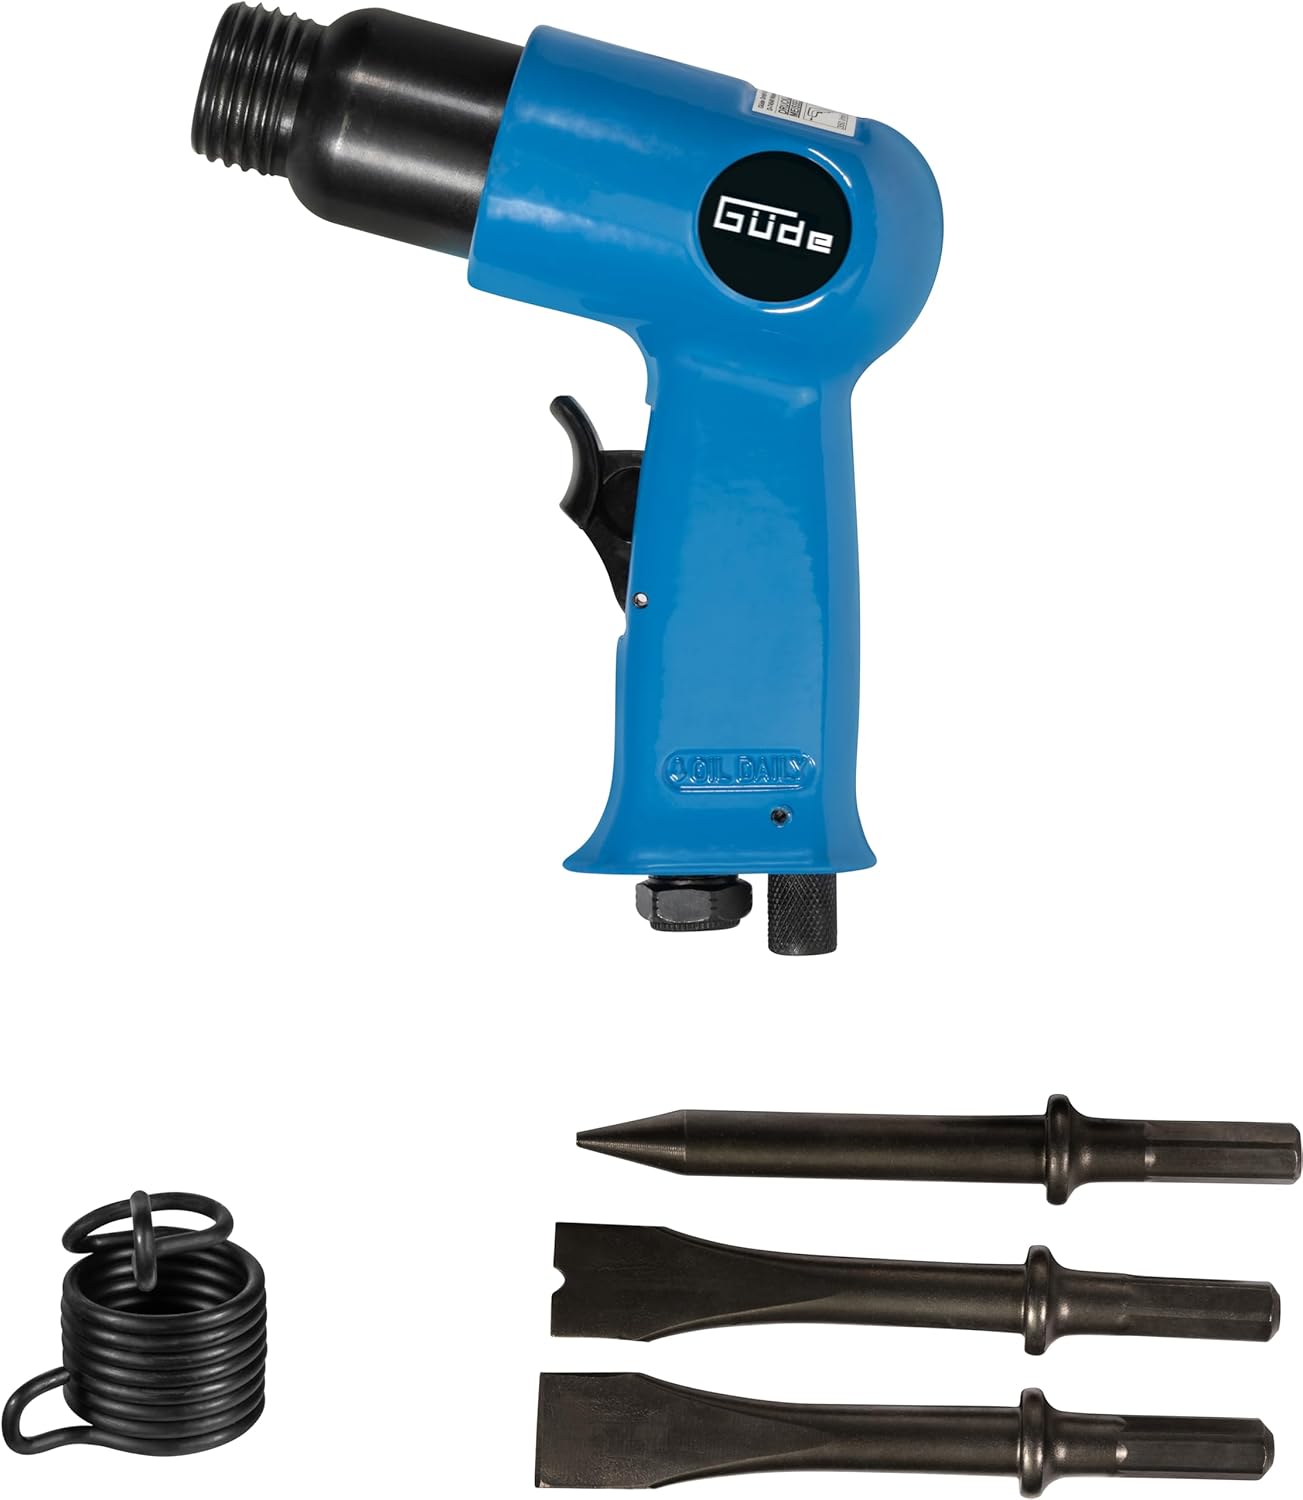
Image: The pneumatic chisel hammer, accompanied by various chisels and its retaining spring, for demolition and cutting tasks.
Pneumatic Straight Grinder
Versatile for deburring, grinding, polishing, and shaping various materials.
- Insert the appropriate grinding stone or sanding drum into the collet and tighten it securely using the provided wrenches.
- Connect the air supply.
- Hold the grinder firmly and apply it to the workpiece with light pressure.
- Press the trigger to start the rotation.

Image: The pneumatic straight grinder, shown with a comprehensive selection of grinding stones and sanding drums for various finishing tasks.
Blow Gun
Used for cleaning dust, debris, and drying surfaces.
- Attach the desired nozzle to the blow gun.
- Connect the air supply.
- Direct the nozzle towards the area to be cleaned or dried.
- Press the lever to release compressed air.
- Always wear eye protection when using the blow gun to prevent injury from flying debris.

Image: The blow gun with a selection of nozzles, suitable for cleaning and drying operations.
Maintenance
- Lubrication: Add 3-5 drops of pneumatic tool oil into the air inlet before each use or after every hour of continuous operation. This prevents wear and corrosion.
- Cleaning: Keep tools clean and free from dirt and debris. Wipe down tools with a clean cloth after each use.
- Air Filter: Regularly check and drain the moisture trap on your air compressor and FRL unit. Replace air filter elements as needed.
- Hose Inspection: Inspect air hoses for cracks, leaks, or damage. Replace damaged hoses immediately.
- Storage: Store tools in their original carrying case in a dry, clean environment, away from direct sunlight and extreme temperatures.
Troubleshooting
| Problem | Possible Cause | Solution |
|---|---|---|
| Tool not operating or low power | Low air pressure; insufficient air volume from compressor; air leak in hose/connections; lack of lubrication; clogged air filter. | Check compressor pressure setting; ensure compressor capacity meets tool requirements; inspect hoses and connections for leaks; lubricate tool; check and clean air filter. |
| Excessive air leakage | Loose connections; damaged O-rings or seals; worn quick connectors. | Tighten all connections; replace damaged O-rings/seals; replace worn quick connectors. |
| Tool runs intermittently | Moisture in air line; restricted air flow; internal debris. | Drain moisture from compressor tank and FRL unit; check air hose for kinks or blockages; lubricate tool and cycle it to clear debris. |
Specifications
| Feature | Detail |
|---|---|
| Manufacturer | Güde GmbH & Co. KG |
| Model Number | 40401 |
| Product Dimensions | 45.8 x 10.5 x 47.5 cm |
| Weight | 8 kg |
| Color | Blue, Black, Grey |
| Material | Metal, Plastic |
| Power Source | Compressed Air |
| Number of Pieces | 71 |
| Max. Operating Pressure | 6 bar |
| Connection Thread | 1/4" |

Image: The tool set case displaying key specifications: 1/4" connection thread, 6 bar maximum working pressure, and 8.0 kg weight.
Warranty and Support
For warranty information or technical support, please refer to the documentation provided with your purchase or contact Güde GmbH & Co. KG directly. Keep your purchase receipt as proof of purchase.
Manufacturer: Güde GmbH & Co. KG