1. Introduction
This manual provides detailed instructions for the safe and effective use of your Olympus IC Recorder Voice-Trek DS-61. Please read this manual thoroughly before using the device and keep it for future reference. The Olympus Voice-Trek DS-61 is a digital voice recorder designed for high-quality audio capture and playback, featuring 2 GB of internal memory and USB connectivity.
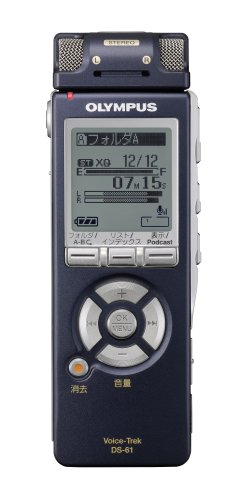
Figure 1: Front view of the Olympus IC Recorder Voice-Trek DS-61, showing the display and control buttons.
2. Safety Precautions
To ensure safe operation and prevent damage to the device, please observe the following precautions:
- Do not expose the device to extreme temperatures, direct sunlight, or high humidity.
- Avoid dropping the device or subjecting it to strong impacts.
- Keep the device away from water and other liquids. If liquid enters the device, discontinue use immediately and consult a service professional.
- Use only the specified batteries and accessories. Incorrect battery types may cause fire or explosion.
- Do not attempt to disassemble or modify the device. This may result in electric shock or damage and will void the warranty.
- Clean the device with a soft, dry cloth. Do not use abrasive cleaners or solvents.
3. Package Contents
Verify that all items are present in the package:
- Olympus IC Recorder Voice-Trek DS-61
- USB Cable
- Stereo Microphone (optional, may be included depending on package)
- Remote Control (optional, may be included depending on package)
- Instruction Manual (this document)
4. Part Names and Functions
Familiarize yourself with the various parts of your Voice-Trek DS-61 and their functions.
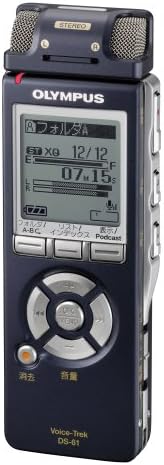
Figure 2: Olympus IC Recorder Voice-Trek DS-61, showing the main display and control layout.
4.1 Front Panel
- Display: Shows recording status, file information, menu options, and battery level.
- Control Buttons (Play, Stop, Record, Rewind, Fast Forward): Used for recording, playback, and navigation.
- OK/Menu Button: Confirms selections and accesses the menu.
- Folder/Index Buttons: Navigates between folders and sets index marks.
4.2 Side Panels
- Power/Hold Switch: Turns the device on/off and locks buttons.
- Volume Buttons (+/-): Adjusts playback volume.
- USB Port: Connects the recorder to a computer.
- Microphone Jack: For connecting an external microphone.
- Earphone Jack: For connecting headphones.
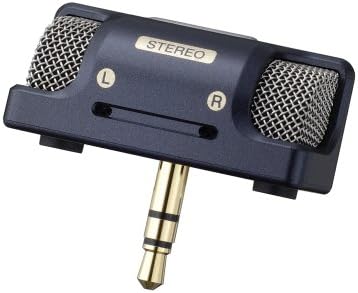
Figure 3: An external stereo microphone accessory, which can be connected to the device for enhanced audio capture.

Figure 4: A wired remote control accessory, allowing for convenient operation from a distance.
5. Setup
5.1 Battery Installation
- Open the battery compartment cover on the back of the device.
- Insert two AAA batteries, ensuring correct polarity (+/-).
- Close the battery compartment cover securely.
5.2 Initial Settings (Date and Time)
Upon first use or after battery replacement, you may need to set the date and time.
- Turn on the device using the Power switch.
- If prompted, follow the on-screen instructions to set the year, month, day, hour, and minute.
- Use the navigation buttons to adjust values and the OK button to confirm.
5.3 Connecting to a Computer
The Voice-Trek DS-61 can be connected to a computer for file transfer.
- Ensure the recorder is powered on.
- Connect the smaller end of the USB cable to the USB port on the recorder.
- Connect the larger end of the USB cable to an available USB port on your computer.
- The recorder will appear as a removable disk drive on your computer, allowing you to drag and drop audio files.
6. Operating Instructions
6.1 Basic Recording
- Turn on the device.
- Press the Record button. The recording indicator will light up, and recording will begin.
- To pause recording, press the Record button again. Press it once more to resume.
- To stop recording, press the Stop button. The recorded file will be saved automatically.
6.2 Playback
- Navigate to the desired file using the Folder and navigation buttons.
- Press the Play button to start playback.
- Use the Volume +/- buttons to adjust the playback volume.
- Press Stop to end playback.
6.3 File Management
The Voice-Trek DS-61 allows you to organize and manage your recorded files.
- Folders: Use the Folder buttons to switch between different recording folders (e.g., A, B, C).
- Erasing Files: Select the file you wish to erase, then access the menu and select the 'Erase' option. Confirm your selection.
6.4 Menu Navigation
Press the Menu/OK button to access the device settings. Use the navigation buttons to scroll through options and OK to select. Press Menu/OK again to exit the menu.
7. Maintenance
7.1 Cleaning
Wipe the exterior of the recorder with a soft, dry cloth. Do not use liquid cleaners, solvents, or abrasive materials, as these can damage the finish or internal components.
7.2 Storage
When not in use for extended periods, remove the batteries to prevent leakage. Store the device in a cool, dry place away from direct sunlight and extreme temperatures.
8. Troubleshooting
If you encounter issues with your Voice-Trek DS-61, refer to the following common problems and solutions:
| Problem | Possible Cause | Solution |
|---|---|---|
| Device does not power on. | Batteries are dead or incorrectly inserted. | Replace batteries or check polarity. |
| No sound during playback. | Volume is too low; headphones not connected properly. | Increase volume; ensure headphones are fully inserted. |
| Cannot record. | Memory is full; device is in HOLD mode. | Delete old files to free up space; slide the HOLD switch to the OFF position. |
| Computer does not recognize the device. | USB cable is faulty or not connected properly. | Try a different USB port or cable; ensure the device is powered on. |
9. Specifications
| Feature | Detail |
|---|---|
| Brand | Olympus |
| Model Number | DS-61 |
| Memory Storage Capacity | 2 GB |
| Hardware Interface | USB |
| Item Weight | 80 Grams |
| Power Source | AAA Batteries (x2) |
| Recording Format | DSS, MP3 (check device for exact formats) |
| Microphone | Built-in stereo microphone, external microphone jack |
| Speaker | Built-in speaker |
10. Warranty and Support
Olympus products are manufactured to high-quality standards. For information regarding warranty coverage, please refer to the warranty card included with your product or visit the official Olympus website. For technical support, product registration, or service inquiries, please contact Olympus customer support through their official channels.
Online Support: Visit the official Olympus support website for FAQs, software downloads, and contact information.
Customer Service: Refer to your product packaging or the Olympus website for regional customer service contact details.