
Introduction
Thank you for purchasing the Monte Carlo Mach Two 3MTR38TMO-L 38-inch Ceiling Fan. This manual provides essential information for the safe installation, operation, and maintenance of your new ceiling fan. Please read these instructions thoroughly before beginning installation and retain them for future reference.
Safety Information
WARNING: To reduce the risk of fire, electric shock, or personal injury, always follow these safety guidelines.
- Ensure the power is turned off at the circuit breaker or fuse box before installation or servicing.
- All wiring must be in accordance with national and local electrical codes. If you are unfamiliar with wiring, consult a qualified electrician.
- The mounting structure must be capable of supporting the weight of the fan (approximately 19.3 pounds).
- Do not operate the fan with damaged blades or housing.
- Keep hands, clothing, and other objects clear of the fan blades when the fan is operating.
- This fan is designed for indoor use only.
Package Contents
Verify that all components are present before beginning installation:
- Fan Motor Assembly
- Fan Blades (3)
- Downrod (4-inch, 1/2-inch Interior Diameter)
- Mounting Bracket
- Remote Control and Wall Control
- Light Kit (includes 1 bulb)
- Hardware Pack (screws, washers, wire nuts)
- Instruction Manual
Setup and Installation
Professional installation is recommended for optimal safety and performance. Ensure you have the necessary tools, including a screwdriver, wire strippers, and a ladder.
1. Mounting the Fan
Attach the mounting bracket to the ceiling junction box. Ensure the junction box is securely fastened to the building structure and can support the fan's weight. Feed the electrical wires through the center hole of the mounting bracket.
2. Wiring Connections
Connect the fan's electrical wires to the household wiring according to the wiring diagram provided in the separate wiring guide (if applicable) or standard electrical practices. Ensure all connections are secure and insulated with wire nuts.
3. Attaching the Downrod and Fan Body
Insert the downrod through the canopy and motor housing. Secure the downrod to the motor with the provided pin and screw. Carefully lift the fan assembly and hang it on the mounting bracket hook. Connect the remaining electrical wires as instructed.
4. Installing the Blades
Attach each of the three fan blades to the motor housing using the provided screws. Ensure all screws are tightened securely. The blades are precision balanced for wobble-free operation.
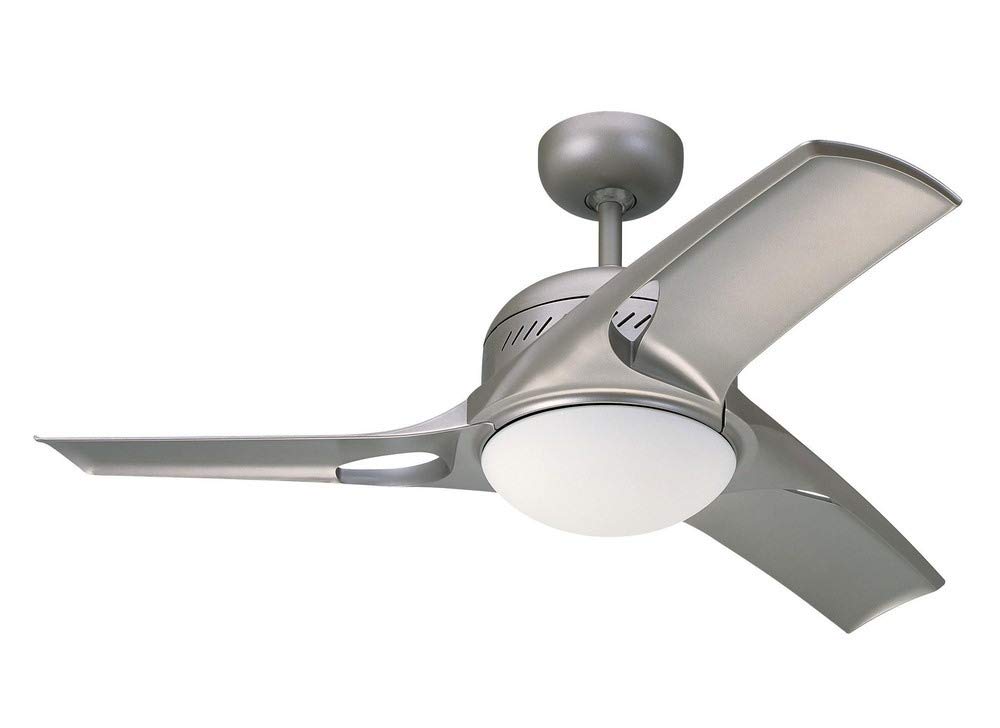
Image: Monte Carlo Mach Two 3MTR38TMO-L 38-inch Ceiling Fan. This image shows the assembled fan with three blades and the integrated light kit.
5. Installing the Light Kit
Connect the light kit wires to the fan motor wires as specified in the instructions. Secure the light kit to the bottom of the fan motor housing. Install the included bulb.
Operating Instructions
Your Monte Carlo Mach Two ceiling fan comes with both a hand-held remote control and a wall control for convenient operation.
Remote Control Operation
- Fan Speed: Use the speed buttons (typically 1, 2, 3) to select one of the three available fan speeds.
- Fan Off: Press the 'OFF' button to turn the fan off.
- Light Control: Press the 'LIGHT' button to turn the light on or off. Hold the 'LIGHT' button to dim or brighten the light (full-range light dimming).
Manual Reverse Switch
The fan features a manual reverse switch located on the fan motor housing. To change the direction of airflow (e.g., for summer cooling or winter heat circulation), turn off the fan, wait for the blades to stop completely, and then slide the switch to the desired position. Restart the fan.
Maintenance
Regular maintenance ensures the longevity and optimal performance of your ceiling fan.
Cleaning
Periodically clean the fan to prevent dust buildup. Use a soft, damp cloth. Do not use abrasive cleaners or solvents, as these can damage the finish. Ensure the power is off before cleaning.
Blade Balancing
If the fan wobbles excessively, ensure all blade screws are tight. If wobbling persists, a blade balancing kit (sold separately) may be used to correct the balance. Refer to the balancing kit instructions for proper use.
Troubleshooting
Before attempting any repairs, ensure the power is turned off at the circuit breaker.
| Problem | Possible Cause | Solution |
|---|---|---|
| Fan does not start | No power to fan; Loose wire connections; Remote control battery dead | Check circuit breaker/fuse; Verify all wire connections are secure; Replace remote control battery. |
| Fan wobbles | Loose blade screws; Unbalanced blades; Loose mounting bracket | Tighten all blade screws; Use a blade balancing kit; Ensure mounting bracket is securely fastened. |
| Light does not work | Bulb faulty; Loose wire connections; Light kit switch off | Replace bulb; Check light kit wiring connections; Ensure light switch on remote/wall control is on. |
| Remote control not working | Dead battery; Incorrect pairing | Replace battery; Refer to remote control pairing instructions (if applicable). |
Specifications
| Feature | Detail |
|---|---|
| Model Number | 3MTR38TMO-L |
| Brand | Monte Carlo |
| Collection Name | Mach Two |
| Fan Size | 38 inches |
| Color | Titanium |
| Number of Blades | 3 |
| Blade Pitch | 13 degrees |
| Motor Type | 172 X 14 mm Torque-Induction |
| Number of Speeds | 3 |
| Control Method | Remote Control, Wall Control |
| Light Kit | Integrated, Dimmable (1 bulb included) |
| Voltage | 120 Volts |
| Wattage | 61.00 Watts |
| Air Flow Capacity | 3973 Cubic Feet Per Minute |
| Mounting Type | Flush Mount |
| Material | Pewter/Stainless-Steel |
| Item Weight | 19.3 Pounds |
| Certification | UL Certified |
Warranty and Support
Warranty Information
This Monte Carlo ceiling fan is covered by a Limited Lifetime Warranty. Please refer to the warranty card included with your purchase or visit the official Monte Carlo website for full details regarding terms and conditions.
Customer Support
For technical assistance, missing parts, or warranty claims, please contact Monte Carlo customer support. Contact information can typically be found on the manufacturer's website or on the product packaging.


