
1. Product Overview
The Progress Lighting P3647-33 is a 2-light semi-flush close-to-ceiling fixture from the Verona Collection. It features a finely crafted metal framework with a cobblestone finish and etched alabaster style glass shades. This fixture is designed to provide ambient lighting in various indoor settings.
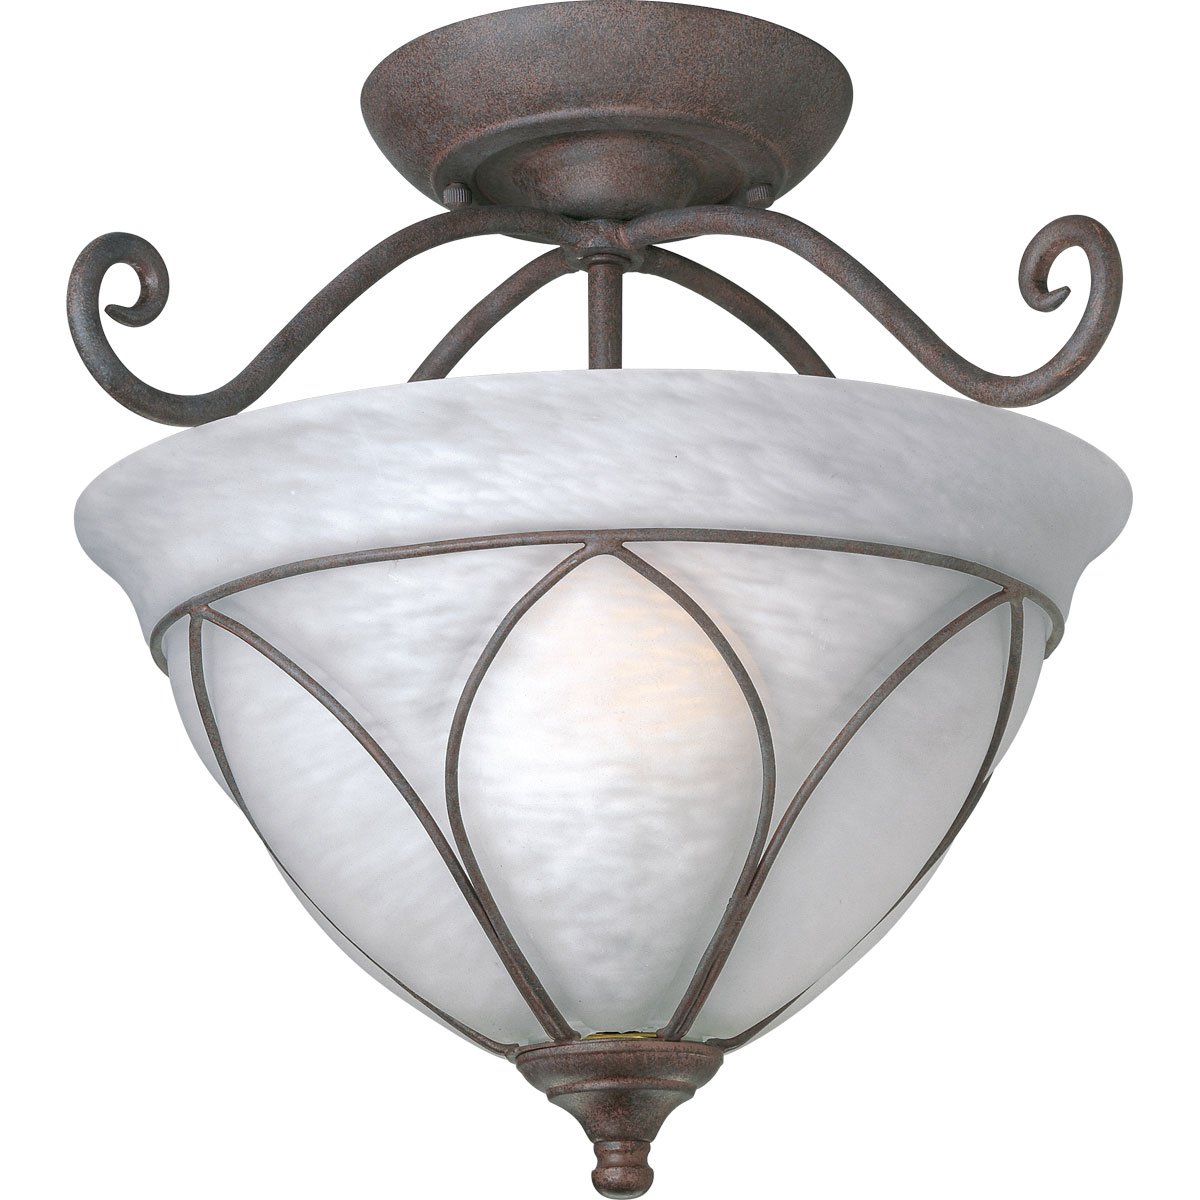
Image 1: The Progress Lighting P3647-33 semi-flush close-to-ceiling light fixture, showcasing its cobblestone finish and etched alabaster style glass shades.
2. Safety Information
Please read and understand all instructions before beginning installation. Failure to do so may result in electric shock, fire, or other injuries. Keep these instructions for future reference.
- WARNING: To avoid electric shock, disconnect power at the main fuse or circuit breaker box before installation or servicing.
- All electrical connections must be in accordance with local codes, ordinances, or the National Electric Code (NEC). Consult a qualified electrician if you are unfamiliar with proper electrical wiring connections.
- Use only UL/cUL listed wire connectors suitable for the size, type, and number of conductors.
- Do not exceed the maximum wattage specified for this fixture (2 x 100-Watt medium base bulbs).
- Handle glass components with care to prevent breakage.
3. Package Contents
Verify that all components are present before discarding packaging materials.
- Fixture Assembly (Metal framework, wiring)
- Glass Shades (Etched Alabaster Style)
- Mounting Hardware (Crossbar, screws, wire nuts)
- Instruction Manual
4. Setup and Installation
Professional installation is recommended. Ensure power is OFF at the circuit breaker before proceeding.
- Prepare for Installation:
- Turn off electricity at the main fuse box or circuit breaker.
- Unpack the fixture and its components carefully.
- Mount the Crossbar:
- Attach the mounting crossbar to the junction box using the provided screws. Ensure the crossbar is securely fastened.
- Make Electrical Connections:
- Connect the fixture's bare copper ground wire to the house ground wire (usually bare copper or green) using a wire nut.
- Connect the fixture's white wire to the house white (neutral) wire using a wire nut.
- Connect the fixture's black wire to the house black (hot) wire using a wire nut.
- Carefully tuck all wires into the junction box.
- Secure the Fixture:
- Align the fixture canopy with the mounting screws on the crossbar.
- Secure the fixture to the crossbar using the decorative nuts or screws provided.
- Install Glass Shades and Bulbs:
- Carefully attach the etched alabaster style glass shades to the fixture according to the design.
- Insert two (2) 100-Watt maximum medium base bulbs (not included) into the sockets. Do not exceed the recommended wattage.
- Restore Power:
- Turn on the electricity at the main fuse box or circuit breaker.
- Test the fixture to ensure proper operation.
5. Operating Instructions
This fixture operates via a standard wall switch (not included). Ensure the wall switch is in the "ON" position for the light to function.
- Turning On/Off: Use the connected wall switch to turn the light fixture on or off.
- Bulb Replacement: Always turn off power at the circuit breaker before replacing bulbs. Allow bulbs to cool completely before touching. Use only medium base bulbs up to 100 watts each.
6. Maintenance
Regular maintenance will help preserve the appearance and functionality of your fixture.
- Cleaning: Disconnect power before cleaning. Wipe the fixture with a soft, dry cloth. Do not use abrasive cleaners, polishes, or solvents as they may damage the finish or glass.
- Glass Care: The etched alabaster style glass can be gently wiped with a damp cloth and then dried with a soft, lint-free cloth.
- Bulb Inspection: Periodically check bulbs for signs of wear or flickering. Replace as needed, ensuring power is off.
7. Troubleshooting
If you experience issues with your light fixture, refer to the following common problems and solutions:
| Problem | Possible Cause | Solution |
|---|---|---|
| Light does not turn on. |
|
|
| Light flickers. |
|
|
| Glass shade is loose. |
|
|
8. Specifications
| Model Number | P3647-33 |
| Brand | Progress Lighting |
| Fixture Type | Semi-Flush Close-to-Ceiling |
| Number of Lights | 2 |
| Bulb Type | Medium Base (E26) |
| Max Wattage per Bulb | 100 Watts |
| Voltage | 120 Volts |
| Finish | Cobblestone (Metal Framework), Silver (Finish Type) |
| Shade Material | Etched Alabaster Style Glass |
| Dimensions (Diameter x Height) | 14-5/8 inches x 12-3/8 inches (37.15 cm x 31.43 cm) |
| Item Weight | 7.2 pounds (3.27 kg) |
| Control Method | Wall Switch (Push Button) |
| UPC | 785247364718 |
9. Warranty and Support
This Progress Lighting product is covered by a 1-year limited warranty from the date of purchase. This warranty covers defects in materials and workmanship under normal use.
For technical assistance, replacement parts, or warranty claims, please contact Progress Lighting customer support. Refer to the official Progress Lighting website for the most current contact information.
Progress Lighting Official Website: www.progresslighting.com


