1. Introduction
This manual provides instructions for the safe and efficient operation of your Singing Machine SML385BTBK Karaoke System. Please read this manual thoroughly before using the product and retain it for future reference.
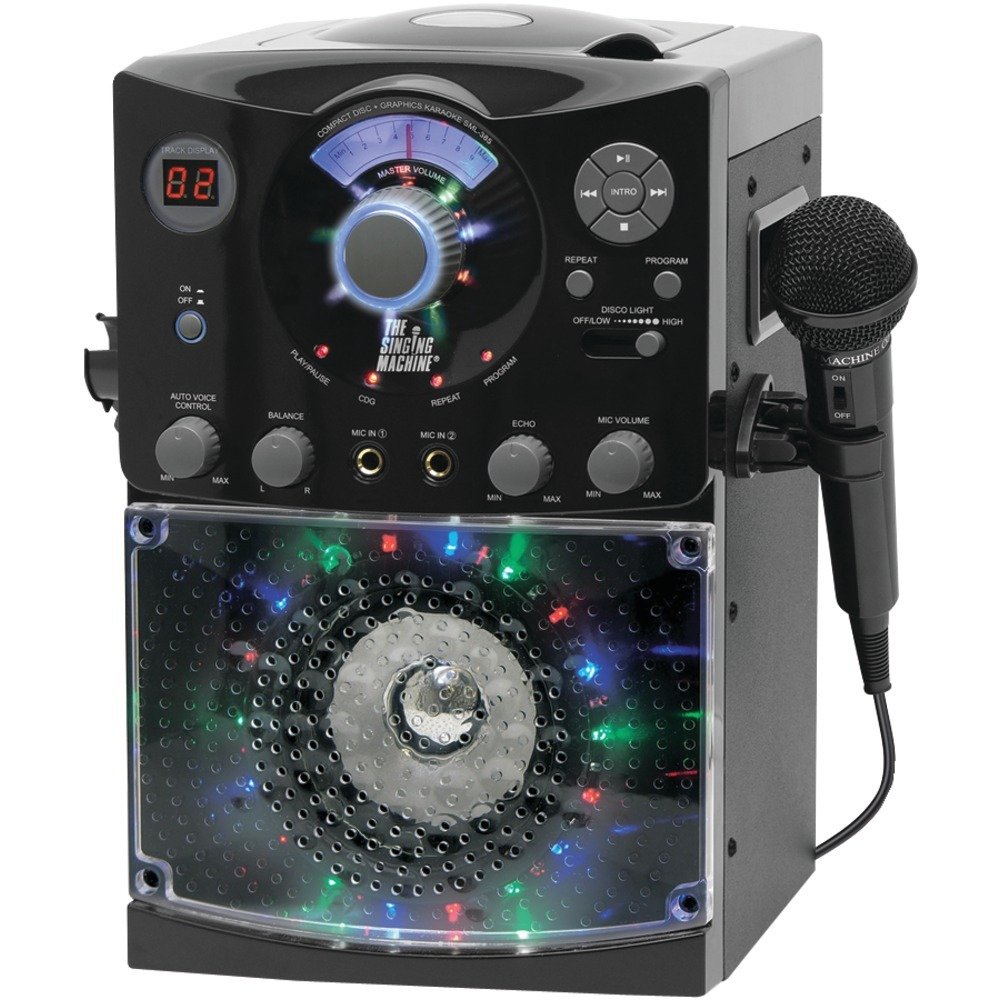
Image: The Singing Machine SML385BTBK Karaoke System, black, featuring a top-loading CD player and front-facing LED disco lights.
2. Important Safety Information
- Read these instructions.
- Keep these instructions.
- Heed all warnings.
- Follow all instructions.
- Do not use this apparatus near water.
- Clean only with a dry cloth.
- Do not block any ventilation openings. Install in accordance with the manufacturer's instructions.
- Do not install near any heat sources such as radiators, heat registers, stoves, or other apparatus (including amplifiers) that produce heat.
- Do not defeat the safety purpose of the polarized or grounding-type plug. A polarized plug has two blades with one wider than the other. A grounding type plug has two blades and a third grounding prong. The wide blade or the third prong are provided for your safety. If the provided plug does not fit into your outlet, consult an electrician for replacement of the obsolete outlet.
- Protect the power cord from being walked on or pinched, particularly at plugs, convenience receptacles, and the point where they exit from the apparatus.
- Only use attachments/accessories specified by the manufacturer.
- Use only with the cart, stand, tripod, bracket, or table specified by the manufacturer, or sold with the apparatus. When a cart is used, use caution when moving the cart/apparatus combination to avoid injury from tip-over.
- Unplug this apparatus during lightning storms or when unused for long periods of time.
- Refer all servicing to qualified service personnel. Servicing is required when the apparatus has been damaged in any way, such as power-supply cord or plug is damaged, liquid has been spilled or objects have fallen into the apparatus, the apparatus has been exposed to rain or moisture, does not operate normally, or has been dropped.
3. Package Contents
Ensure all items listed below are present in the package:
- Singing Machine SML385BTBK Karaoke System
- 1 Wired Microphone
- RCA Cables (for TV connection)
- AC Power Adapter
- Instruction Manual (this document)
4. Product Overview: Controls and Features
Familiarize yourself with the various parts and controls of your karaoke system.
Front Panel

Image: Front view of the SML385BTBK unit, highlighting the control panel with buttons and knobs.
- Power ON/OFF Button: Turns the unit on or off.
- Master Volume Control: Adjusts the overall sound output level.
- Microphone Volume Control: Adjusts the volume of the connected microphones.
- Echo Control: Adds an echo effect to the microphone sound.
- Auto Voice Control (AVC): Automatically reduces the main vocal track on CD+G discs when a microphone is used.
- LED Disco Lights: Multi-colored lights that illuminate during operation.
- LED Display: Shows track number for CD playback.
- Play/Pause Button: Starts or pauses CD playback.
- Stop Button: Stops CD playback.
- Skip/Search Buttons: Skips to the next/previous track or fast forwards/rewinds.
Top Panel

Image: Top view of the SML385BTBK unit, showing the top-loading CD+G player compartment.
- CD Compartment: For loading music CDs and CD+G discs.
Rear Panel
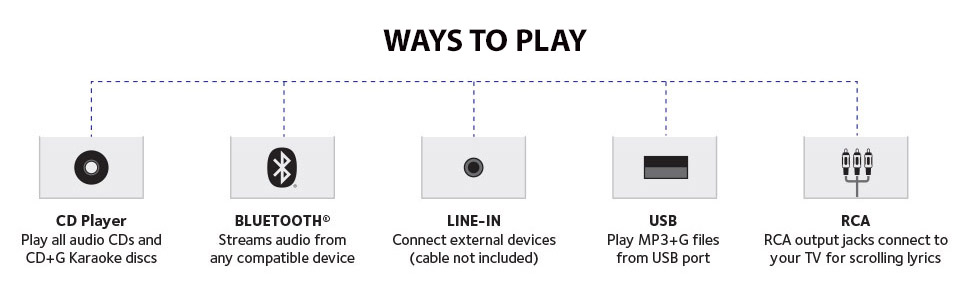
Image: Rear view of the SML385BTBK unit, displaying the power input, RCA output, and auxiliary input ports.
- DC IN Jack: Connects to the AC power adapter.
- RCA Output Jacks (Video Out, Audio Out L/R): Connects to a television for displaying lyrics and audio.
- AUX IN Jack: Connects to external audio devices (e.g., smartphone, tablet).
- Microphone Jacks (MIC 1, MIC 2): Connects wired microphones.
5. Setup
5.1 Power Connection
- Insert the AC power adapter into the DC IN jack on the back of the unit.
- Plug the other end of the AC power adapter into a standard wall outlet.
5.2 Microphone Connection
- Plug the microphone cable into either the MIC 1 or MIC 2 jack on the back of the unit.
- If using a second microphone (sold separately), plug it into the remaining MIC jack.
5.3 TV Connection (for CD+G Lyrics)
To display lyrics from CD+G discs on your television:
- Connect the yellow RCA plug from the provided RCA cable to the VIDEO OUT jack on the karaoke system.
- Connect the other end of the yellow RCA plug to the Video Input jack on your television.
- Connect the red and white RCA plugs from the provided RCA cable to the AUDIO OUT L/R jacks on the karaoke system.
- Connect the other ends of the red and white RCA plugs to the Audio Input L/R jacks on your television.
- Select the correct video input source on your television (e.g., AV1, Video, Input).
5.4 Auxiliary Device Connection
To play audio from an external device (e.g., smartphone, tablet):
- Connect a 3.5mm audio cable (not included) from the headphone jack or audio output of your external device to the AUX IN jack on the back of the karaoke system.
- Ensure the karaoke system is powered on.
- Adjust the volume on both your external device and the karaoke system.
6. Operating Instructions
6.1 Powering On/Off
Press the Power ON/OFF button located on the front panel to turn the unit on or off.
6.2 CD+G Playback
- Open the CD compartment door on the top of the unit.
- Place a music CD or CD+G disc onto the spindle with the label side facing up.
- Close the CD compartment door.
- Press the Play/Pause button to start playback. The track number will appear on the LED display.
- To pause, press Play/Pause again. Press again to resume.
- To stop, press the Stop button.
- To skip tracks, press the Skip/Search buttons.
- Adjust the Master Volume control to your desired listening level.
6.3 Bluetooth Pairing
To stream audio wirelessly from a Bluetooth-enabled device:
- Ensure the karaoke system is powered on.
- Activate Bluetooth on your external device (e.g., smartphone, tablet).
- Search for "SINGING MACHINE" in your device's Bluetooth settings.
- Select "SINGING MACHINE" to pair. A confirmation tone will sound when successfully paired.
- Start playing music on your external device.
- Adjust the volume on both your external device and the karaoke system using the Master Volume control.
6.4 Microphone Usage
- Microphone Volume: Use the Microphone Volume Control knob to adjust the microphone's output level independently.
- Echo Control: Turn the Echo Control knob to add an echo effect to your voice.
- Auto Voice Control (AVC): When playing a CD+G disc, turn the AVC knob to activate the Auto Voice Control feature. This will automatically reduce the lead vocals on the CD+G track when you sing into the microphone. The lead vocals will return when you stop singing.
6.5 LED Disco Lights
The unit features built-in LED disco lights. These lights activate automatically when the unit is powered on. There may be a dimmer setting or a dedicated button to control the lights, refer to the unit's front panel for specific controls if available.
7. Maintenance
7.1 Cleaning
- Always unplug the unit from the power outlet before cleaning.
- Use a soft, dry cloth to clean the exterior surfaces of the unit.
- Do not use abrasive cleaners, waxes, or solvents as they may damage the finish.
- For the CD lens, use a specialized CD lens cleaner disc or a soft, lint-free cloth specifically designed for optical lenses.
7.2 Storage
- Store the unit in a cool, dry place away from direct sunlight and extreme temperatures.
- Keep the unit covered to prevent dust accumulation.
8. Troubleshooting
| Problem | Possible Cause | Solution |
|---|---|---|
| No power | Power cord not connected; outlet not working. | Ensure AC adapter is securely plugged into the unit and a working wall outlet. |
| No sound from unit | Master Volume too low; incorrect input selected; external device volume too low. | Increase Master Volume. Ensure correct source (CD, Bluetooth, AUX) is playing. Increase volume on external device if applicable. |
| No sound from microphone | Microphone not connected; Microphone Volume too low; microphone faulty. | Ensure microphone is securely plugged into MIC jack. Increase Microphone Volume. Test with another microphone if available. |
| CD not playing or skipping | Disc dirty or scratched; disc inserted incorrectly; CD lens dirty. | Clean the disc with a soft cloth. Ensure disc is inserted label-side up. Clean the CD lens with a specialized cleaner. |
| Bluetooth not pairing | Bluetooth not enabled on device; device too far; incorrect device selected. | Ensure Bluetooth is enabled on your device. Move device closer to the karaoke system. Select "SINGING MACHINE" from your device's Bluetooth list. |
| No lyrics on TV | RCA cables not connected correctly; incorrect TV input selected; not a CD+G disc. | Verify RCA video cable (yellow) is securely connected to both the unit and TV. Select the correct video input on your TV. Ensure you are using a CD+G disc. |
9. Specifications
| Feature | Detail |
|---|---|
| Model | SML385BTBK |
| Power Source | AC Power Adapter |
| Media Type | CD, CD+G |
| Connectivity | Bluetooth, RCA, AUX In |
| Microphone Jacks | 2 (wired) |
| Speaker | Built-in speaker in wood cabinet |
| Dimensions (D x W x H) | 10.9"D x 11.1"W x 16"H |
| Weight | 2.4 Kilograms |
| Special Features | LED Disco Lights, Echo Control, Auto Voice Control (AVC) |
10. Warranty Information
This product is covered by a 90-day warranty for parts and labor from the date of purchase. This warranty covers manufacturing defects and workmanship under normal use. It does not cover damage caused by misuse, accident, unauthorized modification, or external causes.
11. Customer Support
For technical assistance, troubleshooting not covered in this manual, or warranty inquiries, please contact Singing Machine customer support. Refer to the official Singing Machine website for the most current contact information.
Website: www.singingmachine.com