Oregon 33-186
Oregon 33-186 Ignition Kit Instruction Manual
For Tecumseh Part Numbers 730600 and 740037A
1. Introduction
This manual provides essential information for the proper installation, operation, and maintenance of your Oregon 33-186 Ignition Kit. This kit is designed as a direct replacement for Tecumseh part numbers 730600 and 740037A, and is compatible with 3-10 HP Tecumseh engines, including LAV, H, HS, V, VH, and VM series. Please read this manual thoroughly before proceeding with installation.
2. Safety Information
- Always disconnect the spark plug wire before performing any maintenance or installation on the engine to prevent accidental starting.
- Wear appropriate personal protective equipment, including safety glasses and gloves, when working with engine components.
- Ensure the engine is cool before handling any parts to avoid burns.
- Refer to your engine's original service manual for specific instructions and torque specifications.
- Keep children and bystanders away from the work area.
3. Product Overview
The Oregon 33-186 Ignition Kit includes the necessary components to restore proper ignition function to compatible Tecumseh engines. This kit contains one (1) 33-606 points set and one (1) 33-008 condenser.
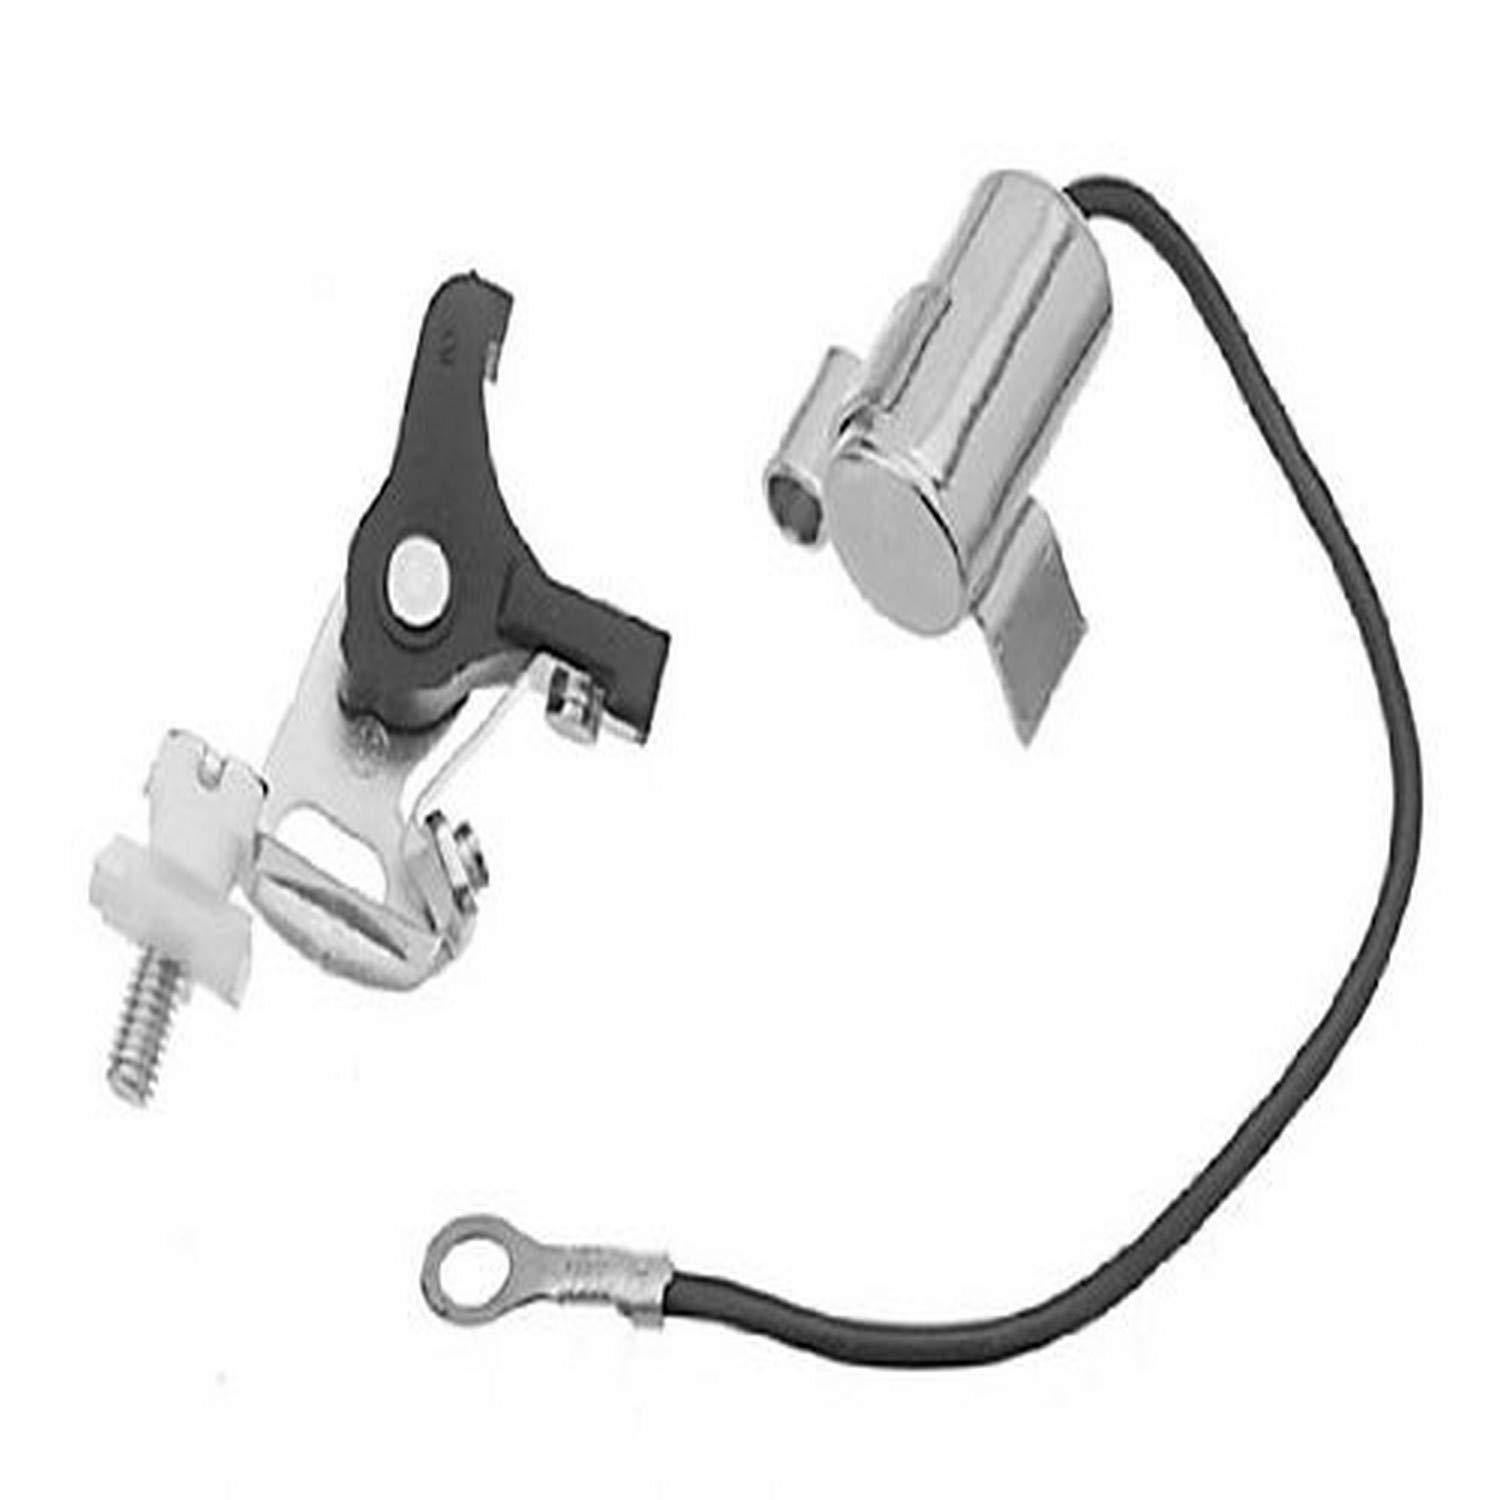
Figure 1: The Oregon 33-186 Ignition Kit, showing the points and condenser components.
4. Setup and Installation
Follow these steps to install the Oregon 33-186 Ignition Kit:
- Preparation: Ensure the engine is off and cool. Disconnect the spark plug wire. Locate the flywheel and the ignition system components (points and condenser) on your engine. You may need to remove the flywheel or other covers to access these parts.
- Remove Old Components: Carefully disconnect the wiring from the old points and condenser. Remove the screws or fasteners holding them in place and extract the old components.
- Clean Contact Surfaces: It is crucial to clean all contact surfaces where the new points and condenser will be installed. Use a clean cloth and a suitable degreaser or alcohol to remove any oil, grease, or corrosion. Some new points may have a protective oil coating; clean these thoroughly before installation.
- Install New Condenser: Place the new 33-008 condenser into its designated slot or mounting bracket. Secure it with the appropriate fastener.
- Install New Points: Position the new 33-606 points set. Ensure the mounting surfaces are clean and the points are correctly aligned. Secure them with the retaining screw(s).
- Connect Wiring: Reconnect the wiring to the new points and condenser according to your engine's wiring diagram. Ensure all connections are secure and free from corrosion.
- Set Point Gap: Refer to your engine's service manual for the correct point gap specification. Use a feeler gauge to set the gap precisely. Adjust as necessary by loosening the retaining screw and moving the stationary point. Tighten the screw once the gap is correct.
- Reassemble: Reinstall any covers or the flywheel that were removed during the process. Reconnect the spark plug wire.
5. Operating
After installation, verify the ignition system's functionality:
- Check for Spark: With the spark plug wire reconnected, remove the spark plug and ground its electrode to the engine block. Pull the starter rope or crank the engine. Observe for a strong, blue spark at the spark plug gap. If no spark is present, refer to the Troubleshooting section.
- Engine Start-up: Reinstall the spark plug. Attempt to start the engine as per its manufacturer's instructions. The engine should start and run smoothly if the ignition system is functioning correctly.
6. Maintenance
To ensure continued reliable performance from your ignition system:
- Periodic Inspection: Annually inspect the points and condenser for wear, corrosion, or damage.
- Clean Points: If the engine experiences intermittent spark or misfires, inspect the points for carbon buildup or oil residue. Clean them with a point file or fine-grit sandpaper, followed by a clean cloth with alcohol.
- Check Point Gap: Verify the point gap periodically and adjust if necessary to the manufacturer's specifications.
- Condenser Check: While less common, a faulty condenser can lead to poor spark. If points are clean and gapped correctly but spark is weak, consider replacing the condenser.
7. Troubleshooting
If your engine is not starting or experiencing ignition issues after installing the kit, consider the following:
| Problem | Possible Cause | Solution |
|---|---|---|
| No Spark |
|
|
| Weak Spark |
|
|
| Engine Misfires |
|
|
8. Specifications
- Model Number: 33-186
- Replaces Tecumseh Part Numbers: 730600, 740037A
- Kit Contents: 1 x 33-606 Points Set, 1 x 33-008 Condenser
- Engine Compatibility: 3-10 HP Tecumseh engines (LAV, H, HS, V, VH, VM series)
- Item Weight: Approximately 27.22 grams
- Installation Type: Component Replacement
9. Warranty
The Oregon 33-186 Ignition Kit comes with a 1-year warranty covering defects in material and/or workmanship from the date of purchase. This warranty does not cover damage due to improper installation, misuse, neglect, or normal wear and tear. Please retain your proof of purchase for warranty claims.
10. Support
For further assistance, technical support, or warranty inquiries, please contact Oregon customer service. It is recommended to have your product model number and purchase information available when contacting support. If you are unsure about any installation steps, consult a qualified small engine technician.
Ask a question about this manual
Ask about setup, troubleshooting, compatibility, parts, safety, or missing instructions. Manuals+ will review the question and use this page’s manual context to help answer it.