1. Introduction
This manual provides detailed instructions for the installation, operation, and maintenance of your Alpenföhn Groß Clock'ner Rev. B CPU Cooler. This high-performance cooling system is designed to effectively dissipate heat from your processor, ensuring stable and efficient computer operation. Please read this manual thoroughly before proceeding with installation or use.
2. Safety Information
- Always disconnect power from your computer before installing or removing any components.
- Handle the cooler and its components with care to avoid damage to the product or other computer parts.
- Keep out of reach of children.
- Do not attempt to modify the cooler or its fan. Unauthorized modifications may void your warranty and pose safety risks.
- Ensure proper grounding to prevent electrostatic discharge (ESD) damage to sensitive components.
3. Package Contents
Verify that all items are present in the package:
- Alpenföhn Groß Clock'ner Rev. B CPU Cooler (Heatsink and Fan assembly)
- Thermal Paste
- Mounting Bracket Kit (for various sockets)
- Fan Speed Potentiometer with adhesive hook-and-loop pad

Figure 3.1: Overview of the Alpenföhn Groß Clock'ner Rev. B CPU Cooler, showing the heatsink with copper heat pipes and the attached 120mm fan.
4. Setup and Installation
The Alpenföhn Groß Clock'ner Rev. B is compatible with LGA775, Socket AM2, Socket AM2+, and Socket AM3 platforms. Installation requires careful attention due to the cooler's size. Refer to the specific mounting instructions for your CPU socket type provided in the mounting bracket kit.
4.1. Preparation
- Ensure your computer is powered off and unplugged from the wall outlet.
- Open your computer case and locate the CPU socket on the motherboard.
- Remove any existing CPU cooler. Clean the CPU surface thoroughly to remove old thermal paste using isopropyl alcohol and a lint-free cloth.
4.2. Applying Thermal Paste
Apply a small amount of the included thermal paste to the center of the CPU's integrated heat spreader (IHS). A pea-sized dot is generally sufficient. The pressure from the cooler will spread it evenly.
4.3. Mounting the Cooler
- Assemble the appropriate mounting bracket for your CPU socket type according to the instructions provided with the kit. This typically involves installing a backplate behind the motherboard and securing standoffs.
- Carefully place the cooler onto the CPU, aligning the mounting holes on the cooler's base with the standoffs or mounting points.
- Secure the cooler using the provided screws or clips. Tighten screws in a diagonal pattern to ensure even pressure. Do not overtighten.
- Connect the 4-pin fan power cable from the cooler to the CPU_FAN header on your motherboard.
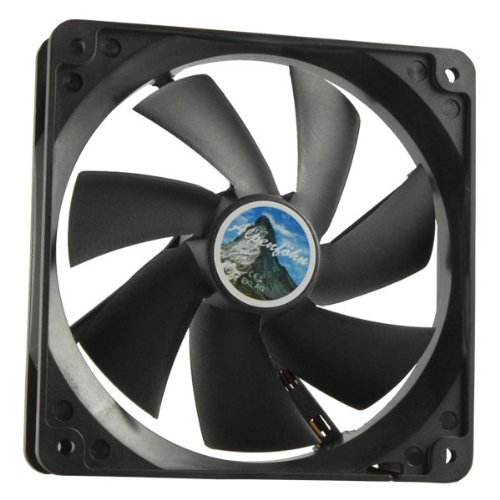
Figure 4.1: Close-up view of the 120mm fan, which provides efficient airflow for cooling.
5. Operating Instructions
Once installed, the Alpenföhn Groß Clock'ner Rev. B CPU Cooler operates automatically, with its fan speed controlled by the motherboard's PWM signal based on CPU temperature. For manual control, use the included potentiometer.
5.1. Fan Speed Control
- Automatic Control: If connected directly to the CPU_FAN header, the motherboard will regulate the fan speed based on CPU temperature, optimizing for both cooling performance and noise levels.
- Manual Control (Potentiometer): The cooler includes a potentiometer for manual fan speed adjustment. Connect the fan to the potentiometer, and then connect the potentiometer to the CPU_FAN header. Use the knob to adjust the fan speed to your preferred balance of cooling and acoustics. The potentiometer can be mounted inside your case using the adhesive hook-and-loop pad.
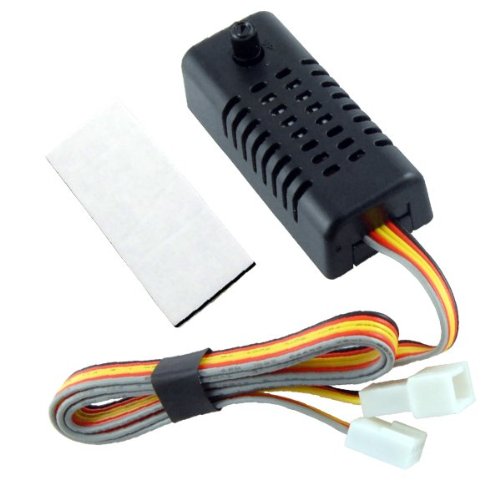
Figure 5.1: The included fan speed potentiometer, allowing for manual adjustment of the fan's rotational speed.
6. Maintenance
Regular maintenance ensures optimal performance and longevity of your CPU cooler.
- Dust Removal: Periodically (e.g., every 3-6 months), power off your computer and use compressed air to clean dust from the heatsink fins and fan blades. Dust accumulation can significantly reduce cooling efficiency.
- Fan Inspection: Check the fan for any obstructions or signs of wear. Ensure the fan cable is securely connected.
- Thermal Paste: While not frequently required, if you notice a significant increase in CPU temperatures over time, consider reapplying thermal paste. This involves carefully removing the cooler, cleaning both surfaces, and applying new thermal paste.
7. Troubleshooting
If you encounter issues with your CPU cooler, refer to the following common problems and solutions:
| Problem | Possible Cause | Solution |
|---|---|---|
| High CPU Temperatures | Insufficient thermal paste, improper cooler mounting, dust accumulation, fan not spinning. | Reapply thermal paste, reseat cooler, clean dust from heatsink and fan, check fan connection. |
| Fan Not Spinning | Loose power connection, faulty fan, motherboard issue. | Ensure 4-pin connector is securely attached to CPU_FAN header. Test fan on another header if available. Contact support if fan is faulty. |
| Excessive Fan Noise | High fan speed, dust in fan bearings, fan hitting cables. | Adjust fan speed using potentiometer or BIOS settings. Clean fan. Ensure no cables obstruct fan blades. |
8. Specifications
| Feature | Detail |
|---|---|
| Brand Name | Alpenföhn |
| Model Number | 84000000018 |
| Part Number | 84000000018 |
| Product Type | CPU Thermal Cooling System |
| Compatible Sockets | LGA775, Socket AM2, Socket AM2+, Socket AM3 |
| Heatsink Dimensions (L x W x H) | 157 mm x 125 mm x 83.5 mm |
| Fan Diameter | 120 mm |
| Fan Height | 25 mm |
| Maximum Rotational Speed | 1200 RPM |
| Noise Level | 17 dB |
| Cooling Method | Forced Air |
| Power Connector Type | 4-Pin |
| Materials | Aluminum and Copper |
| Item Weight | 718 grams |
| GTIN (EAN) | 04250280361742 |
9. Warranty and Support
For warranty information and technical support, please refer to the documentation included with your purchase or visit the official Alpenföhn website. Keep your proof of purchase for warranty claims.