1. Introduction
This manual provides essential information for the safe and effective use of your Welch Allyn Universal Charger and compatible medical diagnostic instruments. Please read these instructions thoroughly before operating the device and retain them for future reference.
2. Safety Information
Observe the following safety precautions to prevent injury or damage to the device:
- Ensure the charger is connected to a power outlet with the correct voltage.
- Do not immerse the charger or instrument handles in water or other liquids.
- Keep the device away from excessive heat, direct sunlight, and moisture.
- Do not attempt to open or repair the device yourself. Refer all servicing to qualified personnel.
- Use only Welch Allyn approved accessories and replacement parts.
- Dispose of NiCad batteries according to local regulations.
3. Package Contents
Verify that all items are present in your package:
- Welch Allyn Universal Charger
- Two (2) NiCad Handles (Model 71670)
- Ophthalmoscope (Model 11720)
- MacroView Otoscope (Model 23810)
- User Manual (this document)
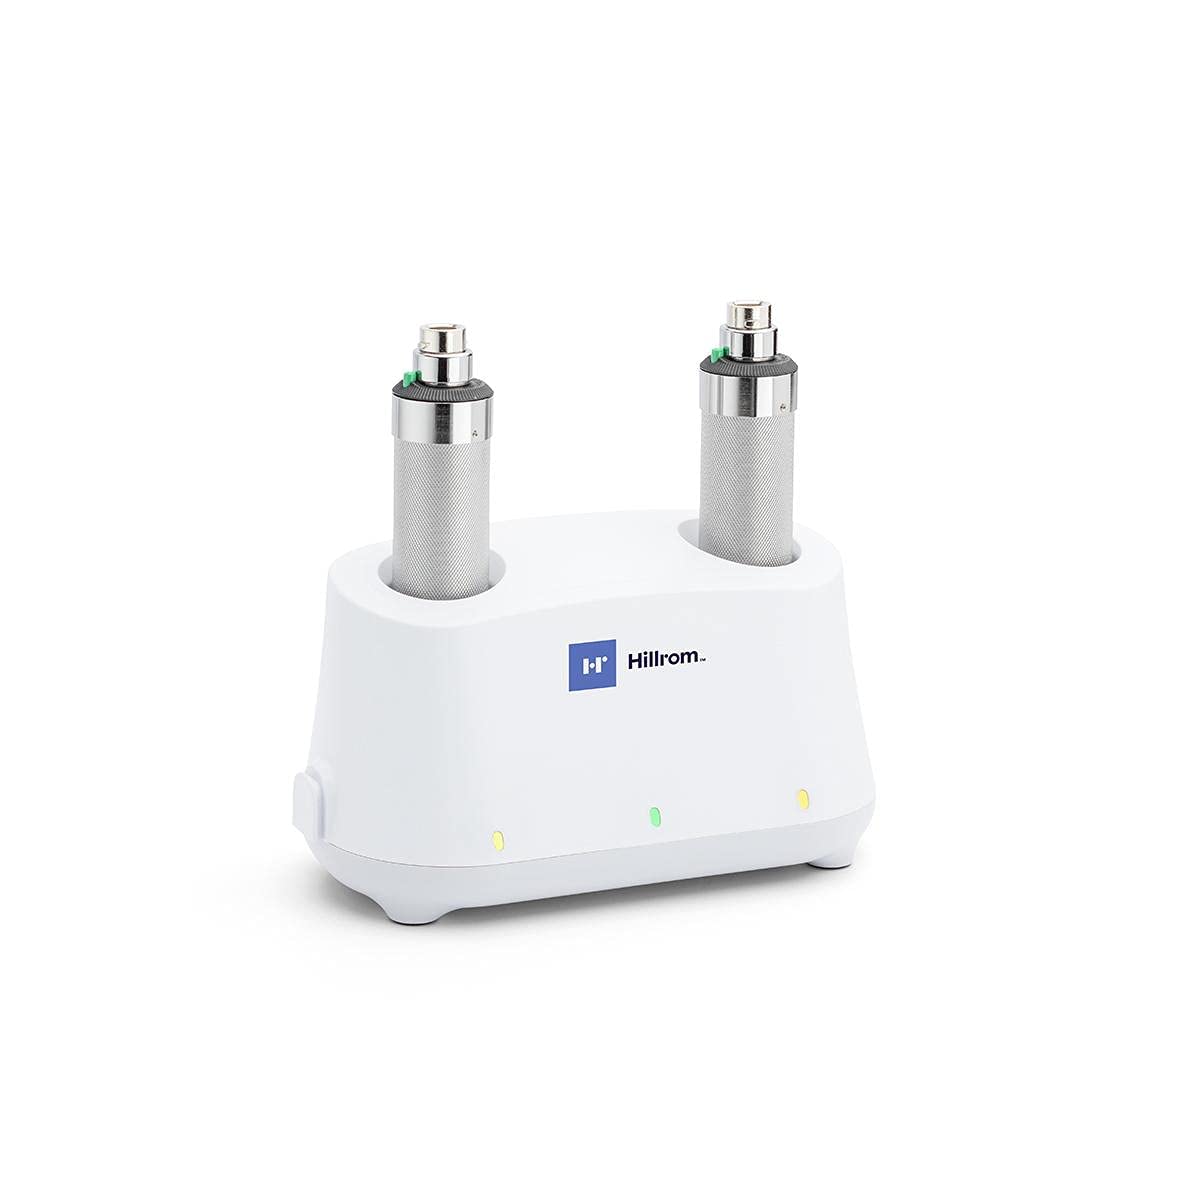
Image: Welch Allyn Universal Charger with two instrument handles inserted.
4. Setup
4.1 Unpacking
Carefully remove all components from the packaging. Inspect for any signs of damage. If any components are damaged or missing, contact your supplier immediately.
4.2 Placing the Charger
Place the universal charger on a stable, flat surface or mount it to a wall using appropriate hardware (not included). Ensure adequate ventilation around the unit.
4.3 Connecting Power
Plug the power cord into the back of the charger, then into a standard electrical outlet. The charger is designed for continuous operation.
4.4 Inserting Handles
Insert the NiCad handles into the charging wells. Ensure they are seated properly. A charging indicator light on the charger will illuminate to confirm charging is active.
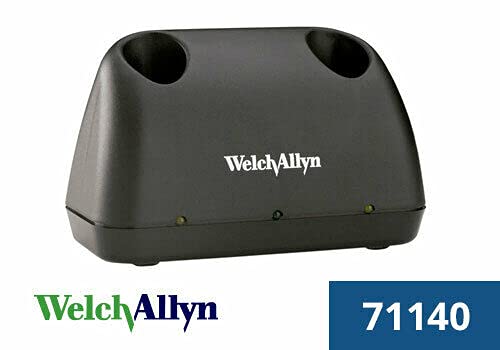
Image: Black Welch Allyn Universal Charger, showing the charging wells.
5. Operating Instructions
5.1 Charging the Handles
Place the NiCad handles into the charging wells. The indicator light will show the charging status. A full charge typically takes several hours. The handles can remain in the charger when not in use to maintain a full charge.
5.2 Attaching Instrument Heads
To attach an instrument head (Ophthalmoscope or Otoscope) to a handle:
- Align the slot on the instrument head with the pin on the handle.
- Push the head onto the handle and twist clockwise until it locks securely into place.

Image: Welch Allyn Ophthalmoscope and MacroView Otoscope heads, ready for attachment to handles.
5.3 Detaching Instrument Heads
To detach an instrument head:
- Twist the instrument head counter-clockwise until it unlocks.
- Pull the head straight off the handle.
5.4 Using the Instruments
Once an instrument head is attached, activate the light by rotating the rheostat control on the handle. Adjust the light intensity as needed for examination. Refer to the specific instrument's manual for detailed usage instructions.

Image: A single Welch Allyn instrument handle.

Image: Welch Allyn MacroView Otoscope with various specula.
6. Maintenance
6.1 Cleaning the Charger
Disconnect the charger from the power outlet before cleaning. Wipe the exterior surfaces with a soft, damp cloth. Do not use abrasive cleaners or solvents.
6.2 Cleaning Instrument Heads and Handles
Clean instrument heads and handles with a soft cloth dampened with a mild disinfectant solution. Ensure no liquid enters the optical components or electrical contacts. Follow specific cleaning guidelines provided with each instrument head.
6.3 Battery Care
The NiCad batteries are designed for long life. For optimal performance, allow batteries to fully discharge occasionally before recharging. If the device will not be used for an extended period, store the handles fully charged and recharge them every few months.
7. Troubleshooting
- Device Not Charging: Ensure the power cord is securely plugged into both the charger and the wall outlet. Verify that the handles are correctly seated in the charging wells. Check for power supply issues.
- Light Not Working: Confirm the instrument head is securely attached to the handle. Rotate the rheostat control to activate the light and adjust intensity. If the light still does not work, the bulb may need replacement (refer to instrument-specific manual) or the battery may be fully discharged.
- Instrument Head Not Attaching: Ensure the alignment pin and slot are correctly matched. Do not force the head onto the handle. If resistance is met, check for any obstructions or damage.
8. Specifications
| Model Number | 71641M |
| Brand | Welch Allyn |
| Connector Type | MagSafe |
| Compatible Devices | Medical Diagnostic Instruments |
| Item Weight | 4.45 pounds |
| Package Dimensions | 9.57 x 6.69 x 5.39 inches |
| Output Voltage | 12 Volts |
| Output Current | 1 Amps |
| Material | Plastic |
| Batteries Required | 2 C batteries (for handles) |
9. Warranty and Support
For information regarding the product warranty, please refer to the warranty documentation provided by Welch Allyn at the time of purchase or visit the official Welch Allyn website. For technical support or service inquiries, please contact Welch Allyn customer service directly.