1. Introduction
This manual provides detailed instructions for the safe and efficient use of your Vivitar VIVICAM-7340RED 7.0MP Digital Camera. Please read this manual thoroughly before operating the camera and keep it for future reference. Your camera is designed for capturing high-quality still images and video recordings with ease.
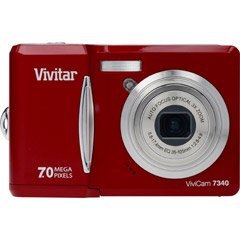
Figure 1: Front view of the Vivitar VIVICAM-7340RED Digital Camera. This image shows the lens, flash, and the overall compact design of the camera.
2. Setup
2.1. Inserting Batteries
- Locate the battery compartment cover on the bottom or side of the camera.
- Slide the latch to open the cover.
- Insert the required batteries (typically AA or AAA, refer to packaging) according to the polarity indicators (+ and -) inside the compartment.
- Close the battery compartment cover securely until it clicks into place.
Note: Ensure batteries are inserted with correct polarity as indicated inside the compartment.
2.2. Inserting a Memory Card
Your camera requires a compatible memory card (e.g., SD card) to store photos and videos. The memory card slot is usually located near the battery compartment or on the side of the camera.
- Open the memory card slot cover.
- Insert the memory card with the metal contacts facing the correct direction (refer to the diagram near the slot). Push gently until it clicks into place.
- Close the memory card slot cover.
Note: Do not force the memory card. If it does not insert easily, check its orientation.
2.3. Powering On/Off
- To turn on the camera, press the POWER button. The LCD screen will illuminate.
- To turn off the camera, press and hold the POWER button again until the LCD screen turns off.
2.4. Initial Settings (Date & Time)
Upon first use or after battery replacement, you may need to set the date and time. Follow the on-screen prompts or navigate to the MENU > SETUP > DATE/TIME option to adjust these settings.
3. Operating the Camera
3.1. Taking Still Photos
- Turn on the camera. Ensure it is in photo capture mode (usually indicated by a camera icon on the LCD).
- Frame your shot using the 2.4-inch LCD screen.
- Press the shutter button halfway down to allow the camera to focus. A green frame or beep typically indicates focus lock.
- Press the shutter button fully down to capture the image.
3.2. Using Optical Zoom
Your camera features a 3x optical zoom. Use the zoom lever (often located around the shutter button) to zoom in or out. Optical zoom adjusts the lens elements to magnify the subject without losing image quality.
- Push the zoom lever towards T (Telephoto) to zoom in.
- Push the zoom lever towards W (Wide) to zoom out.
The camera also has a 5x digital zoom, which can be accessed after reaching the maximum optical zoom. Digital zoom digitally enlarges the image, which may result in reduced image quality.
3.3. Recording Videos
- Switch the camera to video recording mode (usually via a mode dial or menu option).
- Press the shutter button to start recording. A red dot or timer on the LCD indicates recording is in progress.
- Press the shutter button again to stop recording.
3.4. Viewing Photos and Videos
- Press the PLAYBACK button (often indicated by a play icon).
- Use the directional buttons to navigate through your captured images and videos.
- To play a video, select it and press the OK or PLAY button.
3.5. Transferring Files to a Computer (PictBridge)
Your camera is PictBridge compatible, allowing direct printing to compatible printers. For transferring files to a computer:
- Connect the camera to your computer using the provided USB cable.
- Turn on the camera. It should appear as a removable disk or device on your computer.
- Open the camera's folder and copy the desired photos and videos to your computer.
- Safely eject the camera from your computer before disconnecting the USB cable.
4. Maintenance
4.1. Cleaning the Camera
- Lens: Use a soft, lint-free cloth specifically designed for camera lenses. Gently wipe in a circular motion. Avoid using harsh chemicals.
- LCD Screen: Wipe with a soft, dry cloth. For stubborn smudges, a slightly damp cloth (water only) can be used, followed by a dry wipe.
- Camera Body: Use a soft, dry cloth to wipe away dust and fingerprints.
Do not use solvents, alcohol, or abrasive cleaners on any part of the camera.
4.2. Battery Care
- Remove batteries if the camera will not be used for an extended period to prevent leakage.
- Use only the recommended battery types.
- Dispose of old batteries responsibly according to local regulations.
4.3. Storage
Store the camera in a cool, dry place away from direct sunlight, extreme temperatures, and high humidity. Use the included case for protection during transport.
5. Troubleshooting
| Problem | Possible Cause | Solution |
|---|---|---|
| Camera does not turn on. | Dead or incorrectly inserted batteries. | Replace batteries or ensure they are inserted with correct polarity. |
| Photos are blurry. | Camera shake, out of focus, or dirty lens. | Hold camera steady, ensure focus is achieved before shooting, clean the lens. |
| "Memory Card Error" message. | Card not inserted correctly, damaged, or full. | Reinsert card, try a different card, or delete files to free space. |
| Flash not firing. | Flash mode set to OFF, or batteries low. | Check flash settings in menu, replace batteries. |
6. Specifications
| Feature | Detail |
|---|---|
| Brand | Vivitar |
| Model Number | VIVICAM-7340RED |
| Effective Still Resolution | 7 MP |
| Optical Zoom | 3x |
| Digital Zoom | 5x |
| LCD Screen Size | 2.4-Inch |
| Video Recording | Up to 640 x 480 at 30fps |
| Image Resolution | Up to 3072 x 2304 |
| Autofocus | Yes |
| PictBridge Compatible | Yes |
| Power Source | Batteries (Included) |
| Color | Red |