
1. Introduction
This manual provides essential instructions for the safe and efficient operation, setup, and maintenance of your JUKI MO644D Portable Serger. Please read this manual thoroughly before using the machine to ensure proper function and to prevent damage or injury.
The JUKI MO644D is a versatile 2/3/4 thread serger designed for home use, incorporating Juki's industrial sewing machine technology. It features a powerful cutting system, automatic rolled hem capability, and user-friendly color-coded threading.
2. Important Safety Instructions
- Always unplug the machine from the electrical outlet immediately after using and before cleaning, removing covers, or performing any user servicing.
- Do not operate the machine with a damaged cord or plug. If the machine is not working properly, has been dropped, damaged, or dropped into water, return it to an authorized service center for examination and repair.
- Keep fingers away from all moving parts. Special care is required around the serger needle and knife.
- Use only accessories recommended by the manufacturer.
- Never drop or insert any object into any opening.
- Do not use outdoors.
- To disconnect, turn all controls to the off position, then remove plug from outlet.
- This appliance is not intended for use by persons (including children) with reduced physical, sensory or mental capabilities, or lack of experience and knowledge, unless they have been given supervision or instruction concerning use of the appliance by a person responsible for their safety.
3. Setup and Initial Preparation
3.1 Unpacking and Placement
Carefully remove the serger from its packaging. Place the machine on a stable, level surface. Ensure adequate lighting and space for operation.
3.2 Power Connection
Connect the power cord to the machine and then to a suitable electrical outlet. Ensure the voltage matches your local power supply.
3.3 Spool Stand Assembly
Assemble the telescopic spool stand by inserting the rod into the designated hole at the back of the machine. Place the thread guides and spool caps as instructed in the diagram.

Figure 3.3.1: The JUKI MO644D Serger with its spool stand assembled, ready for threading. This image shows the overall machine structure.
3.4 Threading the Machine
The JUKI MO644D features a color-coded threading system for ease of use. Follow the numbered and colored guides precisely. It is recommended to refer to the detailed threading diagrams provided in the full manual for your specific stitch type (2, 3, or 4 thread).
- Raise the presser foot and open the front cover.
- Place thread cones on the spool pins.
- Follow the color-coded threading path for each thread, starting from the spool stand, through the tension discs, and into the loopers and needles.
- The machine includes a breakaway looper for easier access during threading.

Figure 3.4.1: Close-up view of the color-coded tension dials on the JUKI MO644D, indicating the threading path for each thread.

Figure 3.4.2: Detailed view of the looper area on the JUKI MO644D, showing the intricate threading paths for the lower and upper loopers.
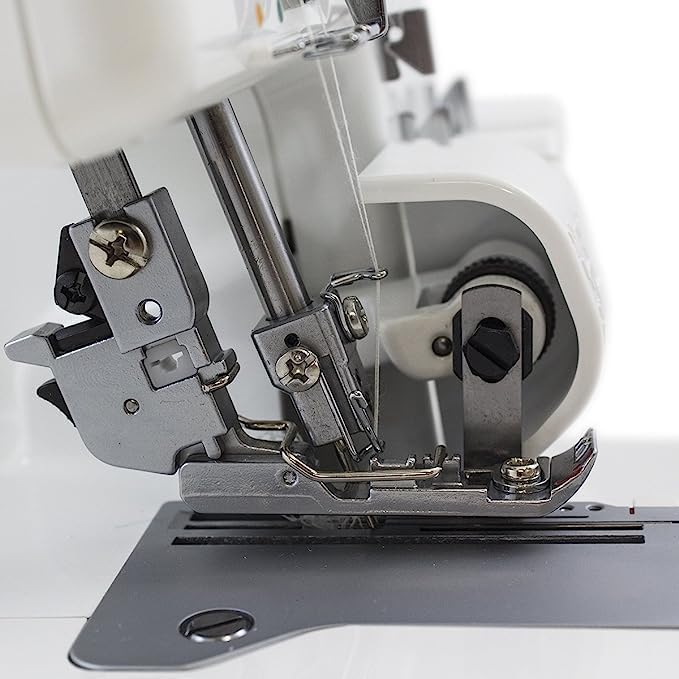
Figure 3.4.3: Close-up of the needle area on the JUKI MO644D, illustrating the needle threading process and the presser foot.
4. Operating Instructions
4.1 Basic Serging
After threading, lower the presser foot and turn on the machine. Gently press the foot controller to begin serging. Guide the fabric smoothly under the presser foot, ensuring the edge aligns with the cutting knife.
4.2 Adjusting Stitch Length and Differential Feed
The JUKI MO644D features adjustable stitch length and differential feed. These controls are located internally on the left side of the machine when the cloth bed is opened. Adjust these settings to suit your fabric type and desired stitch appearance.
- Stitch Length: Controls the density of the stitches. Shorter lengths create denser stitches, longer lengths create looser stitches.
- Differential Feed: Helps prevent stretching or puckering of fabric. Adjusting the differential feed ratio allows you to gather or stretch fabric as it passes through the machine.
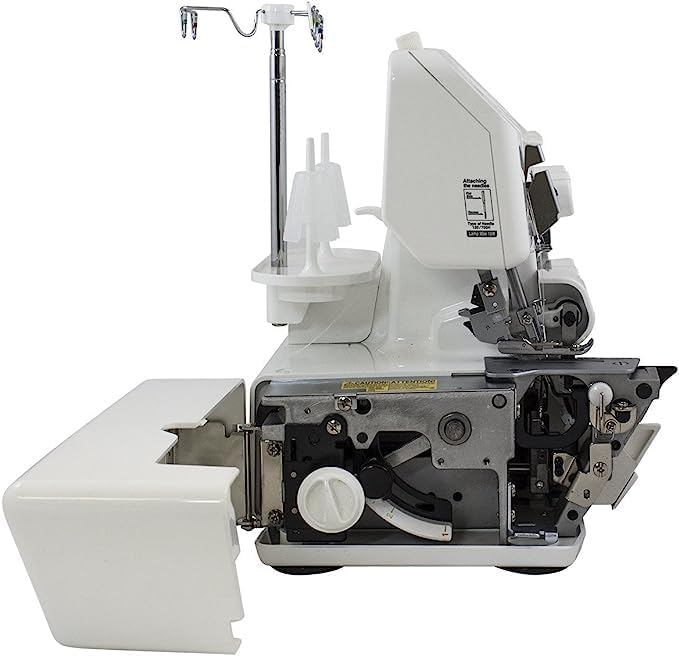
Figure 4.2.1: The JUKI MO644D with its side cover open, revealing the internal controls for stitch length and differential feed adjustments.
4.3 Automatic Rolled Hem
The machine can be easily converted for automatic rolled hemming. Refer to your full instruction manual for specific steps on disengaging the stitch finger and adjusting tension settings for rolled hem stitches.
4.4 Knife System
The powerful knife system trims the fabric edge before serging, ensuring a clean finish. The upper knife can be moved out of the way for safe and easy threading access or when knife cutting is not desired.


