1. Introduction
Thank you for purchasing the Sea Gull Lighting Barrington Two-Light Wall/Bath Fixture. This manual provides detailed instructions for the safe installation, proper operation, and routine maintenance of your new lighting fixture. Please read all instructions carefully before beginning installation and retain this manual for future reference.
2. Safety Information
WARNING: Risk of electric shock. Disconnect power at the fuse box or circuit breaker before installation or servicing. Consult a qualified electrician if you are unsure about the installation process.
- All electrical connections must be in accordance with local codes, ordinances, or the National Electric Code (NEC).
- Ensure the fixture is properly grounded.
- Do not exceed the maximum wattage specified for the bulbs.
- Handle glass components with care to prevent breakage.
- This fixture is UL Approved for Damp Locations.
3. Package Contents
Verify that all components are present before beginning installation:
- Barrington Two-Light Wall/Bath Fixture (Brushed Steel)
- Opal Etched Glass Shades (2)
- Mounting Hardware Kit (includes mounting strap, outlet box screws, wire connectors, decorative nuts)
- Instruction Manual
Note: Light bulbs are not included and must be purchased separately.
4. Specifications
| Feature | Detail |
|---|---|
| Model Number | VS12702-BS |
| Dimensions (H x W x D) | 8.5" x 18" x 6.5" |
| Backplate Dimensions (H x W) | 17.5" x 4" |
| Weight | 5 lbs (Item Weight) / 12.5 lbs (Shipping Weight) |
| Light Sockets | 2 Medium Base (E26) |
| Max Wattage per Bulb | 100 Watt (A19 Style) |
| Total Max Wattage | 200 Watts |
| Bulb Compatibility | Incandescent, CFL, Halogen, LED |
| Voltage | 120 Volts |
| Material | Steel |
| Shade Material | White Opal Etched Glass |
| Finish | Brushed Steel |
| Mounting Type | Wall Mount |
| Installation Position | Lights Up or Down |
| Certification | UL Listed for Damp Locations |
| Special Features | Dimmable (with compatible bulbs and dimmer switch) |
5. Setup and Installation
Professional installation is recommended. Before you begin, ensure the power is turned OFF at the circuit breaker or fuse box.
- Prepare Wiring: Carefully pull the electrical wires from the outlet box.
- Attach Mounting Strap: Secure the mounting strap to the outlet box using the provided outlet box screws. Ensure the strap is firmly attached.
- Make Electrical Connections: Connect the fixture's wires to the house wires according to the following:
- Connect the bare copper or green ground wire from the fixture to the bare copper or green ground wire from the outlet box.
- Connect the ribbed (or white) fixture wire to the white (neutral) house wire.
- Connect the smooth (or black) fixture wire to the black (hot) house wire.
- Mount Fixture: Carefully tuck all wires into the outlet box. Align the fixture's backplate with the mounting strap and secure it using the decorative nuts.
- Install Bulbs: Screw two A19 style bulbs (not included) into the E26 medium base sockets. Do not exceed 100 watts per bulb.
- Attach Glass Shades: Carefully place the opal etched glass shades over the sockets and secure them according to the fixture's design (typically by screwing a retaining ring or using set screws).
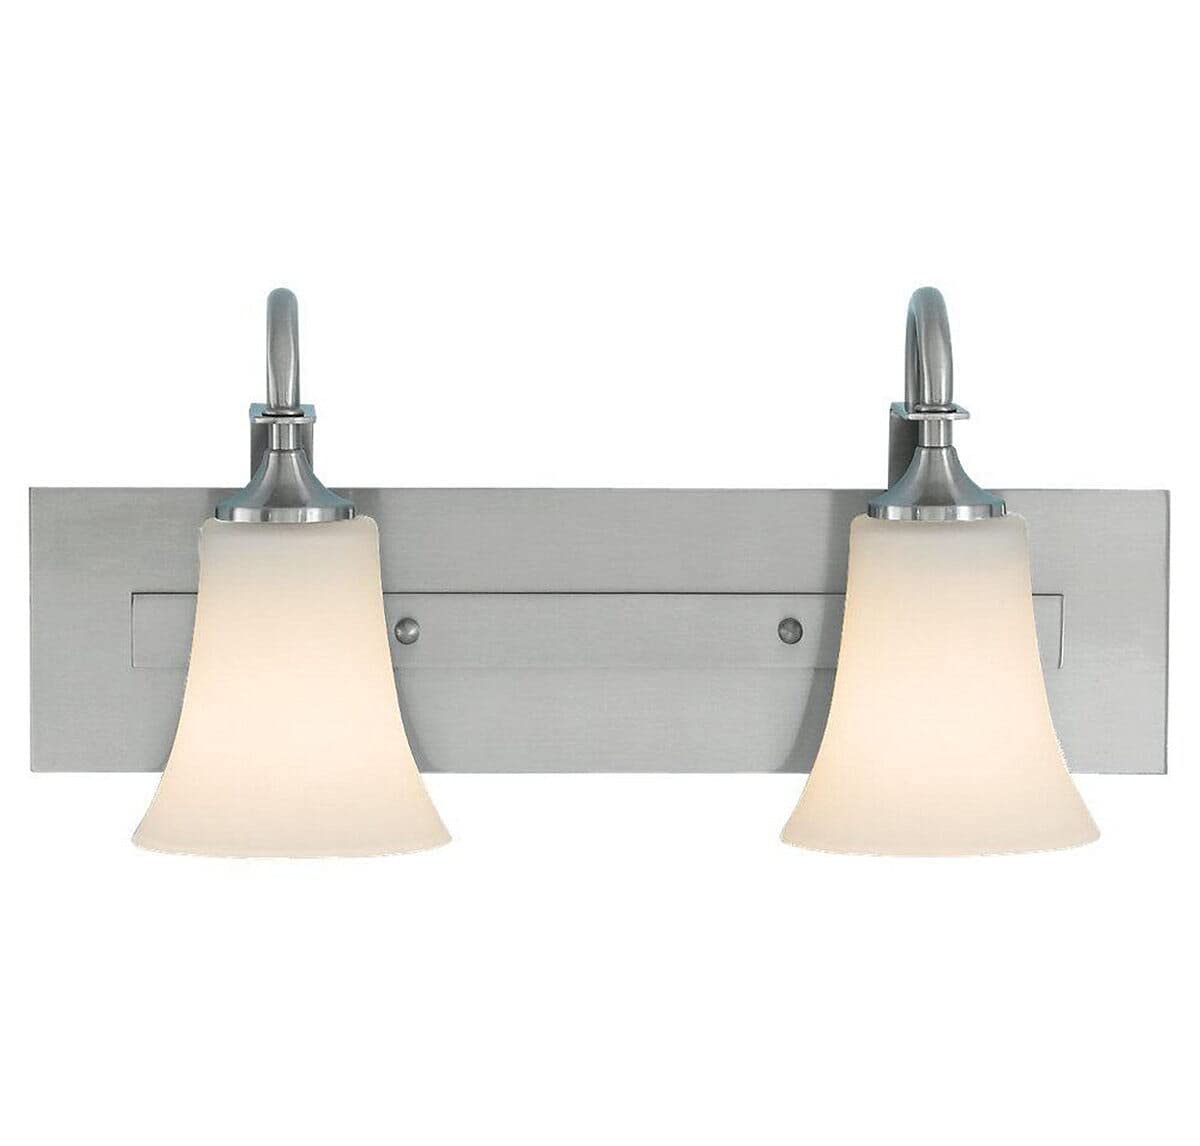
An image showing the complete Sea Gull Lighting Barrington Two Light Wall / Bath Fixture. It features a brushed steel backplate with two upward-curving arms holding frosted opal etched glass shades. The fixture is designed for wall mounting and can be installed with lights pointing up or down.
Once installation is complete, restore power at the circuit breaker.
6. Operating Instructions
To operate your Sea Gull Lighting fixture, simply use the wall switch connected to the electrical circuit. This fixture is compatible with dimmable bulbs and dimmer switches, allowing you to adjust the light intensity. Ensure you use dimmable bulbs if you intend to use a dimmer switch.
7. Maintenance
Regular maintenance will help preserve the appearance and functionality of your fixture.
- Cleaning the Fixture: Use a clean, soft, dry cloth to wipe the metal finish. Avoid abrasive cleaners or solvents, as they may damage the finish.
- Cleaning the Shades: Use a clean, soft cloth to wipe your shade. If necessary, you may use a white cloth dampened with a mild solution of soapy water to gently wash the shade. Rinse thoroughly with a white cloth dipped in clean water. Allow shades to dry completely before reattaching.
- Bulb Replacement: Ensure power is OFF at the circuit breaker before replacing bulbs. Allow bulbs to cool completely before touching. Unscrew old bulbs and replace with new A19 style bulbs, not exceeding 100 watts per bulb.
8. Troubleshooting
If your fixture is not functioning correctly, refer to the following common issues and solutions:
- Light does not illuminate:
- Check if the power is ON at the circuit breaker.
- Ensure the wall switch is in the ON position.
- Verify that bulbs are screwed in tightly and are not burnt out. Replace if necessary.
- Check wire connections inside the outlet box for secure contact. (Turn off power before checking).
- Flickering or dimming issues:
- Ensure you are using dimmable bulbs with a compatible dimmer switch.
- Check for loose wire connections.
If problems persist, consult a qualified electrician.
9. Warranty
This Sea Gull Lighting fixture comes with a 1-year warranty from the date of purchase, covering defects in materials and workmanship. Please retain your proof of purchase for warranty claims. The warranty does not cover damage due to improper installation, misuse, abuse, or normal wear and tear.
10. Customer Support
For technical assistance, missing parts, or warranty inquiries, please contact Sea Gull Lighting customer support. Refer to the packaging or the official Sea Gull Lighting website for current contact information.