1. Introduction
This manual provides comprehensive instructions for the safe and efficient operation, maintenance, and troubleshooting of your Malongo EXP 240 Espresso Pod Machine. Please read this manual thoroughly before first use and retain it for future reference.

Figure 1: Malongo EXP 240 Espresso Pod Machine. This image shows the machine's overall design, including the water tank, pod insertion area, and espresso spout.
2. Important Safety Instructions
Always follow basic safety precautions when using electrical appliances to reduce the risk of fire, electric shock, and injury to persons.
- Read all instructions before operating the appliance.
- Do not touch hot surfaces. Use handles or knobs.
- To protect against fire, electric shock, and personal injury, do not immerse cord, plugs, or the appliance in water or other liquid.
- Close supervision is necessary when any appliance is used by or near children.
- Unplug from outlet when not in use and before cleaning. Allow to cool before putting on or taking off parts, and before cleaning the appliance.
- Do not operate any appliance with a damaged cord or plug or after the appliance malfunctions, or has been damaged in any manner.
- The use of accessory attachments not recommended by the appliance manufacturer may result in fire, electric shock, or personal injury.
- Do not use outdoors.
- Do not let cord hang over edge of table or counter, or touch hot surfaces.
- Do not place on or near a hot gas or electric burner, or in a heated oven.
- Always attach plug to appliance first, then plug cord into the wall outlet. To disconnect, turn any control to "off", then remove plug from wall outlet.
- Do not use appliance for other than intended use.
3. Product Overview
Familiarize yourself with the components of your Malongo EXP 240 machine before operation.
3.1. Main Components
- Water Tank (removable)
- Pod Insertion Slot
- Brewing Handle/Lever
- Espresso Spout (adjustable)
- Drip Tray and Used Pod Container
- On/Off Switch with Indicator Light
- Control Selector (for coffee volume)
- Temperature Indicator Light
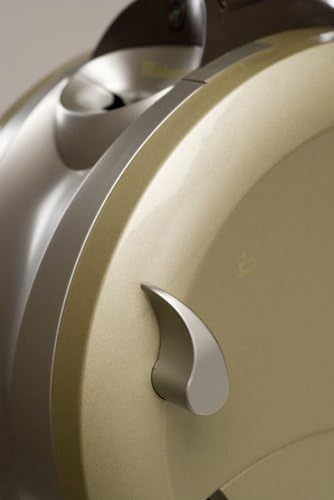
Figure 2: Side view of the machine, showing the brewing handle. This handle is used to open and close the pod insertion mechanism.
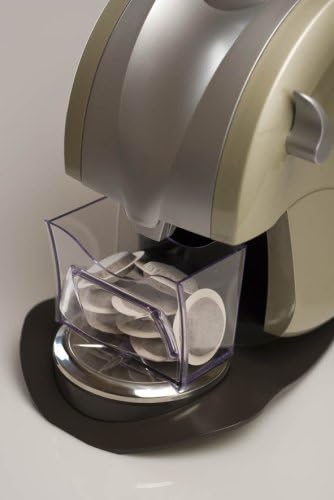
Figure 3: The removable container for used coffee pods, located beneath the brewing area. This container collects pods after brewing.
4. Setup
4.1. Unpacking
Carefully remove the machine from its packaging. Ensure all components are present and undamaged. Retain packaging for future transport or service.
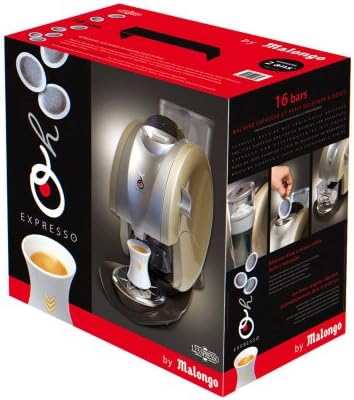
Figure 4: The product packaging. Ensure all items shown on the box are included.
4.2. Initial Cleaning
Before first use, wash the water tank, drip tray, and used pod container with warm, soapy water. Rinse thoroughly and dry. Wipe the exterior of the machine with a damp cloth.
4.3. Filling the Water Tank
Remove the water tank from the back of the machine. Fill it with fresh, cold drinking water up to the MAX line. Replace the water tank securely.
4.4. First Use / Priming the Pump
- Plug the machine into a grounded electrical outlet.
- Press the On/Off switch. The indicator light will illuminate.
- Place a large cup under the espresso spout.
- Without inserting a coffee pod, press the brew button or activate the control selector to dispense water. Allow water to flow until the tank is nearly empty. This primes the pump and flushes the system.
- Repeat if necessary until water flows smoothly.
5. Operating Instructions
5.1. Making Espresso
- Ensure the water tank is filled with fresh water.
- Turn on the machine using the On/Off switch. Wait for the temperature indicator light to signal that the machine is ready (usually when it stops blinking or turns solid).
- Lift the brewing handle to open the pod insertion slot.
- Insert one Malongo espresso pod into the slot, ensuring it is correctly seated.
- Lower the brewing handle firmly until it clicks into place.
- Place your espresso cup under the spout. The spout is adjustable to accommodate different cup sizes.
- Use the control selector to choose your desired coffee volume (e.g., short espresso, long espresso). Press the corresponding button or activate the selector.
- The machine will begin brewing. Once the desired volume is reached, the brewing will stop automatically.
- Lift the brewing handle to eject the used pod into the internal container.

Figure 5: Correct insertion of a coffee pod into the machine. Ensure the pod is flat and centered.
5.2. Adjusting Spout Height
The espresso spout can be adjusted vertically to fit various cup sizes. Gently push or pull the spout to the desired height.
6. Maintenance and Cleaning
Regular cleaning ensures optimal performance and longevity of your machine.
6.1. Daily Cleaning
- Drip Tray and Used Pod Container: Empty and rinse daily. Wash with warm, soapy water and dry thoroughly.
- Water Tank: Rinse daily and refill with fresh water. Clean with warm, soapy water weekly.
- Espresso Spout: Wipe with a damp cloth after each use to prevent coffee residue buildup.
- Exterior: Wipe the machine's exterior with a soft, damp cloth. Do not use abrasive cleaners or solvents.
6.2. Descaling
Descaling is essential to remove mineral deposits that can affect machine performance and coffee taste. The frequency depends on water hardness and usage, but generally every 2-3 months.
- Empty the water tank and fill it with a descaling solution mixed according to the manufacturer's instructions (or a solution of white vinegar and water, 1:1 ratio).
- Place a large container under the espresso spout.
- Turn on the machine. Without a coffee pod, run several brewing cycles until the water tank is empty.
- Rinse the water tank thoroughly and fill it with fresh water.
- Run several cycles with fresh water to flush out any remaining descaling solution.
Caution: Always follow the instructions on your descaling product. Do not use descaling solutions not intended for coffee machines.
7. Troubleshooting
Refer to the table below for common issues and their solutions.
| Problem | Possible Cause | Solution |
|---|---|---|
| Machine does not turn on. | Not plugged in; power outlet fault; On/Off switch not pressed. | Check power cord connection; test outlet with another appliance; press On/Off switch firmly. |
| No coffee dispenses or flow is very slow. | Water tank empty; machine not primed; clogged spout; machine needs descaling. | Fill water tank; prime the pump (Section 4.4); clean spout; descale the machine (Section 6.2). |
| Coffee tastes burnt or plastic-like. | Initial use residue; machine needs cleaning; poor water quality. | Run several plain water cycles; perform thorough cleaning and descaling; use filtered water. |
| Water leaks from the machine. | Water tank not seated correctly; drip tray overflowing; internal seal issue. | Ensure water tank is firmly in place; empty drip tray; if problem persists, contact customer support. |
| Used pods not ejecting properly. | Pod container full; pod jammed. | Empty used pod container; gently remove any jammed pods. |
If the problem persists after attempting these solutions, please contact Malongo customer support.
8. Specifications
- Model: Malongo EXP 240
- Power: 1050 watts
- Pressure: 16 Bars
- Water Tank Volume: 1.3 Liters
- Dimensions (L x W x H): 23.5 x 40.4 x 39.4 cm
- Weight: 3 Kilograms
- Color: Gold
- Features: On/Off switch with indicator, Control selector, Luminous temperature indicator, Adjustable spout.
9. Warranty and Customer Support
Your Malongo EXP 240 machine comes with a 2-year warranty. Malongo offers a revolutionary 48-hour home exchange service under specific conditions:
- Within 3 months of purchase: Exchange with a new machine.
- Within 2 years of purchase: Exchange with a reconditioned (refurbished) machine.
- After 2 years of purchase: Exchange with a reconditioned machine for a fee of 39€ TTC.
To initiate a warranty claim or for any support inquiries, please contact Malongo customer service at: 0 825 826 187 (0.15 €TTC/min).
Important: Please retain your purchase invoice or sales receipt as it is essential for warranty claims. This offer is valid only in France for machines purchased from November 19, 2007, onwards.