Product Overview
The La Crosse Technology WS-8035U-IT-SAL is a wireless weather station designed to monitor indoor and outdoor environmental conditions. It provides real-time temperature and humidity readings, barometric pressure, moon phase, and weather forecasts. The unit features an atomic clock for precise timekeeping and an alarm function.
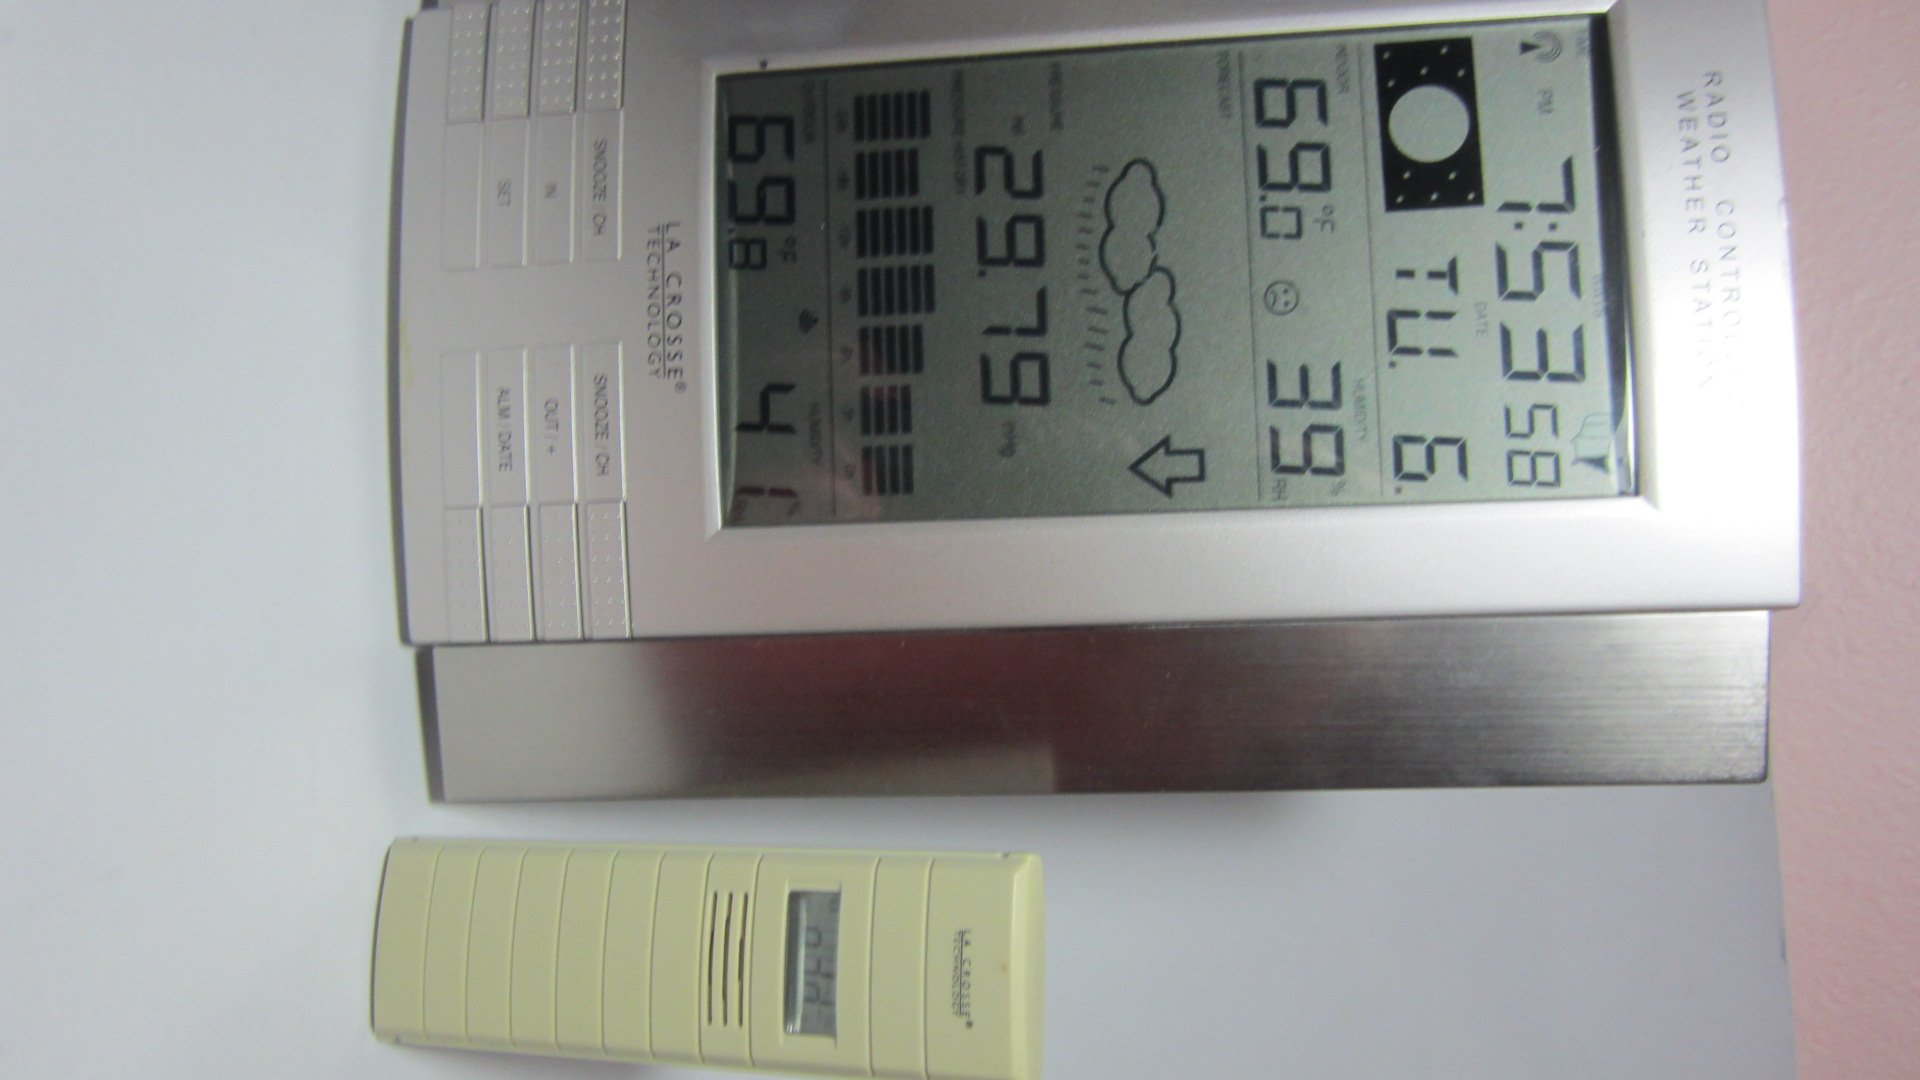
Figure 1: Main display unit of the La Crosse Technology WS-8035U-IT-SAL Wireless Weather Station.
Key Features:
- Records minimum and maximum indoor/outdoor temperature and humidity with time and date stamps.
- Displays barometric tendency with an arrow indicator.
- Includes an indoor comfort level icon and moon phase display.
- Features a barometric pressure display with a 24-hour history graph.
- Capable of receiving data from up to three remote sensors (one included).
- Atomic time and date automatically updates, with an option to disable Daylight Saving Time adjustments.
- Designed for both wall-mount and free-standing use with an integrated stand.
- Main display unit dimensions: 10 x 7.5 x 1 inches.
Setup Guide
1. Battery Installation
The weather station requires a total of 5 AA alkaline batteries (not included): 3 for the remote sensor and 2 for the main display unit. Ensure batteries are inserted with correct polarity.
- Remote Transmitter: First, insert 3 AA batteries into the remote outdoor temperature and humidity sensor.
- Main Receiver: Next, insert 2 AA batteries into the main display unit.
- Synchronization: Allow time for the main unit to receive the outdoor temperature data from the remote sensor. This synchronization process is crucial before proceeding to set the time.
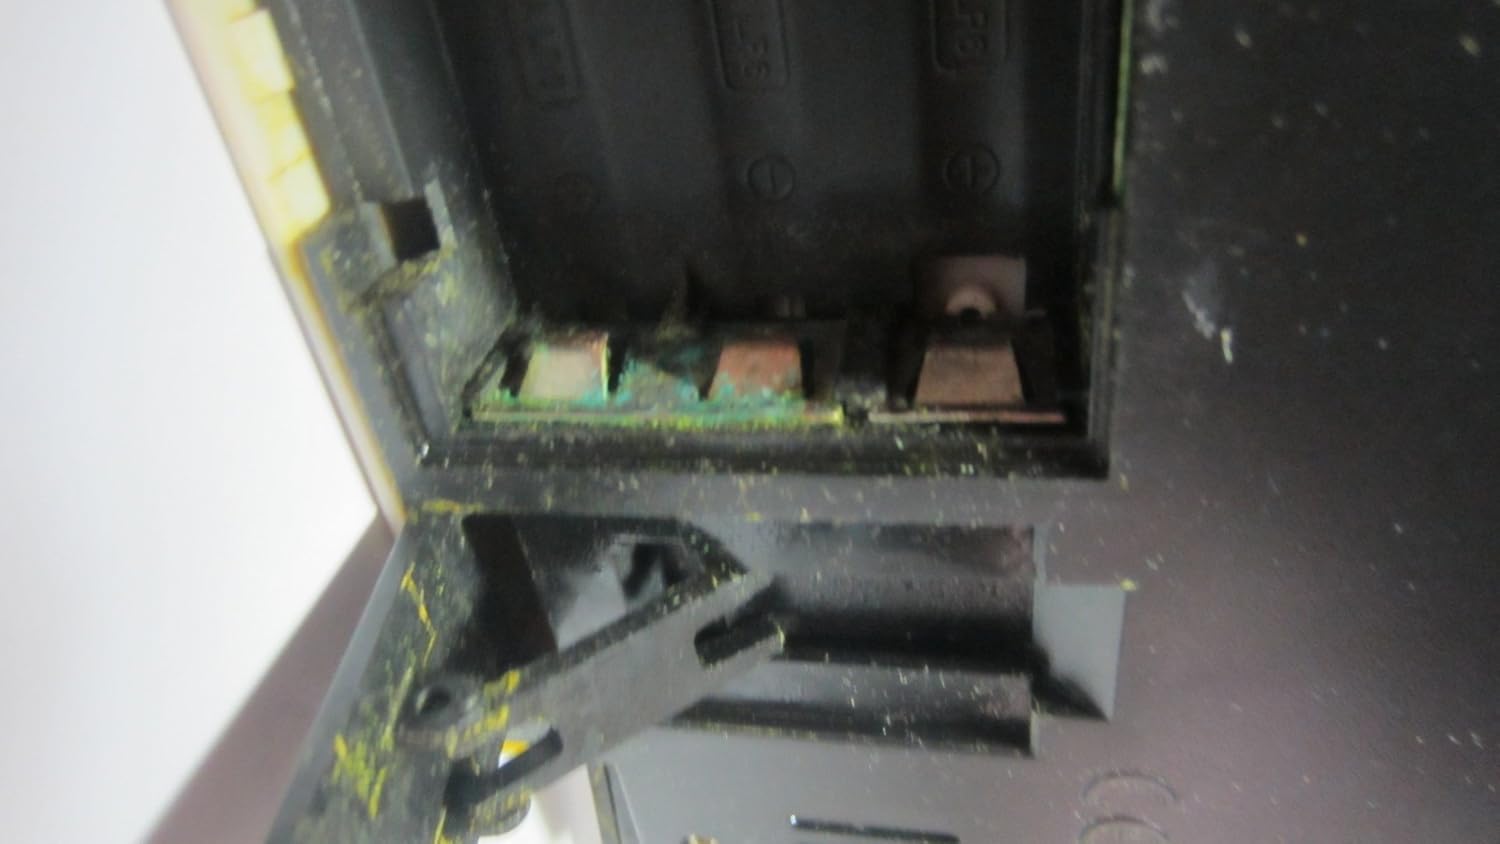
Figure 2: Open battery compartment, showing where batteries are inserted.

Figure 3: Product label on the back of the unit, detailing battery installation order and model information.
2. Remote Sensor Placement
Place the wireless remote sensor in a location that provides accurate readings and is within 330 feet (100 meters) of the main display unit. Ideal locations include a shaded area outdoors, a greenhouse, garage, wine cellar, or a baby's room, where temperature and humidity monitoring is critical. Avoid direct sunlight exposure to prevent inaccurate temperature readings.
3. Atomic Time Synchronization
After battery installation and sensor synchronization, the unit will automatically attempt to synchronize with the U.S. atomic clock signal. This process may take several minutes or up to 24 hours depending on signal strength. Ensure the unit is placed away from electronic interference for best reception. The time can also be set manually if atomic synchronization is not desired or available.
Operating Instructions
The main display unit provides a comprehensive overview of weather data and time information. Familiarize yourself with the display layout and control buttons.
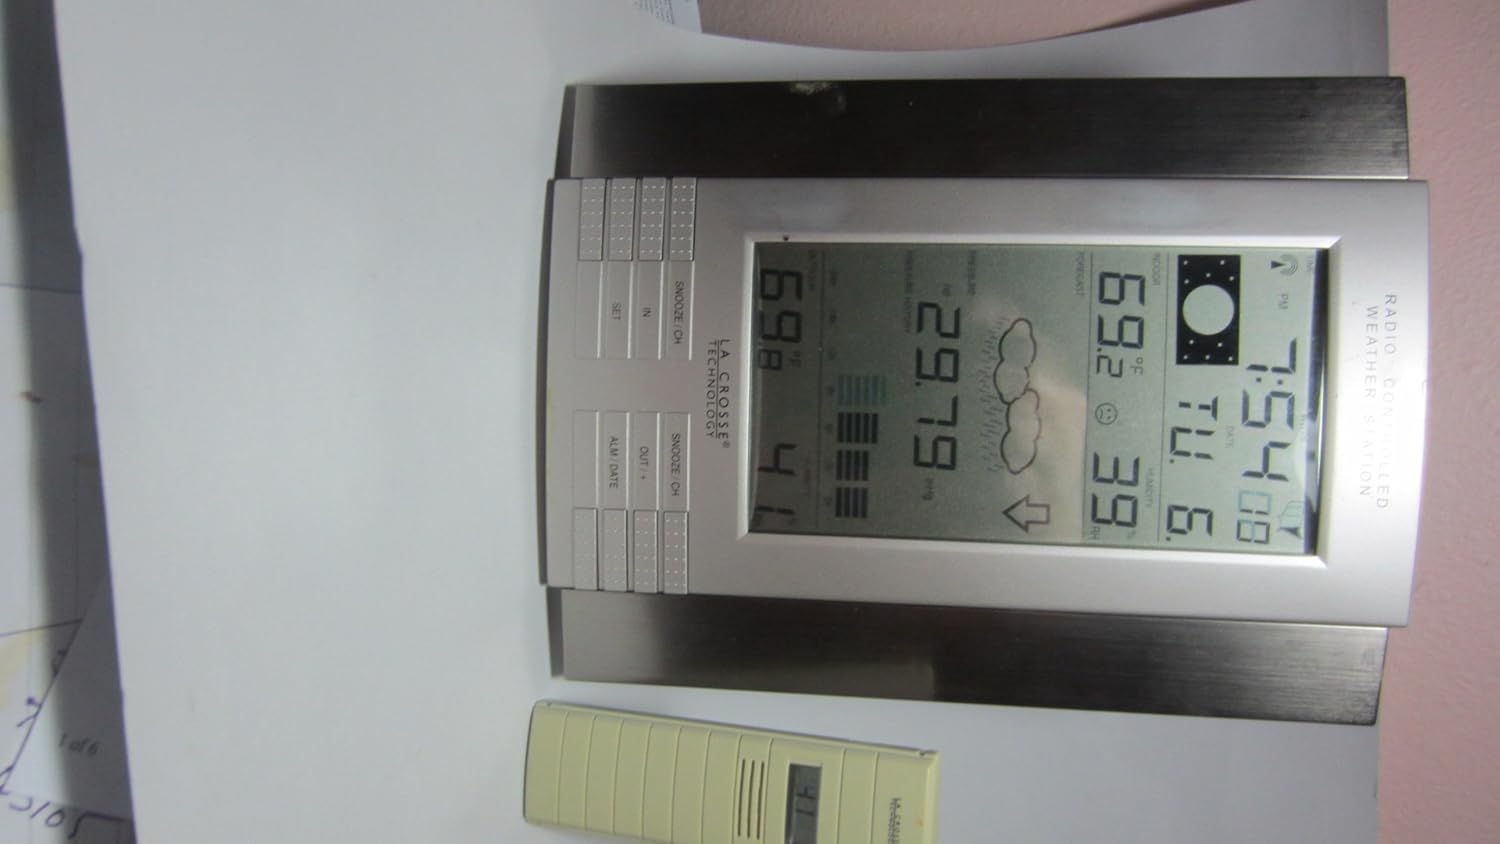
Figure 4: Close-up of the main display unit, highlighting various data points and control buttons.
Display Information:
- Indoor/Outdoor Temperature: Current temperature readings for both inside and outside environments.
- Indoor/Outdoor Humidity: Current humidity levels for both inside and outside environments.
- Barometric Pressure: Current atmospheric pressure, often accompanied by a 24-hour history graph.
- Weather Forecast: Icons indicating predicted weather conditions (e.g., sunny, cloudy, rainy).
- Moon Phase: Graphical representation of the current lunar phase.
- Atomic Time and Date: Automatically updated time and calendar.
- Min/Max Records: Displays the highest and lowest recorded temperatures and humidity levels.
Control Buttons:
The unit features several buttons for setting and viewing information. While specific functions may vary slightly, common buttons include:
- SET: Used to enter settings mode and confirm selections.
- IN / OUT / +: Typically used to switch between indoor and outdoor display data, or to increase values during settings.
- SNOOZE / CH: Activates the snooze function for the alarm or cycles through remote sensor channels (if multiple sensors are used).
- ALM / DATE: Used to set the alarm or view/set the date.
Setting the Alarm:
Press the ALM / DATE button to view the alarm time. Press and hold ALM / DATE to enter alarm setting mode. Use the + or - buttons (often combined with IN/OUT) to adjust the hour and minute. Press SET to confirm each setting.
Maintenance
Battery Replacement:
Replace batteries in both the main unit and the remote sensor when the low battery indicator appears on the display. Always replace all batteries in a unit at the same time. Refer to the "Setup Guide" for the correct battery installation order to ensure proper synchronization.
Cleaning:
Wipe the display and unit casing with a soft, damp cloth. Do not use abrasive cleaners or solvents, as these can damage the plastic and electronic components. Ensure no moisture enters the battery compartments or other openings.
Sensor Care:
Periodically check the remote sensor for any debris or obstructions that might affect its readings. Ensure it remains in a shaded location to maintain temperature accuracy, especially during daytime hours.
Troubleshooting
| Problem | Possible Cause / Solution |
|---|---|
| No outdoor temperature/humidity reading. |
|
| Inaccurate outdoor temperature readings. |
|
| Atomic time not synchronizing. |
|
| Display is dim or blank. |
|
Product Specifications
| Model Number | WS-8035U-IT-SAL |
| Brand | La Crosse Technology |
| Power Source | Main Unit: 2 x AA Alkaline Batteries (not included); Remote Sensor: 3 x AA Alkaline Batteries (not included) |
| Special Features | Alarm, Atomic Clock, Temperature/Humidity Monitoring, Barometric Pressure, Moon Phase, Weather Forecast |
| Material | Plastic |
| Color | Silver |
| Item Weight | 1.3 Pounds (approx. 0.59 kg) |
| Display Type | LCD |
| Dimensions (Main Unit) | 10 x 7.5 x 1 inches (approx. 25.4 x 19.05 x 2.54 cm) |
| Wireless Range | Up to 330 feet (100 meters) in open air |
| Frequency | 915 MHz (IT+ Instant Transmission) |
| UPC | 757456994161 |
Warranty Information
La Crosse Technology products typically come with a limited warranty covering manufacturing defects. For specific warranty terms, duration, and claim procedures, please refer to the documentation included with your product or visit the official La Crosse Technology website. Keep your purchase receipt as proof of purchase for any warranty claims.
Customer Support
For further assistance, technical support, or to view frequently asked questions, please visit the official La Crosse Technology support website. You can find product-specific information and contact details for customer service.
Online Support: www.lacrossetechnology.com/8035it
Please have your model number (WS-8035U-IT-SAL) ready when contacting support.