1. Product Overview
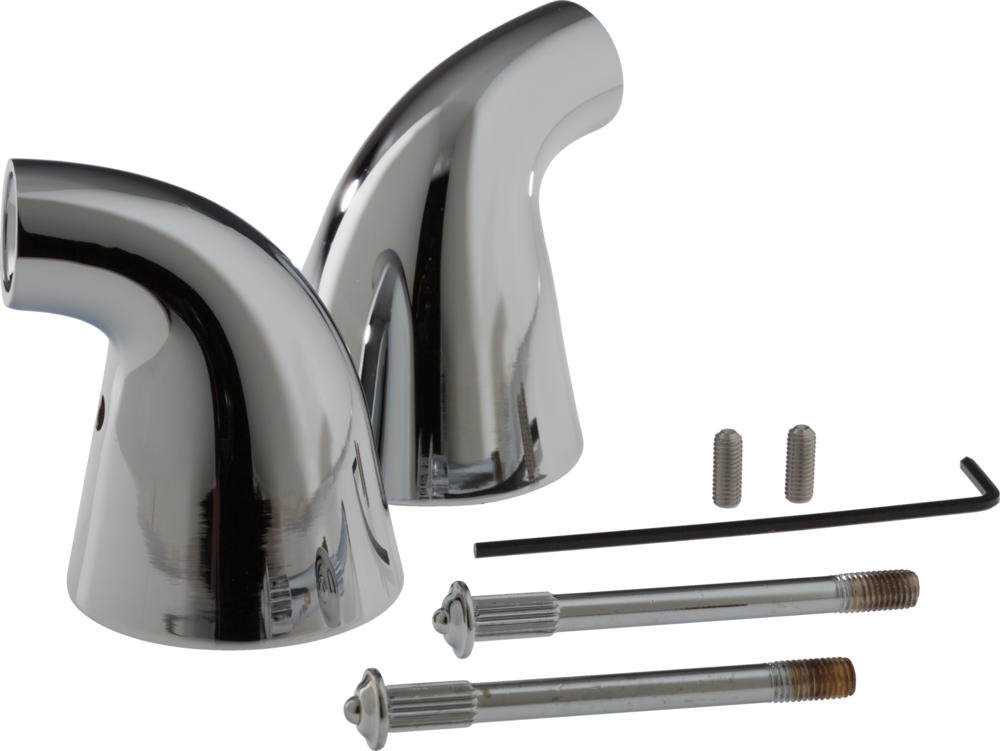
The Delta Innovations Series H64 faucet handle base features a gentle curve and a slight flare, designed to complement various faucet styles. This handle is part of Delta's Less Handle Program, allowing for customization by pairing it with a separate accent piece (model A64, sold separately) to complete the faucet handle assembly.
Key Features
- Designed for use with select Less Handle Program models.
- Requires a separate accent piece (A64) for a complete handle assembly.
- Constructed from durable metal for longevity.
2. Safety Information
Please read all instructions carefully before installation and use. Failure to follow these instructions may result in property damage or personal injury.
- Always turn off the main water supply before attempting any installation or repair.
- Wear appropriate personal protective equipment, such as safety glasses, during installation.
- If you are unsure about any part of the installation process, consult a qualified plumber.
- Ensure all connections are secure to prevent leaks.
3. Package Contents
Verify that all components are present before beginning installation:
- H64 Faucet Handle Base (1)
- Aerator (1) - Note: The accent piece, model A64, is sold separately and is required for a complete handle assembly.
4. Installation Instructions
Tools Required
- Adjustable Wrench
- Phillips Head Screwdriver
- Plumber's Tape (optional, for threaded connections)
- Soft Cloth
Preparation
- Turn off the water supply to the faucet at the shut-off valves under the sink or at the main water supply.
- Clear the workspace around the faucet.
- If replacing an existing handle, remove the old handle and clean the faucet stem area thoroughly.
Step-by-Step Installation
- Position the Handle Base: Carefully place the H64 handle base onto the faucet stem. Ensure it sits flush against the faucet body.
- Secure the Handle Base: Locate the set screw on the side or back of the handle base. Use a Phillips head screwdriver to tighten the set screw, securing the handle base firmly to the faucet stem. Do not overtighten.
- Attach Accent Piece (A64, sold separately): If you have the A64 accent piece, follow its specific instructions to attach it to the H64 handle base. This typically involves aligning and snapping it into place or securing it with an additional screw.
- Test Operation: Once the handle is fully assembled, slowly turn on the water supply. Check for any leaks around the handle base and connections. Operate the handle to ensure smooth movement and proper water flow.
5. Operation
To operate the faucet, grasp the H64 handle and rotate it to control water flow and temperature. The direction of rotation for hot and cold water may vary depending on the specific faucet body it is paired with. Typically, rotating the handle counter-clockwise increases water flow and moves towards hotter temperatures, while clockwise rotation decreases flow and moves towards colder temperatures.
6. Care and Maintenance
Proper care will help maintain the finish and functionality of your Delta H64 faucet handle.
- Cleaning: Clean the chrome finish regularly with a soft, damp cloth. For stubborn spots, use a mild soap solution and rinse thoroughly with clean water.
- Avoid Harsh Cleaners: Do not use abrasive cleaners, harsh chemicals, ammonia-based products, or scouring pads, as these can damage the chrome finish and void the warranty.
- Drying: After cleaning, dry the handle with a soft cloth to prevent water spots.
7. Troubleshooting
| Problem | Possible Cause | Solution |
|---|---|---|
| Handle is loose or wobbly. | Set screw is loose. | Tighten the set screw on the handle base with a Phillips head screwdriver. |
| Difficulty turning the handle. | Mineral buildup or internal faucet valve issue. | Clean around the handle base. If the issue persists, the problem may be with the faucet's internal valve, which is separate from the handle. Consult a plumber or the faucet's instruction manual. |
| Water leaks from around the handle base. | Improper installation or worn internal seals (not part of the handle). | Ensure the handle base is securely installed. If leaks persist, the issue is likely with the faucet's valve or O-rings, which are internal components of the faucet body, not the handle itself. Professional assistance may be required. |
8. Specifications
| Feature | Detail |
|---|---|
| Brand | DELTA |
| Model Name | H64 |
| Model Number | H64 |
| Finish Type | Chrome |
| Material | Metal (Zinc) |
| Number of Handles | 1 |
| Included Components | Handle, Aerator |
| Mounting Type | Deck Mount |
| UPC | 034449363143 |
9. Warranty and Support
Manufacturer Warranty
This Delta Faucet H64 handle is covered by a Limited Lifetime Warranty. Please refer to the official Delta Faucet warranty documentation for complete terms and conditions, including coverage details and limitations.
Customer Support
For technical assistance, replacement parts, or warranty claims, please contact Delta Faucet customer service. Contact information can typically be found on the official Delta Faucet website or by searching for "Delta Faucet customer support" online.