
Introduction
The Poolmaster Water Pop Deluxe Lounge is designed for comfortable relaxation in swimming pools and calm water environments. This inflatable lounge features an oval shape with a mesh seat and a high backrest, providing support and allowing for partial water immersion to keep you cool. This manual provides essential information for the proper setup, operation, maintenance, and troubleshooting of your lounge.

This image shows the Poolmaster Water Pop Deluxe Lounge, an inflatable pool float designed for comfort and relaxation. The lounge features a high backrest and a mesh seat, allowing users to partially immerse themselves in water while lounging.
Setup Instructions
- Unpack: Carefully remove the lounge from its packaging. Inspect for any damage or defects.
- Locate Valve: Find the inflation valve on the lounge.
- Inflate: Use an air pump (not included) to inflate the lounge. Ensure the valve is fully open during inflation. Inflate until the lounge is firm but not overinflated. Overinflation can cause damage.
- Secure Valve: Once inflated, securely close the inflation valve to prevent air leakage.
- Safety Check: Before use, ensure all seams are intact and the lounge holds air without noticeable leaks.
WARNING: This is not a life-saving device. Do not leave children unattended while using this product. Use only under competent supervision. Do not use in rough water or during strong currents.

This image illustrates a person enjoying the Poolmaster Water Pop Deluxe Lounge, highlighting its approximate dimensions of 61 inches in length and 42 inches in width. Key features such as the built-in beverage holder and the easy inflate/deflate valve are also indicated.
Operating Instructions
- Entering the Lounge: Gently enter the lounge from the shallow end of the pool or from a stable edge. The open leg area allows for easy entry and exit.
- Positioning: Sit comfortably in the mesh seat, utilizing the high backrest for support. Your legs can extend through the open area, allowing for partial water immersion.
- Beverage Holder: The integrated beverage pocket is designed to hold standard-sized drinks. Ensure beverages are securely placed to prevent spills.
- Exiting the Lounge: Carefully move towards a stable edge or shallow water before exiting the lounge.
IMPORTANT: Always maintain a safe distance from pool edges, other swimmers, and water features. Avoid sharp objects that could puncture the lounge.

This image features a woman comfortably seated on a blue Poolmaster Water Pop Deluxe Lounge, showcasing its design for all-day comfort. The high pillow, supportive backrest with a mesh seat, and the water-hole leg rest are visible, allowing for a relaxing experience.
Maintenance
- Cleaning: After each use, rinse the lounge with fresh water to remove chlorine, salt, or sand. Use a mild soap solution and a soft cloth for stubborn dirt. Avoid abrasive cleaners.
- Drying: Thoroughly dry the lounge before deflating and storing. Air dry completely in a shaded area to prevent mildew and material degradation from direct sunlight.
- Storage: Deflate the lounge and fold it neatly. Store in a cool, dry place away from direct sunlight, extreme temperatures, and sharp objects.
- Puncture Repair: In case of a small puncture, use a vinyl repair kit (sold separately) following the kit's instructions. Ensure the lounge is clean and dry before applying the patch.
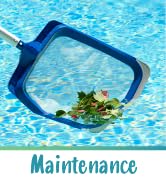
This image depicts a pool skimmer being used to remove debris, such as leaves, from the surface of a swimming pool, illustrating a common pool maintenance task. Proper cleaning and care extend the life of your pool accessories.
Troubleshooting
- Lounge is losing air quickly:
- Check the inflation valve to ensure it is securely closed. Inspect the entire surface of the lounge for punctures or tears. Small leaks can often be found by applying soapy water to the surface; bubbles will indicate the leak location. Repair with a vinyl repair kit.
- Lounge feels unstable:
- Ensure the lounge is adequately inflated. An underinflated lounge may not provide sufficient buoyancy or stability. Always use in calm water conditions.
- Discomfort during use:
- Adjust your position on the lounge. Ensure the backrest is properly supporting your back. If discomfort persists, verify the lounge is correctly inflated and positioned in the water.
Specifications
| Feature | Detail |
|---|---|
| Model Name | Water Pop Deluxe Pool Float Lounge |
| Part Number | 85652 |
| Dimensions (L x W) | 61 inches x 42 inches |
| Item Weight | 3.35 Pounds |
| Material | Vinyl (with Mesh Seat) |
| Age Range | Adult |
| Special Feature | Quick Drying, Integrated Beverage Pocket |
| Available Colors | Blue, Green, Red, Yellow (Surprise Color variant ships one of these) |

Three Poolmaster Water Pop Deluxe Lounges are displayed in blue, green, and red, highlighting the available color options for this comfortable pool float.
Warranty Information
The Poolmaster Water Pop Deluxe Lounge comes with a 1-year warranty against manufacturer defects. This warranty covers defects in materials and workmanship under normal use. It does not cover damage resulting from misuse, accidents, improper inflation, or normal wear and tear. Please retain your proof of purchase for warranty claims.
Support
For further assistance, questions, or to report a warranty claim regarding your Poolmaster Water Pop Deluxe Lounge, please contact Poolmaster customer service. Refer to the product packaging or the official Poolmaster website for current contact information.