
1. Introduction
This manual provides essential instructions for the safe assembly, operation, maintenance, and storage of your KIDWISE Castle Inflatable Bounce House with Slide. Please read this manual thoroughly before initial use and retain it for future reference.
The KIDWISE Castle Bounce House features a dedicated bounce area and an integrated slide, designed for children's recreational use. It is constructed from durable 420D Oxford Nylon with PVC backing. All materials comply with CPSCIA guidelines for Lead and Phthalates.
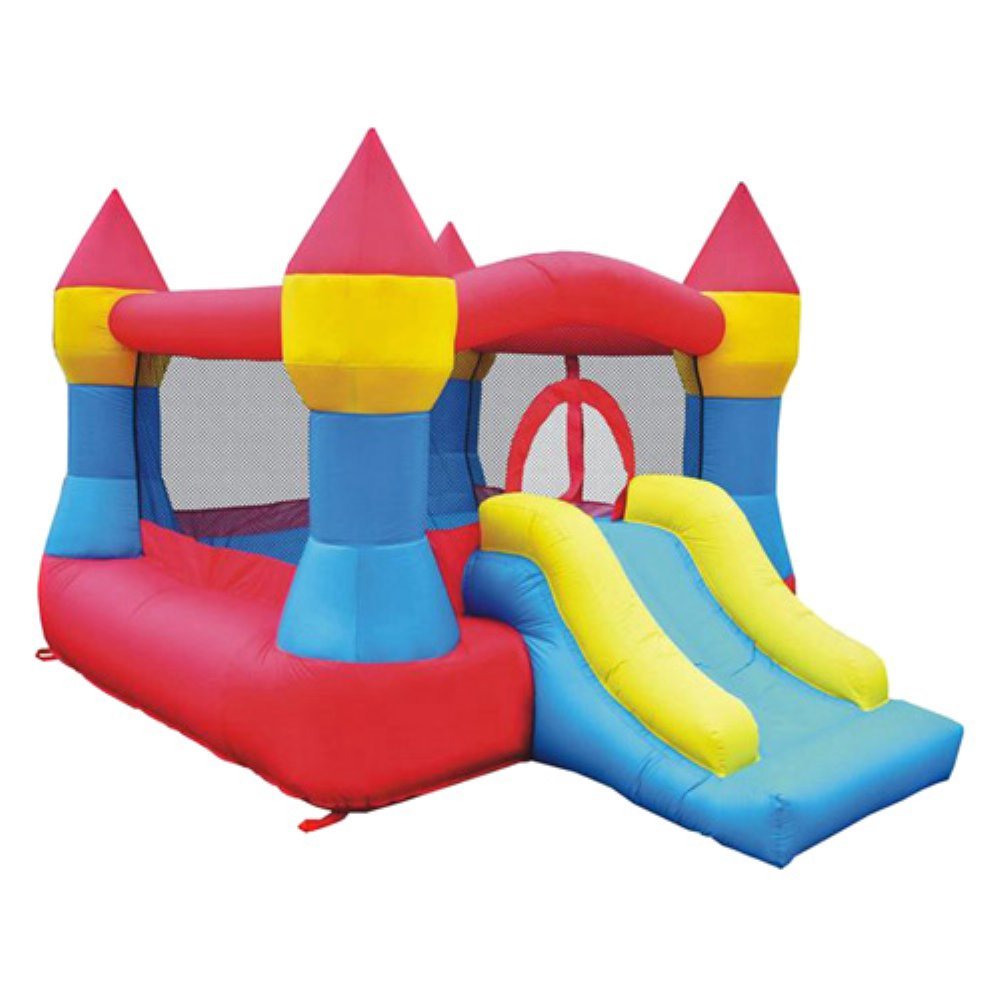
Figure 1: KIDWISE Castle Inflatable Bounce House with Slide. This image displays the fully inflated bounce house, featuring a red and blue castle design with yellow turrets and an attached yellow and blue slide.
2. Important Safety Information
Failure to follow these safety instructions may result in serious injury or death.
2.1 General Safety Rules
- Adult Supervision Required: Constant and competent adult supervision is mandatory at all times when the bounce house is in use.
- Age and Weight Limits: This product is recommended for children aged 24 months to 8 years. The maximum weight recommendation is 250 pounds (113 kg) total. A maximum of 3 children should use the bounce house at one time.
- Clearance: Ensure adequate clear space around the bounce house. Maintain a minimum of 6 feet (1.8 meters) of unobstructed space from any structures, fences, walls, or other obstacles.
- Surface: Set up the bounce house on a soft, level surface such as grass or sand. Do not set up on concrete, asphalt, or other hard surfaces without appropriate padding underneath.
- Anchoring: Always anchor the bounce house securely to the ground using the provided stakes. Do not use in windy conditions.
- Weather Conditions: Do not use in rain, strong winds, or lightning. Moisture can make surfaces slippery and increase the risk of electrical shock from the blower.
- No Sharp Objects: Remove all sharp objects, jewelry, shoes, eyeglasses, and any other hard or sharp items from users before entering the bounce house.
- No Food or Drink: Do not allow food, drinks, or chewing gum inside the bounce house to prevent choking hazards and damage to the material.
- No Flips or Rough Play: Prohibit flips, wrestling, or other rough play that could lead to collisions or falls.
- Emergency Exit: Ensure children know how to exit the bounce house safely in an emergency.
- Blower Operation: The blower must remain on and continuously inflate the unit while in use.
2.2 Electrical Safety
- Use only a Ground Fault Circuit Interrupter (GFCI) protected outlet for the blower.
- Ensure the blower and power cord are placed in a dry area, away from water and moisture.
- Do not operate the blower with a damaged cord or plug.
- Do not allow children to touch or operate the blower.
3. Package Contents
Verify that all items listed below are present in your package:
- Inflatable Bounce House Unit
- Air Blower
- Ground Stakes
- Repair Patches
- Storage Bag
- Instruction Manual (this document)
4. Setup Instructions
- Choose a Location: Select a flat, level, and soft surface (e.g., grass) free from rocks, sharp objects, or debris. Ensure there is at least 6 feet (1.8 meters) of clear space around all sides of the bounce house.
- Unroll the Bounce House: Remove the bounce house from its storage bag and unroll it completely in the chosen setup area.
- Connect the Blower: Locate the inflation tube on the bounce house. Attach the blower's air outlet securely to the inflation tube using the strap or buckle provided. Ensure the connection is tight to prevent air leakage.
- Position the Blower: Place the blower on a stable, dry surface. Ensure the air intake is clear of obstructions.
- Inflate the Bounce House: Plug the blower into a GFCI-protected electrical outlet. Turn the blower switch to the "ON" position. The bounce house will begin to inflate. It should fully inflate within 3-5 minutes.
- Secure the Bounce House: Once fully inflated, use the provided ground stakes to anchor the bounce house firmly to the ground through the designated anchor points. Ensure all anchor points are utilized for maximum stability.
- Check for Obstructions: Before allowing children to enter, ensure there are no obstructions inside or around the bounce house.
- Close Air Outlets: Ensure all zippers or hook-and-loop fasteners on any deflation openings are securely closed before inflation.
5. Operating Instructions
Always ensure constant adult supervision during operation.
- Supervision: An adult must supervise children at all times.
- Entry/Exit: Children should enter and exit the bounce house through the designated opening or slide.
- Capacity: Do not exceed the maximum capacity of 3 children or 250 pounds (113 kg) total weight.
- Safe Play: Instruct children to avoid pushing, shoving, or rough play. Encourage bouncing in the center of the unit.
- Slide Use: Children should slide down feet first, one at a time. Ensure the landing area is clear.
- Blower On: The blower must remain continuously running while the bounce house is in use. If the blower stops, immediately guide children out of the unit.
6. Maintenance
6.1 Cleaning
- Clean the bounce house with a mild soap solution and a damp cloth. Do not use harsh chemicals or abrasive cleaners.
- Ensure the unit is completely dry before storage to prevent mold and mildew.
6.2 Storage
- Deflation: Turn off the blower and unplug it. Open all deflation zippers or hook-and-loop fasteners to allow air to escape.
- Folding: Once deflated, fold the bounce house neatly. Start by folding the sides towards the center, then roll it tightly from one end to the other to expel any remaining air.
- Storage Location: Store the bounce house and blower in a cool, dry place, away from direct sunlight and extreme temperatures.
6.3 Repairs
- For small punctures, use the provided repair patches. Clean the damaged area, apply adhesive (not included, typically vinyl cement), and press the patch firmly over the hole. Allow sufficient drying time.
- For larger damage or if unsure, contact KIDWISE customer support.
7. Troubleshooting
| Problem | Possible Cause | Solution |
|---|---|---|
| Bounce house does not inflate or inflates slowly. | Blower not plugged in or turned on. Inflation tube not securely attached. Deflation zippers/openings are open. Blower air intake is blocked. | Check power connection and blower switch. Securely attach inflation tube to blower. Close all deflation zippers/openings. Clear any obstructions from blower intake. |
| Bounce house loses air during use. | Small punctures or tears. Deflation zippers/openings are open. Blower is not powerful enough (unlikely with included blower). | Inspect for damage and use repair patches. Ensure all deflation zippers/openings are closed. Ensure blower is running continuously and is not obstructed. |
| Blower stops working. | Power outage or tripped GFCI. Blower motor overheating. | Check power supply and reset GFCI if tripped. Turn off blower, allow to cool, then restart. If problem persists, contact support. |
8. Specifications
- Model Number: 9017
- Product Dimensions (Inflated): Approximately 108 x 108 x 144 inches (Length x Width x Height)
- Item Weight: 37.3 pounds (16.9 kg)
- Material: 420D Oxford Nylon with PVC backing
- Maximum Weight Recommendation: 250 pounds (113 kg)
- Maximum Number of Players: 3
- Recommended Age: 24 months - 8 years
- Included Accessories: Air Blower, Ground Stakes, Repair Patches, Storage Bag
9. Warranty and Customer Support
For warranty information, product support, or to purchase replacement parts, please contact KIDWISE customer service. Keep your purchase receipt as proof of purchase.
KIDWISE Customer Service:
- Refer to your product packaging or the KIDWISE official website for the most current contact information.
- Online resources may include FAQs, additional setup videos, and product registration.