1. Introduction
This manual provides essential instructions for the safe and effective use of your MASTRAD Thermo-Sonde m° classic digital cooking thermometer. Please read this manual thoroughly before first use and retain it for future reference.
The MASTRAD Thermo-Sonde m° classic is designed to help you achieve precise cooking temperatures for various dishes. It features a digital display, an integrated timer, and a durable probe with a silicone handle for safe handling.
2. Package Contents
- MASTRAD Thermo-Sonde m° classic main unit
- Temperature probe with silicone handle and cable
- LR3 battery (pre-installed or included separately)
3. Product Overview

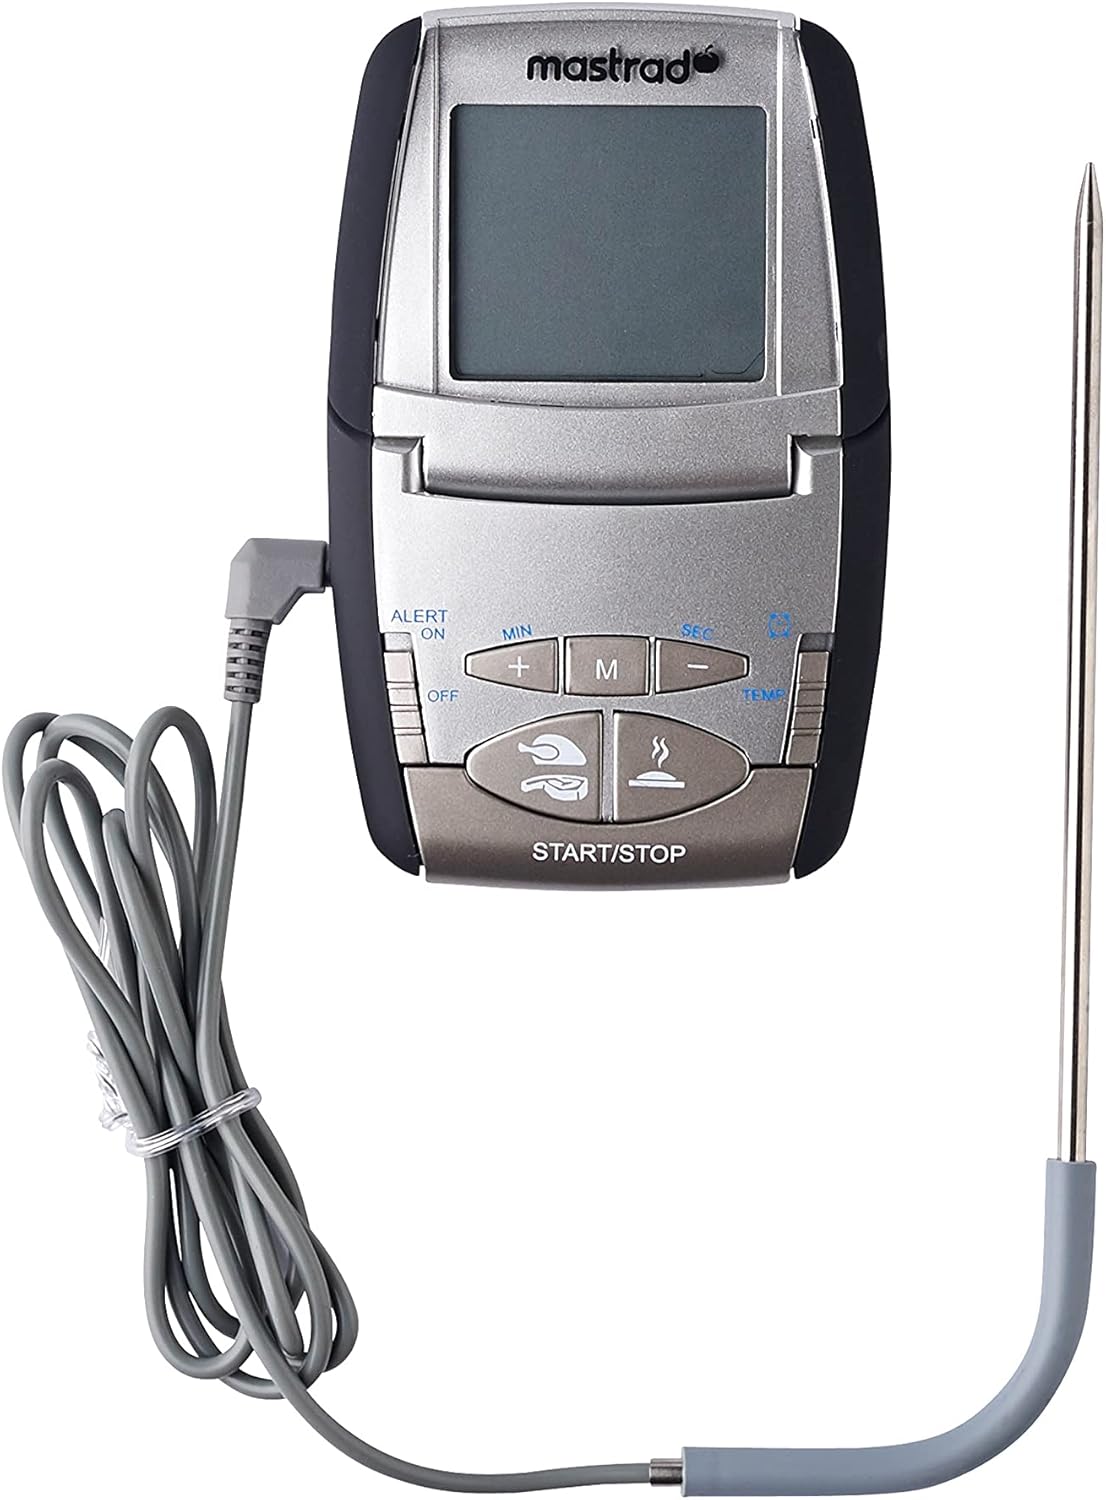
Key Features:
- Digital display for clear temperature readings.
- Integrated timer function with audible alert.
- Magnetic back for convenient attachment to metal surfaces (e.g., oven door).
- Foldable stand for tabletop use.
- Durable stainless steel probe with 100% silicone handle for heat resistance and safety.
- Compatible with ovens, induction cooktops, and barbecues.
4. Setup
4.1 Battery Installation
- Locate the battery compartment on the back of the main unit.
- Open the compartment cover.
- Insert the LR3 battery, ensuring correct polarity (+/-).
- Close the battery compartment cover securely.
4.2 Probe Connection
Connect the probe cable securely into the designated port on the side of the main unit. Ensure the connection is firm to prevent inaccurate readings.
5. Operating Instructions
5.1 Power On/Off
Press the 'ON/OFF' button to power on the device. Press and hold the 'ON/OFF' button to power off.
5.2 Temperature Measurement
- Insert the stainless steel probe into the thickest part of the food, avoiding bones.
- The current internal temperature of the food will be displayed on the screen.

5.3 Setting Target Temperature (Programmable Mode)
The device offers pre-programmed settings for various types of meat and doneness levels, as well as a manual setting.
- Press the 'M' (Mode) button to cycle through different food types (e.g., Beef, Pork, Poultry, Veal, Lamb).
- Once a food type is selected, use the '+' and '-' buttons to adjust the desired doneness level (e.g., Rare, Medium, Well Done).
- Alternatively, select 'MANUAL' mode and use the '+' and '-' buttons to set a specific target temperature.
- The device will sound an alarm when the target temperature is reached.
5.4 Timer Function
The integrated timer can be used independently or in conjunction with temperature monitoring.
- Press the 'TEMP/TIMER' button to switch to timer mode.
- Use the 'MIN' and 'SEC' buttons to set the desired countdown time.
- Press 'START/STOP' to begin the countdown.
- An alarm will sound when the timer reaches zero. Press 'START/STOP' to silence the alarm.
5.5 Placement Options
- Magnetic Attachment: The main unit features a magnetic back, allowing it to be attached to the exterior of an oven door or other metal surfaces.
- Foldable Stand: The unit can be placed on a countertop using its integrated foldable stand.
6. Care and Maintenance
6.1 Cleaning
- Probe: After each use, clean the stainless steel probe with warm soapy water. Rinse thoroughly and dry completely. Do not immerse the silicone handle or cable connection in water.
- Main Unit: Wipe the main unit with a damp cloth. Do not immerse the unit in water or expose it to excessive moisture.
- Do not use abrasive cleaners or scouring pads, as these can damage the display or casing.
6.2 Storage
Store the thermometer in a clean, dry place when not in use. Ensure the probe cable is not kinked or damaged during storage.


7. Troubleshooting
- No Display / Device Not Turning On:
Check battery installation and ensure the LR3 battery is correctly inserted with the correct polarity. Replace the battery if necessary. - Inaccurate Temperature Readings:
Ensure the probe is fully and correctly inserted into the food. Verify the probe cable is securely connected to the main unit. Avoid placing the probe tip directly on bones or in fatty areas, as this can affect accuracy. - Alarm Not Sounding:
Check if the alarm function is enabled and the volume is set appropriately (if adjustable). Ensure the target temperature or timer has been correctly set. - Probe Damage:
Avoid bending or forcefully inserting the probe, as this can damage the internal sensor. Do not expose the probe cable to direct flame or temperatures exceeding its specified limits.
8. Specifications
| Feature | Specification |
|---|---|
| Brand | MASTRAD |
| Model Number | F73000 |
| Color | Black |
| Product Dimensions (L x W x H) | 11.99 x 7.49 x 2.01 cm |
| Item Weight | 120 grams |
| Material | Plastic (main unit), Stainless Steel (probe), Silicone (handle) |
| Display Type | Digital |
| Power Source | Battery Powered (1 x LR3 required) |
| Special Feature | Digital display, Timer, Magnetic, Oven Compatible |
9. Safety Information
- Do not expose the main unit to direct heat or open flames.
- The probe is designed for high temperatures, but the cable and main unit are not. Ensure the main unit and cable are kept outside the oven or away from direct heat sources.
- Always use the silicone handle when inserting or removing the probe from hot food to prevent burns.
- Keep out of reach of children.
- Dispose of batteries according to local regulations.
10. Warranty and Support
Specific warranty information for the MASTRAD Thermo-Sonde m° classic (Model F73000) is not available in this document. For detailed warranty terms, product support, or to inquire about spare parts, please refer to the official MASTRAD website or contact their customer service directly. Contact information can typically be found on the product packaging or the manufacturer's official website.