1. Product Overview
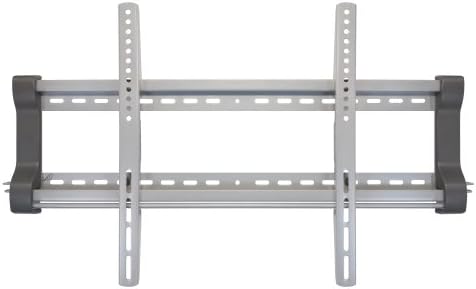
The Bell'O 8310DS is a low-profile fixed wall mount designed for securely mounting medium to large size flat-panel televisions. This mount provides a stable and discreet installation, keeping your TV close to the wall.
Key Features:
- Supports TV sizes from 30 to 50 inches.
- Maximum weight capacity of 200 lbs (91 kg).
- Compatible with universal mounting configurations up to 700x440mm.
- Features decorative end caps for a finished appearance.
- Includes a patent-pending twist lock system for secure attachment of TV brackets to the wall plate.
- Option to add a padlock for enhanced security.
2. Safety Information
WARNING: Failure to read and follow these instructions carefully can result in serious personal injury, property damage, or voiding of your warranty. If you do not understand these instructions or have doubts about the safety of the installation, please contact Bell'O customer support.
- Do not install this product on walls that are not structurally sound. Ensure the mounting surface can support the combined weight of the mount and the television.
- Always use a stud finder to locate wood studs or consult a qualified professional for concrete/masonry installations.
- Do not exceed the maximum weight capacity of 200 lbs (91 kg).
- This product is intended for indoor use only.
- Keep all small parts and packaging materials away from children.
- Ensure all screws are tightened securely, but do not overtighten to avoid stripping threads.
3. Package Contents
Verify that all components are present and undamaged before beginning installation. If any parts are missing or damaged, do not proceed with installation and contact Bell'O customer support.
- Wall Plate Assembly
- TV Bracket Arms (2)
- Complete Hardware Kit (various screws, washers, spacers, anchors)
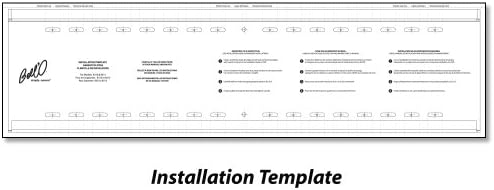
- Installation Template
- Instruction Manual


4. Specifications
| Feature | Specification |
|---|---|
| Model Number | 8310DS |
| Mounting Type | Fixed Wall Mount |
| Movement Type | Fixed |
| Compatible TV Sizes | 30" - 50" |
| Weight Capacity | 200 lbs (91 kg) |
| Universal Mounting Configuration | Up to 700x440mm |
| Product Dimensions | 34.25 x 1.7 x 9.65 inches (L x W x H) |
| Item Weight | 10.7 pounds |
| Color | Silver |
5. Installation Instructions (Setup)
5.1 Before You Begin
- Read all instructions thoroughly before installation.
- Ensure you have all necessary tools and hardware.
- Determine the exact mounting location on your wall, considering viewing height and stud locations.
- Unplug your TV and disconnect all cables before handling.
5.2 Tools Required (Not Included)
- Phillips Head Screwdriver
- Drill with appropriate drill bits (e.g., 3/16" for wood studs, 3/8" for concrete/masonry)
- Stud Finder
- Level
- Measuring Tape
- Pencil
5.3 Mounting Steps
- Attach TV Brackets to TV: Carefully place your TV face down on a soft, clean surface. Identify the mounting holes on the back of your TV. Select the appropriate screws, washers, and spacers from the hardware kit that fit your TV's mounting holes. Attach the two vertical TV bracket arms to the back of your TV, ensuring they are centered and level. Do not overtighten.
- Mark Wall Plate Position: Using a stud finder, locate and mark the center of two adjacent wood studs where you intend to mount the TV. Hold the wall plate assembly against the wall at the desired height and use a level to ensure it is perfectly horizontal. Mark the pilot hole locations through the wall plate onto the wall.
- Drill Pilot Holes: Drill pilot holes at the marked locations. For wood studs, use a 3/16" drill bit. For concrete or masonry walls, use a 3/8" drill bit and insert the appropriate wall anchors (not always included, consult a professional if unsure).
- Secure Wall Plate: Align the wall plate with the drilled pilot holes. Use the provided lag bolts and washers to securely fasten the wall plate to the wall. Tighten all bolts firmly.
- Install Decorative End Caps: Slide the decorative end caps onto the ends of the wall plate for a finished look.

6. Operating Instructions (Usage)
6.1 Securing the TV to the Wall Mount
- With assistance, carefully lift the TV (with the attached brackets) and align the top hooks of the TV brackets with the top edge of the wall plate.
- Gently lower the TV, allowing the brackets to engage with the wall plate. Ensure the TV is centered and level.
- Locate the twist lock system at the bottom of the TV brackets. Rotate the locking mechanism to secure the TV brackets firmly to the wall plate. This prevents accidental dislodgement.
- For added security, you may install a padlock (not included) through the designated holes on the twist lock system.
- Reconnect all necessary cables to your TV.
7. Maintenance
- Periodically check all mounting screws and bolts to ensure they remain tight. Retighten if necessary.
- Clean the mount with a soft, dry cloth. Avoid abrasive cleaners or solvents.
- Do not hang objects from the mount or apply excessive force to the mounted TV.
8. Troubleshooting
| Problem | Possible Cause | Solution |
|---|---|---|
| TV is not level | Wall plate not level during installation. | Remove TV, loosen wall plate screws, adjust with a level, and retighten. |
| TV brackets do not fit TV | Incorrect screw size or VESA pattern mismatch. | Ensure your TV's VESA pattern is within the mount's specifications (up to 700x440mm). Use the correct screws and spacers from the hardware kit. |
| Mount feels unstable | Screws not fully tightened or improper wall installation. | Verify all wall plate screws are securely tightened into studs. If installed on concrete/masonry, ensure anchors are properly seated. Do not exceed weight capacity. |
9. Warranty and Support
9.1 Warranty Information
Bell'O International warrants its products against defects in material and workmanship under normal use for a specified period from the original date of purchase. Please refer to the warranty card included with your product or visit the official Bell'O website for detailed warranty terms and conditions.
9.2 Customer Support
If you have any questions, require assistance with installation, or need to report a missing/damaged part, please contact Bell'O customer support. Contact information can typically be found on the Bell'O website or on the product packaging.