1. Introduction
This instruction manual provides detailed guidance for the assembly, operation, and maintenance of your Bandai Gundam Maxter G 04 Neo-American 1/100 HG Model Kit. Please read all instructions carefully before beginning assembly to ensure a successful and enjoyable building experience. This kit is designed for enthusiasts aged 8 and above.
2. Safety Information
- Small Parts: This kit contains small parts that may pose a choking hazard. Keep out of reach of small children.
- Sharp Edges: Some parts may have sharp edges or points. Handle with care during assembly.
- Tools: Use appropriate tools such as hobby nippers and a hobby knife carefully. Adult supervision is recommended for younger builders.
- Ventilation: If using paints or adhesives (not included), ensure adequate ventilation.
3. Package Contents
Upon opening the package, verify that all components are present. The kit typically includes:
- Multiple plastic runners (frames of parts)
- Polycaps (for joint articulation)
- Sticker sheet (for detailing)
- Instruction booklet (visual assembly guide)

Figure 3.1: Front view of the Bandai Gundam Maxter G 04 Neo-American 1/100 HG Model Kit packaging. This image displays the product's box art, featuring the Gundam Maxter in an action pose, indicating the model contained within.
4. Assembly Instructions (Setup)
Follow the visual instructions provided in the kit's included booklet. The general steps are outlined below:
- Preparation: Lay out all runners and identify parts according to the instruction booklet. Prepare your tools (nippers, hobby knife).
- Part Removal: Carefully cut parts from the runners using nippers. Trim any excess plastic (nubs) with a hobby knife for a clean finish.
- Sectional Assembly: Assemble the model in sections, typically starting with the head, torso, arms, legs, and then combining them. Pay close attention to part orientation.
- Joints: Insert polycaps into designated areas to create movable joints. Ensure they are seated correctly for proper articulation.
- Detailing: Apply stickers as indicated in the instruction booklet to enhance the model's appearance.
- Final Assembly: Connect all assembled sections to form the complete Gundam Maxter model.
Note: The instruction booklet uses clear diagrams, making assembly straightforward even if the text is in Japanese.
5. Operating (Posing and Display)
Once assembled, your Gundam Maxter model is designed for dynamic posing and display.
- Articulation: The model features multiple points of articulation, allowing for a wide range of poses. Gently manipulate the joints to achieve desired stances.
- Accessories: The kit includes accessories such as boxing gloves. Attach these to the hands as shown in the instruction booklet to recreate iconic scenes.
- Transformation: The Gundam Maxter can be converted between its normal mode and boxer mode. Refer to the instruction booklet for specific steps on how to achieve this transformation.
- Display: Place your completed model on a stable surface. Consider using an action base (sold separately) for more dynamic aerial or action poses.
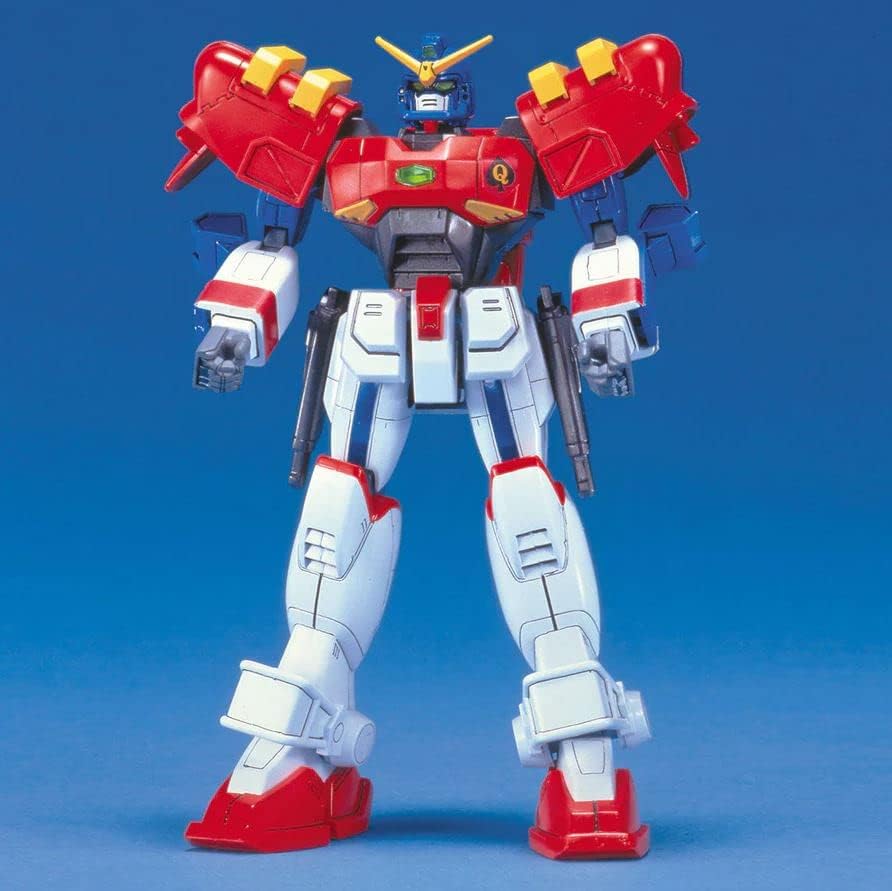
Figure 5.1: An image of the fully assembled Bandai Gundam Maxter G 04 Neo-American 1/100 HG Model Kit. This showcases the completed model in a neutral standing pose, highlighting its design and color scheme.
6. Maintenance
Proper care will help preserve the appearance and integrity of your model kit.
- Cleaning: Dust the model regularly with a soft brush or a can of compressed air. Avoid using harsh chemicals or abrasive materials.
- Storage: Store the model away from direct sunlight, extreme temperatures, and high humidity to prevent discoloration or material degradation.
- Handling: Handle the model by its main body parts rather than delicate accessories or thin antennas to prevent breakage.
7. Troubleshooting
If you encounter issues during or after assembly, consider the following common solutions:
- Parts Not Fitting: Ensure parts are correctly oriented. Check for any remaining plastic nubs that might obstruct proper fitting. Apply gentle, even pressure.
- Loose Joints: If a joint feels too loose, a small amount of clear nail polish or hobby cement applied to the ball joint (and allowed to dry) can increase friction.
- Missing Parts: Double-check the runners and packaging. If a part is genuinely missing, contact Bandai customer support.
8. Specifications
| Feature | Detail |
|---|---|
| Brand | BANDAI |
| Model Number | 4902425448053 |
| Scale | 1/100 |
| Material | Plastic |
| Item Dimensions (L x W x H) | 11.93 x 7.87 x 2.44 inches |
| Item Weight | 11.2 ounces (0.7 Pounds) |
| Number of Pieces | 1 (referring to the complete kit) |
| Recommended Age Range | Kid (typically 8+) |
| UPC | 787799363386, 698887593960, 899998639046 |
9. Warranty and Support
For any inquiries regarding missing parts, manufacturing defects, or assembly assistance, please contact Bandai customer support directly. Specific warranty details may vary by region and purchase location. Please retain your proof of purchase.
For further information, you may visit the official BANDAI Store.