GE E1040
GE E1040 10MP Digital Camera User Manual
Model: E1040
Introduction
This manual provides essential instructions for the safe and effective use of your GE E1040 10MP Digital Camera. Please read this manual thoroughly before using the camera and retain it for future reference. The GE E1040 is a compact digital camera featuring a 10-megapixel sensor, 4x optical zoom, and a 3.0-inch LCD screen, designed for capturing high-quality still images and MPEG4 videos.
What's in the Box
Verify that all the following items are included in your camera package:
- GE E1040 Digital Camera
- Rechargeable Lithium-Ion Battery
- Battery Charger
- USB Cable
- AV Cable
- Wrist Strap
- CD-ROM (Software/Drivers)
- Quick Start Guide
- Warranty Card
- User's Manual (this document)
Camera Components
Familiarize yourself with the various parts of your GE E1040 camera.
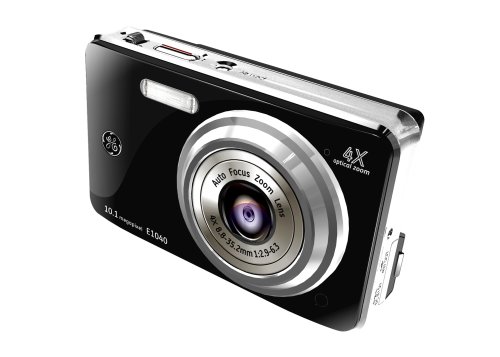
Figure 1: Front View
This image displays the front of the GE E1040 camera, highlighting the main lens, built-in flash, and the GE brand logo. The model number E1040 and 10.1 megapixel resolution are also visible.

Figure 2: Rear View
This image shows the back of the GE E1040 camera, featuring the large 3.0-inch LCD screen and the various control buttons for navigation, menu access, and function selection.
Front Panel
- Lens: Captures images and videos.
- Flash: Provides illumination in low-light conditions.
- Self-Timer Lamp/AF Assist Lamp: Indicates self-timer countdown and assists autofocus in dim light.
- Microphone: Records audio during video capture.
Rear Panel
- LCD Monitor: Displays live view, menus, and playback.
- Zoom Lever: Controls optical and digital zoom.
- Mode Dial: Selects shooting modes (e.g., Auto, Program, Scene).
- Menu Button: Accesses camera settings.
- Function/OK Button: Confirms selections and accesses quick functions.
- Directional Pad: Navigates menus and selects options.
- Playback Button: Enters playback mode to view photos and videos.
- Delete Button: Deletes selected images or videos.
Top Panel
- Shutter Button: Captures photos.
- Power Button: Turns the camera on or off.
Side/Bottom Panels
- USB/AV Port: Connects to a computer or TV.
- SD/SDHC Card Slot: Insert memory card.
- Battery Compartment: Holds the rechargeable battery.
- Tripod Socket: For mounting the camera on a tripod.
Setup
1. Charging the Battery
- Insert the rechargeable lithium-ion battery into the provided battery charger.
- Plug the charger into a power outlet.
- The charging indicator light will show the charging status. Charge until the indicator shows a full charge.
- Remove the battery once fully charged.
Note: For first-time use, fully charge the battery before operation.
2. Inserting the Battery and Memory Card
- Open the battery/card compartment cover on the bottom of the camera.
- Insert the charged battery according to the polarity indicators inside the compartment.
- Insert an SD or SDHC memory card (up to 4 GB) into the card slot with the metal contacts facing the correct direction until it clicks into place.
- Close the compartment cover securely.
Important: Ensure the camera is turned off before inserting or removing the battery or memory card.
3. Initial Power On and Date/Time Setting
- Press the Power button to turn on the camera.
- The first time you power on, you may be prompted to set the date and time. Use the directional pad to navigate and the Function/OK button to confirm.
- Set the correct date, time, and time zone for accurate photo metadata.
Operating the Camera
1. Taking Photos
- Turn on the camera.
- Rotate the Mode Dial to select your desired shooting mode (e.g., Auto for general use).
- Frame your subject using the LCD monitor.
- Use the Zoom Lever to adjust the focal length.
- Press the Shutter Button halfway down to focus. The focus frame will turn green when focus is achieved.
- Press the Shutter Button fully down to capture the photo.
2. Recording Videos
- Turn on the camera.
- Rotate the Mode Dial to the video recording mode (usually indicated by a film camera icon).
- Frame your subject.
- Press the Shutter Button to start recording. A red indicator or timer will appear on the screen.
- Press the Shutter Button again to stop recording.
Videos are recorded in MPEG-4 format at resolutions such as 320x240 or 640x480.
3. Playback Mode
- Press the Playback Button to enter playback mode.
- Use the Directional Pad to scroll through your captured images and videos.
- To view a video, select it and press the Function/OK button to start playback.
- Press the Playback Button again to return to shooting mode.
4. Key Features
- Face-Tracking: Automatically detects and focuses on faces in the frame.
- Electronic Image Stabilization: Reduces blur caused by camera shake.
- Panorama Stitching: Allows you to capture multiple images and stitch them together in-camera to create a wide panoramic photo.
- Red-Eye Removal: Corrects red-eye effect in flash photography during playback or capture.
- 3.0" Vibrant LCD: Provides a clear view for framing and reviewing shots.
Maintenance
Cleaning the Camera
- Lens: Use a soft, lint-free cloth or a lens brush to gently remove dust. For smudges, use a specialized lens cleaning solution applied to the cloth, not directly to the lens.
- LCD Screen: Wipe gently with a soft, dry cloth. Avoid pressing hard.
- Camera Body: Use a soft, dry cloth to wipe away dust and fingerprints. Do not use harsh chemicals or solvents.
Battery Care
- Store batteries in a cool, dry place when not in use.
- Avoid fully discharging the battery frequently to prolong its lifespan.
- If the camera will not be used for an extended period, remove the battery.
Storage
Store the camera in a dry, dust-free environment, away from extreme temperatures and direct sunlight. Use a camera bag for protection during transport.
Troubleshooting
| Problem | Possible Cause | Solution |
|---|---|---|
| Camera does not turn on. | Battery is depleted or incorrectly inserted. | Charge the battery fully. Reinsert the battery correctly. |
| Cannot take pictures. | Memory card is full, locked, or not inserted. | Delete unnecessary files. Unlock the memory card. Insert the memory card correctly. |
| Images are blurry. | Camera shake, subject movement, or out of focus. | Hold the camera steady. Use image stabilization. Ensure proper focus before shooting. |
| Flash does not fire. | Flash mode is set to off or red-eye reduction. | Check flash settings and select an appropriate mode (e.g., Auto Flash). |
| No sound in recorded videos. | Microphone is obstructed or audio settings are low. | Ensure microphone is clear. Check camera's audio settings. |
Specifications
| Model Name | GE E1040 |
| Photo Sensor Resolution | 10 MP |
| Optical Zoom | 4x |
| Digital Zoom | 5.7x |
| Screen Size | 3.0 Inches |
| Image Stabilization | Digital, Optical |
| Supported File Format | JPEG (Stills), MPEG-4 (Video) |
| Memory Card Type | SD, SDHC (up to 4 GB) |
| Battery Type | Lithium Ion (Rechargeable) |
| Connectivity | USB 2.0, AV Out |
| Dimensions (W x H x D) | 3.87 x 2.3 x 0.94 inches (approx.) |
| Weight | 0.33 pounds (approx.) |
Warranty and Support
Warranty Information
The GE E1040 Digital Camera comes with a one-year limited warranty from the date of purchase. This warranty covers manufacturing defects under normal use. Please refer to the included warranty card for detailed terms and conditions, including exclusions and how to make a claim.
Customer Support
For technical assistance, troubleshooting beyond this manual, or warranty service, please visit the official GE consumer electronics support website or contact their customer service department. Contact information can typically be found on the warranty card or the GE brand website.
Ask a question about this manual
Ask about setup, troubleshooting, compatibility, parts, safety, or missing instructions. Manuals+ will review the question and use this page’s manual context to help answer it.