1. Introduction
The ENGINEER PA-07 Precision Wire Stripper is a high-performance tool designed for stripping both solid and stranded wires within the AWG #24 to #12 range. Manufactured in Japan, this tool features sharp, precise high-carbon steel jaws and comfortable, oil-resistant Thermoplastic Rubber (TPR) handles. Its design ensures clean insulation strips without damaging the conductor wires.
Key Features:
- Strips Solid Wire AWG #22 to #10 (SWG #23 ~ #12)
- Strips Stranded Wire AWG #24 to #12 (SWG #25 ~ #13)
- High Carbon Steel Jaws for exceptional sharpness and precision
- Oil-resistant Thermoplastic Rubber (TPR) handles for comfort and grip
- Spring-loaded mechanism for easy operation, with a latch for storage
- Designed to prevent damage to copper conductor wires
2. Safety Information
Always prioritize safety when using any tools. Failure to follow these safety guidelines may result in injury or damage to the tool.
- Wear Protective Eyewear: Always wear appropriate eye protection to shield against flying debris.
- Clear Work Area: Ensure there are no people or fragile items in the vicinity, as cut wire insulation or fragments may scatter.
- Intended Use Only: Do not use this tool for cutting hard materials such as piano wire, hardened steel, or other materials beyond its specified capacity.
- Avoid Excessive Force: Do not apply excessive torque when tightening or adjusting components. This can cause damage to the tool.
- Proper Adjustment: If adjusting the set pin, do not overtighten the bolts and nuts on both ends, as this may damage the set pin. The recommended tightening torque is less than 2N/m.
3. Setup
The ENGINEER PA-07 Precision Wire Stripper is designed for immediate use out of the box. No assembly is required.
Initial Inspection:
- Inspect the tool for any visible damage from shipping.
- Check the set pin for tightness. While the tool is factory-adjusted, prolonged use or shipping vibrations may cause it to loosen. If the set pin feels loose or rattles, refer to the 'Maintenance' section for adjustment guidance.
- Familiarize yourself with the AWG and millimeter markings on the jaws.
4. Operating Instructions
Follow these steps for effective and safe wire stripping:
- Select the Correct Hole: Identify the appropriate stripping hole on the tool's jaws that matches the gauge (AWG) or diameter (mm) of the wire you intend to strip. The tool features markings for both AWG and millimeter sizes. Note that the AWG markings are primarily for stranded conductors.
- Insert the Wire: Open the stripper handles and insert the wire into the selected stripping hole. Ensure the wire is positioned perpendicular to the jaws and that only the insulation is within the cutting edges, not the conductor itself.
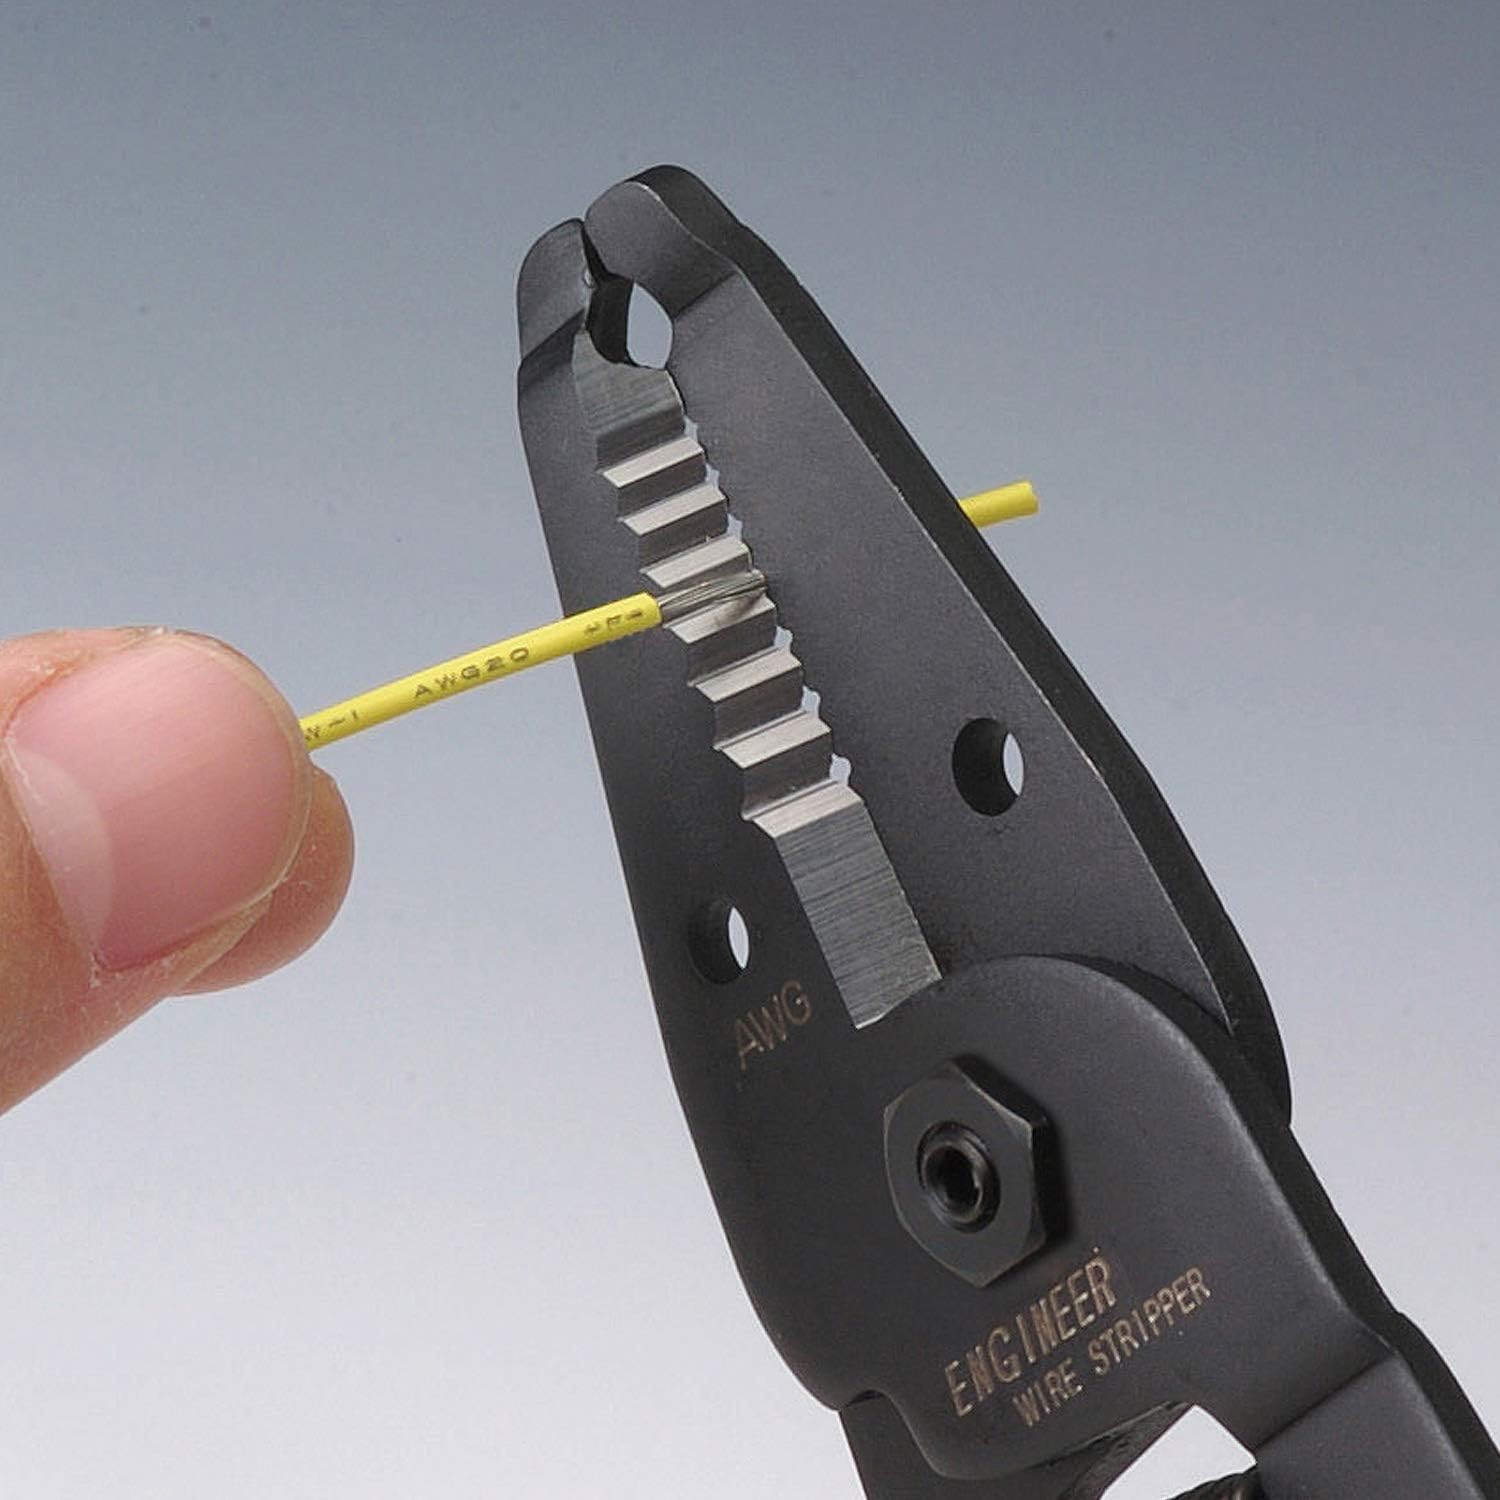
This image shows the precision jaws of the ENGINEER PA-07 stripper engaging with a yellow wire, demonstrating the stripping action. The wire is correctly inserted into the appropriate stripping hole.
- Close the Handles: Gently but firmly close the handles. The sharp, polished jaws will cut through the insulation cleanly without damaging the underlying conductor.
- Remove Insulation: While maintaining pressure on the handles, pull the wire stripper away from the wire to remove the cut insulation. The spring-loaded mechanism will assist in opening the handles after the strip is complete.

This image displays the clearly marked AWG and millimeter sizes on the tool's jaws, guiding users in selecting the correct stripping hole for various wire gauges.
Tips for Best Results:
- Always ensure the wire is clean and free of debris before stripping.
- For optimal performance, match the wire gauge as closely as possible to the stripping hole.
- The tool's jaws are designed with a precision polished finish to create a very round shape with a sharp edge, ensuring a clean strip without damaging the core line.
5. Maintenance
Proper maintenance will extend the life and performance of your ENGINEER PA-07 wire stripper.
Cleaning:
- After each use, wipe the jaws and handles with a clean, dry cloth to remove any dust, dirt, or wire fragments.
- The elastomer grip is oil-resistant, but avoid prolonged exposure to harsh chemicals.
Set Pin Adjustment:
The PA-07 features a unique set pin design that allows for adjustment. Over time, with extensive use, the set pin may loosen, leading to rattling or uncomfortable operation, which can affect performance and potentially damage the tool.
- If the set pin becomes loose or rattles, it can be adjusted.
- Important: Do not tighten the bolts and nuts on both ends excessively to adjust the gap. Applying excessive torque (more than 2N/m) can damage the set pin.
- Refer to the official ENGINEER website for detailed instructions on set pin adjustment if needed.
Storage:
- When not in use, engage the handle latch to keep the jaws closed for safe storage.
- Store the tool in a dry environment to prevent corrosion of the high-carbon steel jaws.
6. Troubleshooting
This section addresses common issues you might encounter with your wire stripper.
Issue: Jaws not aligning smoothly or 'banging' together.
- Possible Cause: The central nut/bolt connecting the two halves of the tool may have loosened.
- Solution: Carefully tighten the central nut/bolt. Ensure not to overtighten (maximum torque less than 2N/m) to avoid damaging the tool. Test the jaw alignment after tightening.
Issue: Set pin is loose or rattling.
- Possible Cause: Normal wear and tear from prolonged use.
- Solution: Refer to the 'Maintenance' section for guidance on adjusting the set pin. Avoid overtightening.
Issue: Wire insulation is not cleanly stripped, or conductor wires are nicked.
- Possible Cause 1: Incorrect stripping hole selected for the wire gauge.
- Solution 1: Ensure you are using the correct stripping hole that matches the wire's AWG or diameter. Refer to the application size chart in the 'Specifications' section.
- Possible Cause 2: Jaws are not fully closing or are misaligned.
- Solution 2: Check for any debris obstructing the jaws. If the central pivot is loose, refer to the solution for 'Jaws not aligning smoothly'.
- Possible Cause 3: Tool is being used on materials it is not designed for.
- Solution 3: Confirm the wire material is within the tool's intended use (e.g., not hardened steel or piano wire).
7. Specifications
| Attribute | Detail |
|---|---|
| Model Number | PA-07 |
| Stripping Capacity (Stranded) | AWG #24 to #12 (SWG #25 ~ #13) |
| Stripping Capacity (Solid) | AWG #22 to #10 (SWG #23 ~ #12) |
| Material (Jaws) | High Carbon Steel |
| Material (Handles) | Thermoplastic Rubber (TPR) |
| Length | 175 mm (6.89 inches) |
| Handle Width | 50 mm (1.97 inches) |
| Weight | 134 g (approx. 4.7 oz) |
| Origin | Made in Japan |
| UPC | 785533591002 |
| GTIN | 04989833035075 |
Dimensional Drawing:

A technical diagram illustrating the overall length (175mm) and handle width (50mm) of the PA-07 wire stripper.
Application Size Chart:

This table provides specific stripping hole diameters in millimeters, corresponding external wire diameters, sectional areas, and AWG conversions for both stranded and solid wires, serving as a reference for proper wire selection.
8. Warranty and Support
Warranty Information:
Specific warranty details for the ENGINEER PA-07 Precision Wire Stripper are not provided in this manual. For information regarding product warranty, please refer to the official ENGINEER website or contact your authorized retailer.
Customer Support:
If you encounter any issues or have questions regarding the use, maintenance, or performance of your ENGINEER PA-07 wire stripper, please contact:
- The retailer from whom you purchased the product.
- The official ENGINEER customer support channels, typically found on their corporate website.


