1. Introduction
This manual provides essential instructions for the setup, operation, and maintenance of your AOC 19MVWk 19-inch TFT LCD DVI/VGA Widescreen Monitor. Please read this manual thoroughly before using your monitor to ensure proper functionality and to prevent damage.
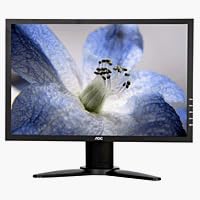
Figure 1: Front view of the AOC 19MVWk 19-inch TFT LCD DVI/VGA Widescreen Monitor. This image displays the monitor's slim design and black bezel, highlighting its widescreen display suitable for various computing tasks.
2. Setup
2.1 Unpacking
Carefully remove the monitor and all accessories from the packaging. Ensure all components listed below are present:
- AOC 19MVWk Monitor
- Power Cord
- VGA Cable
- DVI Cable (if included with your model)
- Audio Cable (if included for speakers)
- User Manual (this document)
2.2 Connecting the Monitor
- Power Connection: Connect the power cord to the monitor's power input and then to a grounded electrical outlet.
- Video Connection:
- VGA: Connect one end of the VGA cable to the VGA port on your computer and the other end to the VGA port on the monitor. Tighten the screws on the VGA connector.
- DVI: Connect one end of the DVI cable to the DVI port on your computer and the other end to the DVI port on the monitor. Tighten the screws on the DVI connector.
Note: Use either the VGA or DVI connection, not both simultaneously for the same input source.
- Audio Connection (Optional): If you wish to use the integrated speakers, connect an audio cable from your computer's audio output to the audio input port on the monitor.
2.3 Powering On
Press the power button on the monitor. The power indicator light will illuminate. Turn on your computer. The monitor should automatically detect the input signal.
3. Operating the Monitor
3.1 On-Screen Display (OSD) Controls
The monitor features an On-Screen Display (OSD) menu for adjusting various settings. The control buttons are typically located on the front or bottom bezel of the monitor.
Common OSD buttons include:
- Menu: Opens the OSD menu or selects an option.
- Up/Down (or Left/Right) Arrows: Navigate through menu options or adjust values.
- Enter/Select: Confirms a selection.
- Auto: Automatically adjusts image settings for optimal display (primarily for analog VGA input).
- Power: Turns the monitor on or off.
3.2 Adjusting Display Settings
To adjust settings such as brightness, contrast, color temperature, and input source:
- Press the Menu button to open the OSD.
- Use the arrow buttons to navigate to the desired setting (e.g., "Brightness," "Contrast," "Input Select").
- Press Enter/Select to choose the setting.
- Use the arrow buttons to adjust the value or select an option.
- Press Menu again to exit the OSD or navigate back.
3.3 Resolution Settings
For optimal image quality, set your computer's display resolution to the monitor's native resolution of 1440 x 900 pixels. Refer to your computer's operating system display settings for instructions on changing resolution.
4. Maintenance
4.1 Cleaning the Monitor
To clean the monitor screen and casing:
- Turn off the monitor and unplug the power cord.
- Use a soft, lint-free cloth lightly dampened with water or a non-abrasive screen cleaner.
- Wipe the screen gently. Avoid applying excessive pressure.
- Do not use alcohol, ammonia-based cleaners, or abrasive materials, as these can damage the screen surface.
4.2 General Care
- Avoid placing the monitor in direct sunlight or near heat sources.
- Ensure adequate ventilation around the monitor.
- Do not block the ventilation openings.
- Avoid spilling liquids on the monitor.
5. Troubleshooting
If you encounter issues with your monitor, refer to the following common problems and solutions:
5.1 No Power
- Ensure the power cord is securely connected to both the monitor and the electrical outlet.
- Verify the power outlet is functioning by plugging in another device.
- Check if the monitor's power button is pressed.
5.2 No Image on Screen
- Confirm the video cable (VGA or DVI) is securely connected to both the monitor and the computer.
- Ensure the computer is powered on and not in sleep mode.
- Press the monitor's input select button to cycle through available input sources (VGA, DVI) to match your connection.
- If using a desktop computer, ensure the graphics card is properly seated.
5.3 Poor Image Quality
- Fuzzy or Blurry Image: Ensure the computer's display resolution is set to the monitor's native resolution (1440 x 900). For VGA connections, use the OSD "Auto" adjustment function.
- Incorrect Colors: Adjust color settings in the OSD menu. Ensure the video cable pins are not bent or damaged.
- Screen Flickering: Check the refresh rate setting on your computer. Try a different video cable.
5.4 No Sound from Speakers
- Ensure the audio cable is correctly connected from your computer to the monitor.
- Check the volume settings on both your computer and the monitor's OSD menu.
- Verify that the audio output on your computer is directed to the correct device.
6. Specifications
The following table lists the key technical specifications for the AOC 19MVWk monitor:
| Feature | Specification |
|---|---|
| Model Name | AOC 19MVWk |
| Screen Size | 19 Inches |
| Display Type | TFT Active Matrix LCD |
| Native Resolution | 1440 x 900 |
| Aspect Ratio | 16:10 |
| Brightness | 300 cd/m² (typical) |
| Contrast Ratio | 800:1 (typical) |
| Pixel Pitch | 0.285 mm² |
| Colors Supported | 16.2 Million |
| Connectivity | DVI, VGA |
| Integrated Speakers | Yes |
| Power Supply | Integrated |
| Color | Black |
| Mounting Type | Wall Mount (VESA compatible, specific bracket not included) |
7. Warranty and Support
For warranty information and technical support, please refer to the warranty card included with your product or visit the official AOC website. Keep your purchase receipt as proof of purchase for warranty claims.
For further assistance, you may contact AOC customer service through their official channels.