1. Introduction
This manual provides instructions for the safe and effective use of your OM SYSTEM OLYMPUS Stylus FE-230 7.1MP Digital Camera. Please read this manual thoroughly before using the camera and retain it for future reference.
The OM SYSTEM OLYMPUS Stylus FE-230 is a compact digital camera designed for ease of use, featuring a 7.1-megapixel CCD sensor, 3x optical zoom, and a 2.5-inch LCD screen. It incorporates technologies such as Digital Image Stabilization and Bright Capture for enhanced photography.
2. Safety Information
Observe the following precautions to ensure safe operation and prevent damage to the camera or injury to yourself.
- Do not expose the camera to water or moisture. This product is not water resistant.
- Avoid dropping the camera or subjecting it to strong impacts.
- Do not attempt to disassemble or modify the camera. Refer all servicing to qualified personnel.
- Keep the camera away from extreme temperatures, direct sunlight, and strong magnetic fields.
- Use only specified batteries and accessories.
- Keep out of reach of children.
3. Package Contents
The standard package for the OM SYSTEM OLYMPUS Stylus FE-230 includes:
- OM SYSTEM OLYMPUS Stylus FE-230 Digital Camera Body
- Rechargeable Lithium-Ion Battery
- Battery Charger
- USB Cable
- AV Cable
- Wrist Strap
- Instruction Manual (this document)
- Software CD-ROM
Note: Specific contents may vary by region or package.
4. Camera Components

Figure 4.1: Front View of the Camera
This image displays the front of the OM SYSTEM OLYMPUS Stylus FE-230 digital camera, showing the lens, flash, and the camera body with an attached wrist strap.

Figure 4.2: Front Panel Detail
A closer view of the camera's front, highlighting the Olympus lens with 3x optical zoom, the built-in flash, and the FE-230 7.1 Megapixel branding.

Figure 4.3: Side View with Power Button
This image shows the side of the camera, featuring the power button and other controls, indicating its slim profile.

Figure 4.4: Rear View with Active LCD Menu
The back of the camera is shown with the 2.5-inch LCD screen displaying the menu interface, including options for Panorama, Picture + Sound, Image Quality, Setup, Scene, and Silent Mode. Control buttons and the mode dial are also visible.
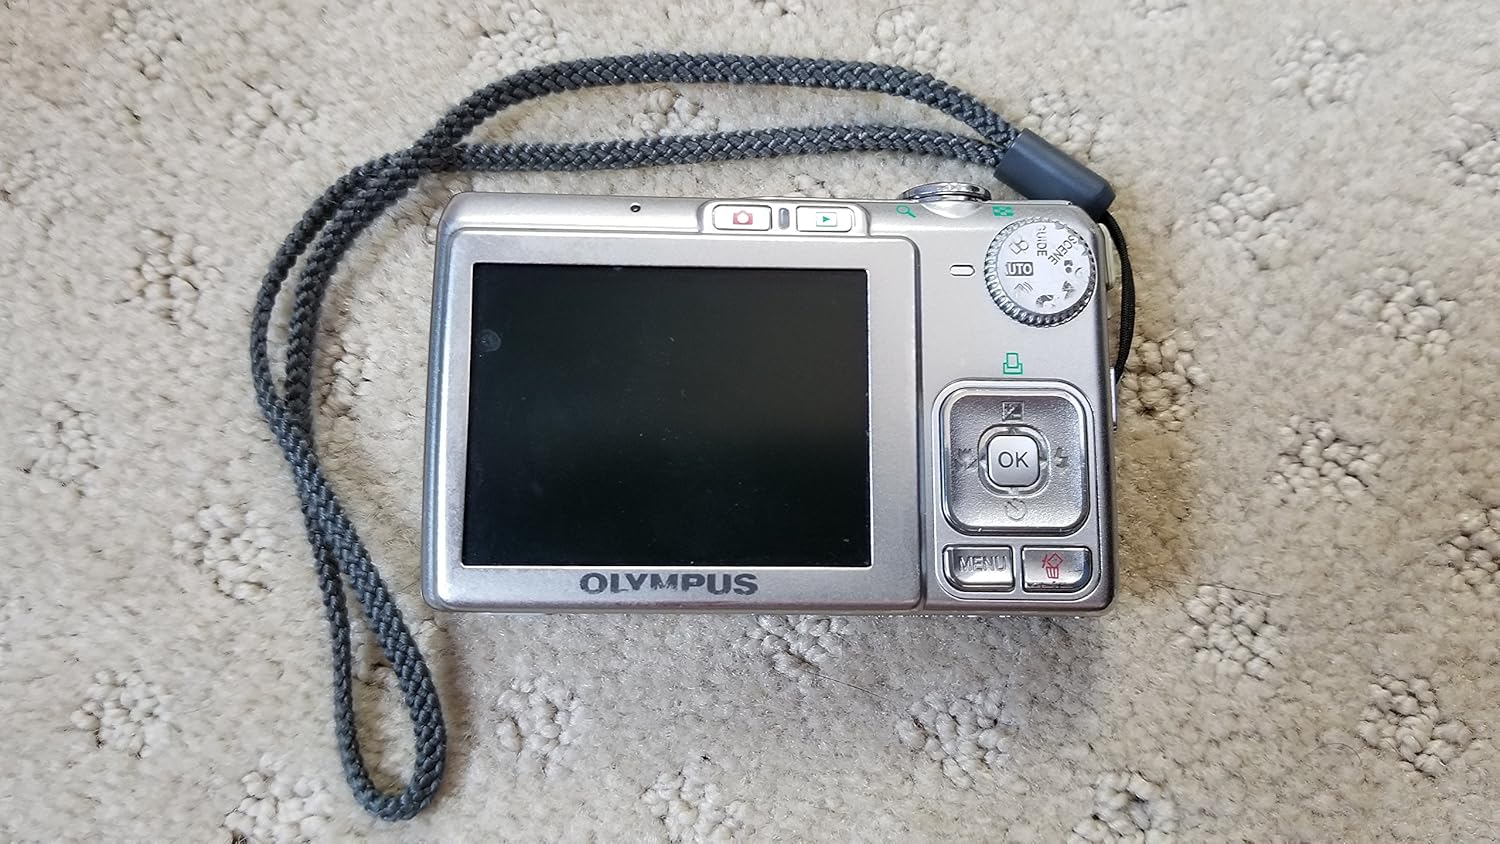
Figure 4.5: Rear View with LCD Screen Off
This image presents the rear of the camera with the LCD screen powered off, clearly showing the arrangement of the control buttons, directional pad, and mode dial.

Figure 4.6: Bottom View (Closed Compartment)
The bottom of the camera, showing the closed compartment for the battery and xD Picture Card, along with regulatory markings and model information.

Figure 4.7: Bottom View (Open Compartment)
This image shows the bottom of the camera with the battery and xD Picture Card compartment open, revealing the battery slot and the memory card slot.
Key Components:
- Lens: 3x Optical Zoom Olympus Lens.
- Flash: Built-in flash for low-light conditions.
- Power Button: Turns the camera on and off.
- Shutter Button: Press halfway to focus, fully to take a picture.
- Zoom Lever: Controls optical zoom.
- LCD Monitor: 2.5-inch display for framing shots, reviewing images, and navigating menus.
- Mode Dial: Selects shooting modes (e.g., Auto, Scene, Movie).
- Directional Pad (4-way controller): Navigates menus and selects options.
- MENU Button: Accesses the camera's menu system.
- OK Button: Confirms selections.
- Playback Button: Switches to playback mode to view photos and videos.
- Battery/Card Compartment: Houses the rechargeable battery and xD Picture Card.
- USB/AV Port: Connects the camera to a computer or TV.
5. Setup
5.1. Charging the Battery
- Insert the rechargeable Lithium-Ion battery into the provided battery charger.
- Plug the charger into a power outlet. The charging indicator light will illuminate.
- Once charging is complete (indicator light changes or turns off), remove the battery.
Note: Ensure the battery is fully charged before initial use.
5.2. Inserting the Battery and Memory Card
- Open the battery/card compartment cover located on the bottom of the camera (refer to Figure 4.7).
- Insert the charged Lithium-Ion battery into the battery slot, ensuring correct orientation as indicated inside the compartment.
- Insert an xD Picture Card into the memory card slot until it clicks into place.
- Close the compartment cover securely.
Note: The camera has internal memory, but an xD Picture Card is recommended for extended storage.
5.3. Initial Settings
Upon first power-on, you may be prompted to set the date, time, and language. Follow the on-screen instructions using the directional pad and OK button.
6. Operating the Camera
6.1. Powering On/Off
Press the POWER button (refer to Figure 4.3) to turn the camera on or off.
6.2. Taking Photos (Auto Mode)
- Turn the mode dial to AUTO.
- Frame your shot using the LCD monitor.
- Press the shutter button halfway down to focus. The focus indicator will illuminate.
- Press the shutter button fully down to capture the image.
6.3. Using the Zoom
Use the zoom lever located near the shutter button to adjust the optical zoom. Push the lever towards T (Telephoto) to zoom in, and towards W (Wide-angle) to zoom out.
6.4. Shooting Modes
Rotate the mode dial to select from various shooting modes:
- AUTO: Standard point-and-shoot mode for general photography.
- SCENE: Accesses preset scene modes (e.g., Portrait, Landscape, Night Scene, Sports, Beach and Snow, Underwater) for optimized settings in specific situations.
- MOVIE: Records video with sound.
- MY FAVORITES: Stores up to 9 favorite images for quick access.
6.5. Digital Image Stabilization Mode
This mode helps prevent and correct blurry images. It increases ISO sensitivity and uses faster shutter speeds to capture sharp images, even with subject movement. Digital Image Stabilization Edit can also be used in-camera to fix blurry images after capture.
6.6. Bright Capture Technology
For low-light conditions, Bright Capture allows you to preview your shot clearly on the LCD and capture brighter, more vivid images without needing the flash.
6.7. Recording Movies
- Turn the mode dial to MOVIE.
- Press the shutter button to start recording.
- Press the shutter button again to stop recording.
Note: Records TV-quality AVI movies (640 x 480 resolution at 30fps) up to the capacity of your xD card.
6.8. Viewing Images (Playback Mode)
Press the PLAYBACK button to switch to playback mode. Use the directional pad to navigate through your photos and videos.
6.9. Menu Navigation
Press the MENU button to access camera settings. Use the directional pad to highlight options and the OK button to select.
7. Maintenance and Care
- Cleaning the Camera Body: Wipe the camera body with a soft, dry cloth. For stubborn dirt, use a cloth lightly dampened with water and then wipe dry. Do not use organic solvents.
- Cleaning the Lens: Use a lens brush or a blower to remove dust. For smudges, use a lens cleaning cloth and lens cleaning fluid. Avoid touching the lens surface with your fingers.
- Cleaning the LCD Monitor: Gently wipe the LCD with a soft, dry cloth. Avoid pressing hard on the screen.
- Storage: When not in use for extended periods, remove the battery and store the camera in a cool, dry place, away from dust and direct sunlight.
- Battery Care: Store batteries in a cool, dry place. Do not short-circuit or expose to fire.
8. Troubleshooting
| Problem | Possible Cause | Solution |
|---|---|---|
| Camera does not turn on. | Battery is depleted or incorrectly inserted. | Charge the battery. Reinsert the battery correctly. |
| Cannot take pictures. | Memory card is full or not inserted. Battery is low. | Delete unnecessary images or insert a new memory card. Charge the battery. |
| Images are blurry. | Camera shake. Subject movement. Lens is dirty. | Hold the camera steady. Use Digital Image Stabilization mode. Clean the lens. |
| Flash does not fire. | Flash mode is set to off. Subject is too far. | Check flash settings. Ensure subject is within flash range. |
| LCD screen is dark in low light. | Bright Capture mode is not active. | Activate Bright Capture technology for improved visibility in low light. |
9. Specifications
| Feature | Detail |
|---|---|
| Model Name | FE-230 |
| Image Sensor | 7.1 Megapixel CCD (1/2.5-inch) |
| Effective Still Resolution | 7.1 MP |
| Lens | 3x Optical Zoom (38-114mm equivalent) |
| Digital Zoom | 4x |
| Image Stabilization | Digital |
| LCD Monitor | 2.5-inch (115,000 dots) |
| Storage Media | xD Picture Card, Internal Memory |
| File Format (Still) | JPEG |
| File Format (Video) | AVI (640 x 480, 320 x 240 @ 30fps) |
| ISO Sensitivity | Expanded ISO Minimum 50, Expanded ISO Maximum 1250 |
| Shutter Speed | 1/2000 to 1/2 seconds |
| Power Source | Lithium-Ion Battery (DC 3.7V) |
| Connectivity | USB, Video Output |
| Dimensions (Approx.) | Item Height: 2.17 inches (Super-slim design measures only .65-inches deep) |
| Weight (Approx.) | 0.32 Pounds |
10. Warranty and Support
This product is manufactured by Olympus. For specific warranty terms and conditions, please refer to the warranty card included with your purchase or visit the official OM SYSTEM / Olympus website.
Warranty Type: No Warranty (as per provided specifications, users should check their purchase documentation for actual warranty details).
For technical support, service, or inquiries regarding your OM SYSTEM OLYMPUS Stylus FE-230 camera, please contact OM SYSTEM / Olympus customer support through their official channels.
Note: Warranty information provided here is general. Always refer to the documentation supplied with your product for precise details.