
1. Product Overview
The Carxtc Stereo Wire Harness is designed for aftermarket radio/stereo installations in specific Chevy CK Silverado models from 1995 to 1998. This harness facilitates a direct plug-and-play connection into the vehicle's existing harness, eliminating the need for cutting or splicing factory wires. It ensures a professional and clean installation, adhering to EIA color coding standards for compatibility with aftermarket wiring.
Key Features:
- Aftermarket Radio / Stereo Installation Wire Harness
- Plug N Play Connection: Plugs directly into vehicle harness (no cutting or splicing required).
- Professional Wiring: EIA color coded to match aftermarket wiring standards.
- Compatibility: Designed for standard / non-premium / non-factory amplified systems only.
Important Note: This harness is not compatible with OnStar, Sync, RAP (Retained Accessory Power) features, or CAN Bus systems. Specialty premium harnesses are available for these configurations.
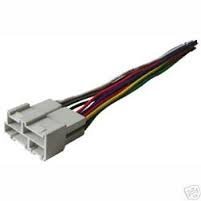
Image: The Carxtc Stereo Wire Harness, featuring a multi-colored wire bundle connected to a white plastic connector, alongside an antenna adapter cable. This image displays the primary components included with the product.
2. Setup and Installation
Proper installation of the Carxtc Stereo Wire Harness ensures optimal performance and compatibility with your aftermarket stereo. Follow these steps carefully.
2.1 Safety Precautions
- Always disconnect the vehicle's negative battery terminal before beginning any electrical work to prevent short circuits and electrical damage.
- Ensure the vehicle is turned off and the parking brake is engaged.
- Wear appropriate safety gear, such as gloves and eye protection.
2.2 Wiring Connections
- Prepare the Harnesses:
Identify the Carxtc Stereo Wire Harness (plugs into the vehicle) and the harness included with your new aftermarket stereo (plugs into the stereo unit). Both harnesses will have multiple color-coded wires.
- Match and Connect Wires:
Using appropriate wire connectors (e.g., crimp connectors, solder and heat shrink), connect the corresponding color-coded wires from the Carxtc harness to the aftermarket stereo harness. The EIA color coding standard ensures that wires with the same function have the same color (e.g., yellow for constant power, red for accessory power, black for ground, etc.).
Example: Connect the yellow wire from the Carxtc harness to the yellow wire of the aftermarket stereo harness. Repeat for all matching wires.
- Special Connections:
Some wires on the aftermarket stereo harness may not have a direct corresponding wire on the vehicle harness. These might include:
- Amplifier Turn-On Wire: Typically blue or blue/white. Connect this to the remote turn-on wire of an external amplifier, if applicable.
- Parking Sense Wire: Often light green. This wire requires connection to the vehicle's parking brake circuit for safety features (e.g., video playback when parked). Consult your stereo's manual for specific requirements.
- Steering Wheel Control Connections: If your vehicle has steering wheel audio controls and your aftermarket stereo supports them, additional adapters (sold separately) may be required to retain this functionality.
Ensure all connections are secure and properly insulated to prevent short circuits.
2.3 Physical Installation
- Remove Factory Radio: Carefully remove the factory radio from your vehicle's dashboard. This usually involves removing trim panels and unscrewing the radio unit.
- Connect Harnesses: Plug the vehicle-side connector of the Carxtc harness into the corresponding port in your vehicle's dashboard. Then, connect the aftermarket stereo-side harness (which you previously wired) into your new stereo unit.
- Connect Antenna: If an antenna adapter is included or required, connect it between the vehicle's antenna cable and the aftermarket stereo's antenna input.
- Mount New Stereo: Securely mount your new aftermarket stereo into the dashboard opening using the appropriate mounting kit (often sold separately).
2.4 Post-Installation
- Reconnect Battery: Reconnect the negative battery terminal.
- Test Functions: Turn on the vehicle and the new stereo. Test all functions, including radio reception, audio playback, balance, fade, and any connected accessories.
- Reassemble Dashboard: Once all functions are verified, carefully reassemble any removed trim panels.
Installation Videos:
Video: This video demonstrates the general process of connecting a GM radio stereo wire harness to an aftermarket head unit, including wire stripping and crimping techniques. It shows how to prepare the harness for installation into a vehicle.
Video: This video provides general instructions for installing a Scosche wire harness, covering steps from disconnecting the battery to testing the new stereo. It illustrates the physical installation process within a vehicle's dashboard.
3. Operation
The Carxtc Stereo Wire Harness is a passive component designed to facilitate the connection of an aftermarket stereo to your vehicle's electrical system. Once correctly installed, the harness itself does not require any direct operation. The operation of your audio system will be controlled entirely by your aftermarket stereo unit, according to its manufacturer's instructions.
Refer to the user manual provided with your aftermarket stereo for detailed instructions on how to operate its features, such as radio tuning, media playback, volume control, and settings adjustments.
4. Maintenance
The Carxtc Stereo Wire Harness is designed for long-term reliability and requires minimal maintenance once installed. However, periodic checks can help ensure continued performance.
- Connection Integrity: If you experience any issues with your stereo, it is advisable to check the harness connections to ensure they remain secure and free from corrosion. This may require temporary removal of the stereo unit.
- Environmental Factors: Keep the area around the stereo and wiring free from excessive moisture or extreme temperatures, which could potentially affect electrical connections over time.
- Cleaning: No specific cleaning is required for the harness itself. When cleaning your vehicle's interior, avoid spraying liquids directly onto the stereo or exposed wiring.
5. Troubleshooting
If you encounter issues after installing the Carxtc Stereo Wire Harness, consider the following troubleshooting steps:
- No Power to Stereo:
- Check the vehicle's fuses related to the radio and accessory power.
- Verify that the yellow (constant power) and red (accessory power) wires are correctly connected and receiving power.
- Ensure the black (ground) wire is securely connected to a good chassis ground point.
- No Sound from Speakers:
- Confirm that all speaker wires (typically pairs of solid and striped colors) are correctly matched and connected from the aftermarket stereo harness to the Carxtc harness.
- Check the stereo's settings for balance and fade to ensure audio is not directed to non-existent speakers.
- If an external amplifier is used, ensure its remote turn-on wire is connected and the amplifier is receiving power.
- Radio Stays On After Key Removal:
Important: If your current car radio stays on after the key is removed (before the door is opened), this harness will not work properly for retaining the RAP (Retained Accessory Power) feature. This harness is designed for standard systems without RAP. If RAP functionality is desired, a specialized premium harness is required.
- Intermittent Power or Functionality:
- Re-check all wire connections for looseness or poor crimps.
- Ensure no bare wires are touching, which could cause short circuits.
If issues persist, consult a professional car audio installer or contact Carxtc customer support.
6. Specifications
| Attribute | Detail |
|---|---|
| Brand | Carxtc |
| Model Compatibility | Chevy CK Silverado 1995-1998 (Standard/Non-Premium/Non-Factory Amplified Systems) |
| Connector Type | Vehicle-specific Connector |
| Material | Plastic |
| Item Weight | 2 Ounces |
| ASIN | B000KL2GDI |
| Date First Available | June 5, 2010 |
7. Warranty and Support
Specific warranty information for the Carxtc Stereo Wire Harness is not provided in this document. Please refer to the product packaging or the manufacturer's official website for details regarding warranty coverage and terms.
For technical support, installation assistance, or inquiries about product compatibility, please contact Carxtc customer service through their official channels. Contact information can typically be found on the product packaging or their website.