1. Introduction
This manual provides instructions for the safe and effective use of your Canon PowerShot A640 digital camera. The PowerShot A640 is a 10-megapixel camera featuring a 4x optical zoom lens and a 2.5-inch vari-angle LCD screen, designed for versatile photography.

Image 1: Front-right view of the Canon PowerShot A640 digital camera.
2. What's in the Box
Verify that all the following items are included with your Canon PowerShot A640:
- PowerShot A640 Camera Body
- AA-size Alkaline Batteries (x4)
- MultiMediaCard (32MB)
- Wrist Strap (WS-200)
- Digital Camera Solution CD-ROM
- USB Interface Cable (IFC-400PCU)
- AV Cable (AVC-DC300)

Image 2: Canon PowerShot A640 camera shown with accompanying user manuals.
3. Setup
3.1. Installing Batteries
- Open the battery compartment cover located on the side of the camera.
- Insert four AA-size alkaline batteries, ensuring correct polarity (+/-) as indicated inside the compartment.
- Close the battery compartment cover securely.
3.2. Inserting a Memory Card
- Open the memory card slot cover.
- Insert the MultiMediaCard (or an SD card) into the slot until it clicks into place. Ensure the card is facing the correct direction.
- Close the memory card slot cover.
3.3. Initial Settings
Upon first power-on, the camera may prompt you to set the date, time, and language. Follow the on-screen instructions to configure these basic settings.
4. Operating the Camera
4.1. Power On/Off
Press the ON/OFF button located on the top of the camera to power it on or off.

Image 3: Top-front view of the Canon PowerShot A640, highlighting the power button and mode dial.
4.2. Shooting Modes
Rotate the mode dial on the top of the camera to select your desired shooting mode:
- Program (P): Camera automatically sets aperture and shutter speed.
- Shutter Priority (Tv): You set shutter speed, camera sets aperture.
- Aperture Priority (Av): You set aperture, camera sets shutter speed.
- Manual (M): You set both aperture and shutter speed.
- Scene Modes: Pre-set modes for specific situations (e.g., Portrait, Landscape, Night Scene).
4.3. Taking Photos
- Select a shooting mode.
- Frame your shot using the 2.5-inch vari-angle LCD screen or the optical viewfinder.
- Press the shutter button halfway down to focus. The camera will confirm focus.
- Press the shutter button fully to capture the image.
4.4. Zoom Function
Use the zoom lever around the shutter button to adjust the focal length. The camera features a 4x optical zoom. For additional magnification without image quality loss at smaller resolutions, utilize the Safety Zoom feature. The Digital Teleconverter provides a constant digital zoom (1.4x/2.3x).
4.5. Focusing
The camera uses a 9-point AiAF (Artificial Intelligence Autofocus) system to automatically select focus points. For manual control, use FlexiZone AF/AE to select a specific focus point within the frame.
4.6. ISO Sensitivity
Adjust the ISO setting to control the camera's sensitivity to light. Options include Auto, 80, 100, 200, 400, and 800. Higher ISO values allow for shooting in lower light conditions but may introduce more image noise.
4.7. LCD Screen and Display
The 2.5-inch vari-angle LCD screen can be rotated for flexible viewing angles. During shooting, you can enable a Grid Line display for composition assistance or a 3:2 ratio overlay to visualize standard print sizes.
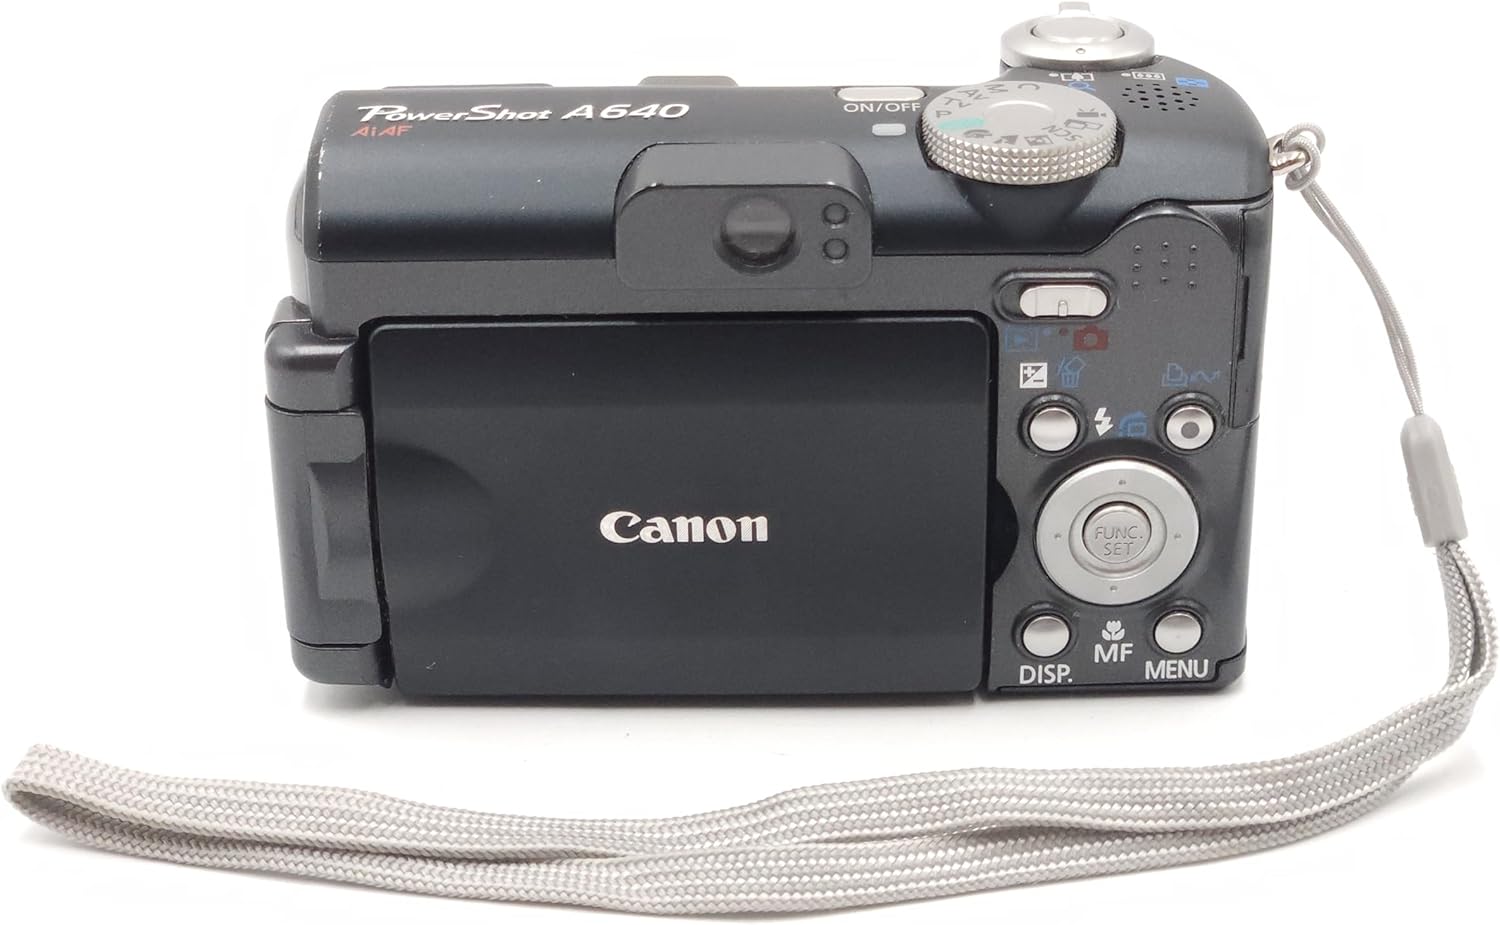
Image 4: Rear view of the Canon PowerShot A640, showing the vari-angle LCD and navigation controls.
4.8. Flash Usage
The camera has a built-in flash. You can select various flash modes (e.g., Auto, Fill-in, Red-eye Reduction). Second Curtain Sync is available for creative flash exposures, such as capturing light trails.
4.9. Video Recording
The PowerShot A640 can record VGA (640 x 480) quality movies at 30 frames per second (fps) with sound. Video recording will automatically stop when the file size reaches 1GB, which is approximately 9 minutes at 640x480/30fps. For longer recordings, consider lower resolutions or frame rates.
4.10. Playback and Review
Press the Playback button to review captured images and videos. During playback, an overexposure warning feature can highlight areas that are too bright.
4.11. My Colors
Apply artistic photo effects in-camera using the My Colors feature, either during or after shooting.
4.12. Printing and Downloading
Use the Print/Share button for direct printing to compatible Canon printers or for easy downloading of images to a computer via the USB interface cable.
5. Maintenance
- Cleaning the Camera Body: Use a soft, dry cloth to wipe the camera body. For stubborn dirt, lightly dampen the cloth with water.
- Cleaning the Lens: Use a lens brush or a soft, lint-free cloth specifically designed for camera lenses. Avoid touching the lens surface with your fingers.
- Battery Care: Remove batteries when the camera will not be used for an extended period. Store batteries in a cool, dry place.
- Storage: Store the camera in a dry, well-ventilated area, away from direct sunlight and extreme temperatures.
6. Troubleshooting
- Camera does not power on: Ensure batteries are correctly inserted and fully charged. Try new batteries.
- Images are blurry: Check focus settings. Ensure sufficient lighting. Use a higher ISO or flash if necessary. Hold the camera steady or use a tripod.
- Memory card error: Reinsert the memory card. Ensure the card is not locked. Format the card (this will erase all data).
- Video recording stops unexpectedly: Video recording is limited to 1GB per file. This is a design specification, not a malfunction.
- Cannot transfer large video files via USB: If video files exceed 1GB, they may not transfer correctly via the camera's USB connection. Remove the SD card and use an external card reader for transfer.
- High-pitched squeal in video audio: This may indicate an internal issue. If persistent, contact Canon support.
- Difficulty with close-up focus: The camera's autofocus may struggle at very close distances. Try moving the subject slightly further away and using the optical zoom. Manual focus is digital and may not provide the desired precision for extreme close-ups.
- Settings reset after power-off: The camera's power save feature may reset certain settings. For persistent settings, use the Custom mode if available, or re-apply settings after powering on.
7. Specifications
| Feature | Specification |
|---|---|
| Brand | Canon |
| Model Name | Canon PowerShot A640 |
| Effective Still Resolution | 10 Megapixels |
| Optical Zoom | 4x |
| Screen Size | 2.5 Inches (Vari-angle LCD) |
| Image Stabilization | Optical |
| ISO Range | Auto, 80, 100, 200, 400, 800 |
| Min Shutter Speed | 15 seconds |
| Max Shutter Speed | 1/2500 Seconds |
| Video Capture Resolution | SD VGA 480p (640 x 480) |
| Video Capture Format | MPEG-4 |
| File Format | JPEG, RAW |
| Power Source | 4 AA-size batteries |
| Item Dimensions (L x W x H) | 4.29 x 1.93 x 2.6 inches |
| Item Weight | 1.9 Ounces |
8. Warranty and Support
For warranty information and technical support, please refer to the documentation included with your product or visit the official Canon support website. Keep your proof of purchase for warranty claims.


