1. Introduction
Thank you for purchasing the JVC XVN330B DVD Video Player. This player is designed to provide high-quality video and audio playback from various disc formats. Key features include Digital Direct Progressive Scan output, 192kHz/24-bit audio D/A converter, 10-bit/54MHz video D/A converter, and multi-format compatibility (DVD-R/RW, DVD+R/RW, CD-R/RW, VCD/SVCD, MP3, and JPEG). This manual provides essential information for the safe and efficient operation of your device.
2. Safety Information
- Power Source: Connect the player only to the specified power supply voltage.
- Ventilation: Ensure adequate ventilation around the unit. Do not block ventilation openings.
- Water and Moisture: Do not expose the unit to rain or moisture. Do not place objects filled with liquids on the unit.
- Heat: Keep the unit away from heat sources such as radiators, heat registers, stoves, or other apparatus (including amplifiers) that produce heat.
- Servicing: Do not attempt to service this product yourself. Refer all servicing to qualified service personnel.
- Disc Handling: Handle discs by their edges. Avoid touching the playback surface.
3. Package Contents
Verify that all items listed below are included in the package:
- JVC XVN330B DVD Video Player
- Remote Control (with batteries)
- A/V Cable (Composite)
- Operating Instructions (this manual)
4. Product Overview
The JVC XVN330B DVD Video Player features a slim design and a black finish.
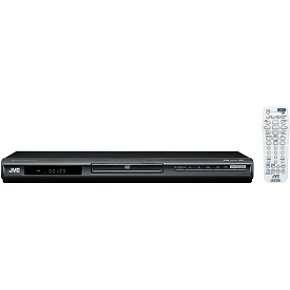
Figure 4.1: Front view of the JVC XVN330B DVD Video Player. This image shows the compact, black chassis with the disc tray, power button, and basic playback controls on the front panel.
4.1 Front Panel Controls
- Power Button: Turns the player on or off.
- Disc Tray: For inserting DVDs and CDs.
- Open/Close Button: Opens and closes the disc tray.
- Play/Pause Button: Starts or pauses playback.
- Stop Button: Stops playback.
- Skip Buttons (Forward/Backward): Skips tracks or chapters.
- Display: Shows playback information.
4.2 Rear Panel Connections
- Component Video Output (Y, Pb, Pr): For high-quality video connection to compatible TVs.
- S-Video Output: For improved video quality over composite.
- Composite Video Output (Yellow RCA): Standard video connection.
- Analog Audio Output (Red/White RCA): For stereo audio connection.
- Coaxial Digital Audio Output: For digital audio connection to a receiver or amplifier.
- AC Power Input: Connects to the power cord.
4.3 Remote Control
The included remote control provides full functionality for operating the DVD player from a distance. It includes buttons for power, disc tray open/close, playback controls (play, pause, stop, fast forward, rewind, skip), menu navigation, volume, and special features. Ensure batteries are correctly inserted.
5. Setup
5.1 Connecting to a Television
Choose one of the following connection methods based on your television's available inputs for the best possible picture quality.
- Component Video Connection (Best Quality):
Connect the Component Video Output (Y, Pb, Pr) jacks on the DVD player to the corresponding Component Video Input jacks on your TV using a component video cable (not included). Ensure colors (green, blue, red) match.
- S-Video Connection (Better Quality):
Connect the S-Video Output jack on the DVD player to the S-Video Input jack on your TV using an S-Video cable (not included).
- Composite Video Connection (Standard Quality):
Connect the Composite Video Output (yellow RCA) jack on the DVD player to the Video Input (yellow RCA) jack on your TV using the supplied A/V cable.
5.2 Connecting Audio
Connect the audio outputs from the DVD player to your TV or an audio receiver/amplifier.
- Analog Audio Connection:
Connect the Analog Audio Output (red and white RCA) jacks on the DVD player to the corresponding Audio Input jacks on your TV or audio receiver using the supplied A/V cable (for stereo sound).
- Coaxial Digital Audio Connection:
For multi-channel surround sound, connect the Coaxial Digital Audio Output jack on the DVD player to a Coaxial Digital Audio Input on your compatible audio receiver/amplifier using a coaxial digital audio cable (not included).
5.3 Power Connection
After all video and audio connections are made, plug the AC power cord into the AC power input on the rear of the DVD player, then plug the other end into a wall outlet.
6. Operating Instructions
6.1 Basic Disc Playback
- Press the POWER button to turn on the player.
- Press the OPEN/CLOSE button to open the disc tray.
- Place a DVD or CD disc onto the disc tray with the label side facing up.
- Press the OPEN/CLOSE button again to close the disc tray. The player will automatically begin playback or display the disc menu.
- Use the remote control's navigation buttons and ENTER to select options from the disc menu.
- During playback, use PLAY/PAUSE, STOP, FAST FORWARD, REWIND, and SKIP buttons as needed.
6.2 Playing MP3/JPEG Discs
When an MP3 or JPEG disc is inserted, a menu displaying the files and folders will appear.
- Use the navigation buttons on the remote to select the desired file or folder.
- Press ENTER to open a folder or start playback of a selected file.
- For JPEG slideshows, you can select from 11 visual effects and save an image as a custom startup screen.
6.3 Special Features
- Progressive Scan: Provides a smoother, flicker-free picture when connected via component video to a compatible display. Ensure your TV is set to progressive scan mode if applicable.
- PAL Playback on NTSC TV: This player supports playback of PAL-formatted DVDs on NTSC televisions.
- Video Fine Processor: Offers 7 parameters, 2 presets, and 2 manual settings to adjust video output for personalized viewing. Access this feature through the player's setup menu.
- 10-Disc Memory: Allows you to bookmark a specific scene on up to 10 different discs, enabling easy return to that point later.
- Express Play Start: Reduces the time it takes for a disc to begin playing after insertion.
- Track Adjust: Helps ensure noise-free playback of burned discs.
7. Maintenance
7.1 Cleaning the Unit
- Wipe the exterior of the unit with a soft, dry cloth.
- Do not use abrasive cleaners, waxes, or solvents as they may damage the finish.
- Ensure the unit is unplugged before cleaning.
7.2 Disc Care
- Hold discs by their edges to avoid fingerprints on the playing surface.
- Clean discs with a soft, lint-free cloth, wiping gently from the center outwards.
- Do not use solvents or abrasive cleaners on discs.
- Store discs in their cases to protect them from dust and scratches.
8. Troubleshooting
If you experience problems with your DVD player, refer to the following table for possible solutions.
| Problem | Possible Cause | Solution |
|---|---|---|
| No power | Power cord not connected securely. | Ensure the power cord is firmly plugged into the player and the wall outlet. |
| No picture | Incorrect video connection or TV input. | Check video cables are securely connected. Select the correct input source on your TV. |
| No sound | Incorrect audio connection or TV/receiver volume. | Check audio cables. Increase volume on TV/receiver. Ensure correct audio input is selected. |
| Disc does not play / Freezes | Disc is dirty, scratched, or incompatible format. | Clean the disc. Try a different disc. Ensure the disc format is supported (DVD, CD, MP3, JPEG). |
| Remote control not working | Batteries are dead or incorrectly inserted. Obstruction between remote and player. | Replace batteries. Ensure line of sight to the player's remote sensor. |
| Disc tray vibrates | Normal operation for some units, or disc not seated properly. | Ensure the disc is centered in the tray. This can sometimes be a characteristic of the unit's build. |
9. Specifications
| Feature | Description |
|---|---|
| Model Name | XVN330B |
| Brand | JVC |
| Media Type | DVD, CD, DVD-R/RW, DVD+R/RW, CD-R/RW, VCD/SVCD, MP3, JPEG |
| Special Features | Progressive Scan, Digital Still (JPEG) Slideshow with Music, PAL playback on NTSC TV, Video Fine Processor, 10-Disc Memory, Express Play Start, Track Adjust |
| Video D/A Converter | 10-bit/54MHz |
| Audio D/A Converter | 192kHz/24-bit |
| Video Output | Component Video (Y, Pb, Pr), S-Video, Composite Video (RCA) |
| Audio Output | Analog Stereo (RCA), Coaxial Digital Audio |
| Supported Audio Format | Dolby Digital (AC-3) |
| Color | Black |
| Item Weight | 5 Pounds (approx. 2.27 kg) |
| UPC | 046838026287 |
10. Warranty and Support
JVC products are manufactured to high-quality standards and are backed by a limited warranty. For specific warranty terms and conditions, please refer to the warranty card included with your product or visit the official JVC website.
For technical assistance, customer service, or to inquire about repairs, please contact JVC customer support through their official channels. Contact information can typically be found on the JVC website or in the documentation provided with your purchase.
Online Support: www.jvc.com/support (This is a placeholder link, please refer to actual JVC support page)