1. Introduction
This manual provides essential information for the proper installation, operation, and maintenance of your Bosch 13191 Premium OE Fitment Oxygen Sensor. This sensor is designed to meet original equipment (OE) specifications for select Chevrolet, GMC, Oldsmobile, Pontiac, and Saturn vehicles, ensuring optimal engine performance and emission control. Please read these instructions thoroughly before proceeding with installation.
2. Safety Information
Always prioritize safety when working on a vehicle. Failure to follow safety precautions can result in personal injury or damage to the vehicle.
- Ensure the vehicle's engine is off and cool before beginning any work.
- Disconnect the vehicle's battery to prevent electrical hazards.
- Wear appropriate personal protective equipment, including safety glasses and gloves.
- Refer to your vehicle's service manual for specific procedures and torque specifications.
- Exhaust components can be extremely hot. Allow sufficient time for cooling.
3. Package Contents
Verify that all components are present in the package:
- 1x Bosch 13191 Oxygen Sensor
The sensor threads are pre-coated with an anti-seize compound for ease of installation. Do not remove this coating.
4. Setup and Installation
The Bosch 13191 Oxygen Sensor is designed for direct-fit OE replacement, featuring connectors and harnesses that match your vehicle's original components for a hassle-free installation.
4.1. Vehicle Compatibility
This sensor is compatible with select Chevrolet, GMC, Oldsmobile, Pontiac, and Saturn models. It is crucial to verify specific fitment details, including the sensor's position (e.g., upstream or downstream), using a reliable vehicle fitment checker or your vehicle's service manual before installation.
4.2. Installation Steps
- Locate the existing oxygen sensor on your vehicle. Refer to your vehicle's service manual for the exact location.
- Disconnect the electrical connector from the old sensor.
- Using an oxygen sensor wrench, carefully remove the old sensor from the exhaust system. Note that older sensors may be seized and require significant force or heat to remove.
- Inspect the sensor bung threads for damage. Clean if necessary.
- Take the new Bosch 13191 Oxygen Sensor. Ensure the pre-applied anti-seize compound on the threads is intact.
- Thread the new sensor into the exhaust bung by hand to prevent cross-threading.
- Tighten the sensor to the manufacturer's specified torque using an oxygen sensor wrench. Overtightening can damage the sensor or exhaust system.
- Connect the electrical connector of the new sensor, ensuring it clicks securely into place.
- Reconnect the vehicle's battery.
- Start the engine and check for any exhaust leaks or illuminated check engine lights.
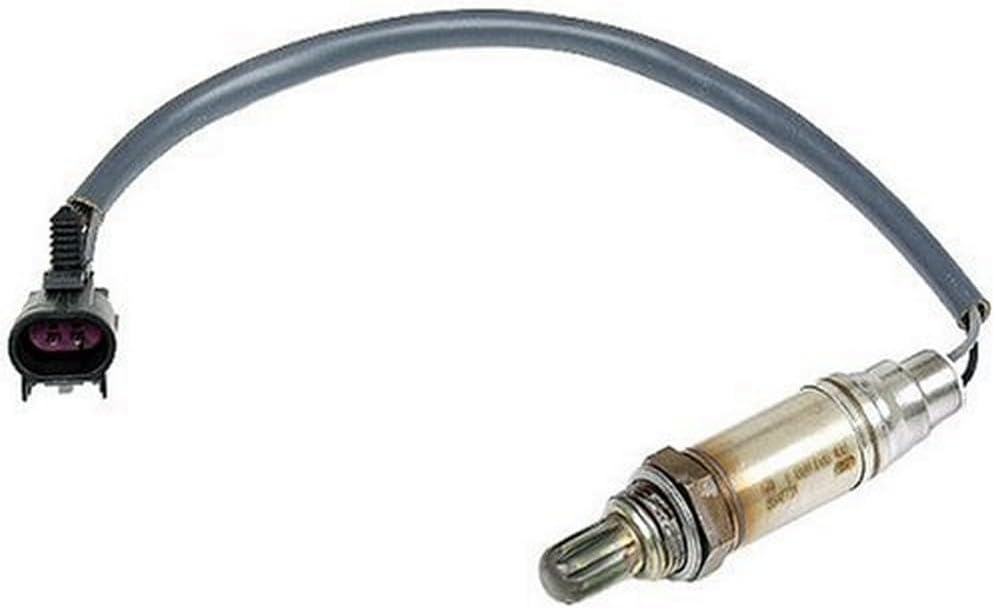
Image 1: The Bosch 13191 Oxygen Sensor, showing its electrical connector and sensor tip. This sensor is designed for direct replacement.

Image 2: Retail packaging for the Bosch Premium Oxygen Sensor. The packaging highlights improved fuel economy, better engine performance, and cleaner exhaust emissions. For more information, scan the QR code or visit boschautoparts.com/QR/PremO2.aspx.
5. Operating Principles
An oxygen sensor, also known as a lambda sensor, measures the oxygen content in the exhaust gases. This information is sent to the vehicle's engine control unit (ECU), which then adjusts the air-fuel mixture for optimal combustion. A properly functioning oxygen sensor ensures:
- Improved Fuel Economy: By maintaining the ideal air-fuel ratio, the engine operates more efficiently, reducing fuel consumption.
- Better Engine Performance: Correct air-fuel mixture leads to consistent power delivery and smoother engine operation.
- Cleaner Exhaust Emissions: An optimized air-fuel ratio allows the catalytic converter to function effectively, reducing harmful pollutants.
The Bosch 13191 features a fast-acting heater that quickly brings the sensor to its optimal operating temperature, typically within seconds, for immediate and accurate readings.
6. Maintenance
Oxygen sensors are wear-and-tear components and have a finite lifespan. It is critical to replace oxygen sensors at the intervals suggested by your vehicle manufacturer. Following these recommendations helps prevent long-term damage to your vehicle's engine, reduces harmful carbon dioxide (CO2) emissions, and maintains fuel efficiency.
Signs of a failing oxygen sensor may include:
- Illuminated Check Engine Light
- Decreased fuel economy
- Rough idling or engine hesitation
- Increased exhaust emissions
7. Troubleshooting
If you experience issues after installing the oxygen sensor, consider the following:
- Check Engine Light Remains On: Ensure the electrical connector is fully seated. Disconnect the battery for a few minutes to reset the ECU, or use an OBD-II scanner to clear fault codes. If the light persists, re-check the installation and verify the sensor's compatibility with your specific vehicle and sensor position.
- Poor Engine Performance: Double-check all connections and ensure no exhaust leaks are present near the sensor.
- Sensor Damage: Avoid dropping the sensor or contaminating the sensor tip with grease, oil, or other fluids, as this can affect its performance.
If problems persist, consult a qualified automotive technician.
8. Specifications
| Feature | Specification |
|---|---|
| Brand | Bosch |
| Model Number | 13191 |
| Material | Ceramic |
| Item Weight | 0.25 Pounds (4 ounces) |
| Product Dimensions (L x W x H) | 2.2 x 1.97 x 5.83 inches |
| Mounting Type | Flange Mount |
| Output Type | Electrical Signal |
| Upper Temperature Rating | 1200 Degrees Celsius |
| UPC | 826732808093, 028851131919 |
9. Warranty and Support
Bosch is a reputable manufacturer known for its quality automotive components. For specific warranty information, terms, and conditions related to your Bosch 13191 Oxygen Sensor, please refer to the documentation included with your purchase or visit the official Bosch Automotive website. For technical support or further assistance, contact Bosch customer service.