
1. Introduction
The Badger Air-Brush Co. Model 360 Universal Airbrush is a versatile tool designed for a wide range of artistic and crafting applications. This unique airbrush can operate in both gravity feed and bottom feed modes, offering flexibility for various projects and paint types. This manual provides essential information for the proper setup, operation, maintenance, and troubleshooting of your 360-7 Universal Airbrush Complete Set.
Included Components:
- 360 Universal Airbrush with all-purpose nozzle/needle (.75 millimeter)
- Three mixing jars
- Two jar adaptors
- Air hose with varying air source fitting
- Protective cap
- Instruction Manual (this document)

Image 1.1: The complete Badger 360-7 Universal Airbrush set, including the airbrush, mixing jars, jar adaptors, air hose, and protective cap.
2. Safety Information
Please read and understand all safety warnings before operating the airbrush. Failure to follow these instructions may result in injury or damage to the equipment.
- Always wear safety glasses when using the airbrush.
- Never point the airbrush at yourself or others.
- Keep the airbrush and associated materials away from heat sources and open flames.
- Always unplug the air compressor and turn off the air supply before cleaning or performing maintenance on the airbrush.
- Dispose of paint and cleaning materials according to local regulations.
- Always follow the manufacturer's instructions for safe use and storage of all materials used with the airbrush.
3. Product Features
The Model 360 Universal Airbrush offers several key features for enhanced performance and versatility:
- Dual Action, Internal Mix: Provides precise control over both air and paint flow for detailed work.
- Universal Feed System: Capable of performing in both gravity feed and bottom (siphon) feed modes.
- 360-Degree Front End Rotation: Allows easy switching between gravity and bottom feed configurations.
- Single Needle/Nozzle Design: Features a .75 millimeter nozzle that sprays from fine pencil lines to 3-inch (76 millimeter) patterns.
- Wide Material Compatibility: Designed to spray various materials, including acrylics, watercolors, inks, lacquers, Air-Opaque, Air-Tex, SpectraTex, MODELflex, and Totally Tattoo airbrush paints.
- Patented Rotational Seal: Ensures reliable performance in both feed modes.
- Easy Access Needle Assembly: Facilitates maintenance and cleaning.
4. Setup
Proper setup is crucial for optimal airbrush performance. Follow these steps to prepare your airbrush for use:
- Unpack Components: Carefully remove all items from the packaging. Inspect for any damage.
- Connect Air Hose: Attach one end of the air hose to the airbrush's air inlet fitting (located on the underside of the airbrush body). Connect the other end to your air compressor or air source. Ensure connections are secure to prevent air leaks.
- Select Feed Mode: The Model 360 can be configured for gravity feed or bottom feed.
- Gravity Feed: For smaller amounts of paint and finer detail work. Rotate the front end of the airbrush so the small cup is positioned on top. Pour prepared paint directly into this cup.
- Bottom Feed (Siphon Feed): For larger volumes of paint. Rotate the front end of the airbrush so the fitting for the jar adaptor is positioned on the bottom. Securely attach a mixing jar with a jar adaptor to this fitting.
- Prepare Paint: Ensure your paint is properly thinned for airbrushing. Consult your paint manufacturer's recommendations. The airbrush's .75mm nozzle is designed to handle a variety of viscosities, but proper thinning prevents clogging and ensures smooth flow.
- Fill Paint Reservoir:
- For gravity feed, use an eyedropper to fill the small cup with paint.
- For bottom feed, fill a mixing jar with prepared paint and attach it to the airbrush.

Image 4.1: The Badger 360 Universal Airbrush, showing the main body and the rotational front end for feed mode selection.
5. Operation
The Model 360 is a dual-action airbrush, meaning the trigger controls both air and paint flow independently. This allows for precise control over your spray.
- Turn on Air Supply: Ensure your air compressor is set to the desired pressure. A common starting pressure is 20-30 PSI, but this may vary depending on paint type and desired effect.
- Initiate Air Flow: Press the trigger down to release air. This should be done before paint flow begins to prevent paint from drying on the needle tip.
- Control Paint Flow: While holding the trigger down for air, pull the trigger back to release paint.
- Pulling the trigger back further increases paint flow.
- Releasing the trigger forward reduces paint flow.
- Adjust Spray Pattern: The distance between the airbrush and your surface, along with the amount of paint and air, determines the spray pattern.
- For fine lines, hold the airbrush closer to the surface and use minimal paint flow.
- For wider patterns (up to 3 inches), move the airbrush further away and increase paint flow.
- Practice: It is recommended to practice on scrap material to get a feel for the airbrush's response and to achieve desired effects before working on your final project.
- Finish Spraying: When you are done spraying, release the trigger forward completely to stop paint flow, then release the trigger up to stop air flow. This sequence helps keep the nozzle clean.

Image 5.1: Side view of the Badger 360 Universal Airbrush, illustrating the trigger mechanism for dual-action control.
6. Maintenance and Cleaning
Regular cleaning is essential to maintain the performance and longevity of your airbrush. Clean your airbrush immediately after each use, especially when changing colors or finishing a session.
- Initial Rinse:
- If using gravity feed, empty any remaining paint from the cup. Add a few drops of appropriate cleaner (water for water-based paints, solvent for solvent-based paints) to the cup and spray it through until clear.
- If using bottom feed, remove the paint jar. Attach a jar filled with cleaner and spray through until clear.
- Back-Flushing (Optional but Recommended): For gravity feed, place a finger over the nozzle cap while spraying cleaner. This forces air and cleaner back into the paint cup, helping to dislodge paint from the internal passages.
- Wipe Down: Use a soft cloth or cotton swab dampened with cleaner to wipe the exterior of the airbrush, especially around the nozzle and needle.
- Thorough Cleaning (Periodically or for Clogs):
- Disassembly: Carefully unscrew the nozzle cap and remove the needle. Refer to the included diagram in the original manual for detailed disassembly steps.
- Clean Components: Use appropriate cleaning solutions and specialized airbrush cleaning brushes to clean the nozzle, needle, paint cup/jar adaptor, and internal passages. Pay close attention to the needle tip and nozzle opening.
- Reassembly: Reassemble the airbrush carefully, ensuring all parts are correctly seated and tightened finger-tight. Do not overtighten.
- Lubrication: Apply a tiny drop of airbrush lubricant (specifically designed for airbrushes) to the needle packing and trigger mechanism periodically to ensure smooth operation.

Image 6.1: Close-up view of the Badger 360 Universal Airbrush nozzle, highlighting the area critical for cleaning and maintenance.
7. Troubleshooting
If you encounter issues with your airbrush, consult the following common problems and solutions:
| Problem | Possible Cause | Solution |
|---|---|---|
| No Paint Flow | Clogged nozzle or needle, paint too thick, air cap blocked, needle not pulled back. | Clean nozzle and needle thoroughly. Thin paint appropriately. Check air cap for blockages. Ensure trigger is pulled back for paint. |
| Sputtering or Intermittent Spray | Partial clog, air leak, low air pressure, paint level too low (bottom feed). | Perform thorough cleaning. Check all connections for air leaks. Increase air pressure. Ensure sufficient paint in jar/cup. |
| Paint Drying on Needle Tip | Paint drying too quickly, air pressure too high, not enough paint flow. | Add a retarder to paint. Reduce air pressure slightly. Increase paint flow. Keep needle clean by wiping periodically. |
| Wide or Uneven Spray Pattern | Damaged nozzle, bent needle, incorrect air pressure. | Inspect nozzle and needle for damage; replace if necessary. Adjust air pressure. |
If problems persist after attempting these solutions, contact Badger Air-Brush Co. customer support for further assistance.
8. Specifications
- Model Number: 360-7
- Brand: Badger Air-Brush Co.
- Type: Dual Action, Internal Mix
- Feed System: Universal (Gravity Feed & Bottom Feed)
- Nozzle/Needle Size: .75 millimeter (all-purpose)
- Spray Pattern: Pencil lines to 3 inches (76 millimeter)
- Material: Metal (airbrush body), Plastic (jars)
- Product Dimensions: 15 x 7.5 x 2.5 inches
- Item Weight: 1.28 pounds (0.58 Kilograms)
- Included Components: Airbrush, 3 mixing jars, 2 jar adaptors, air hose, protective cap, instruction guide.
- UPC: 047459360071
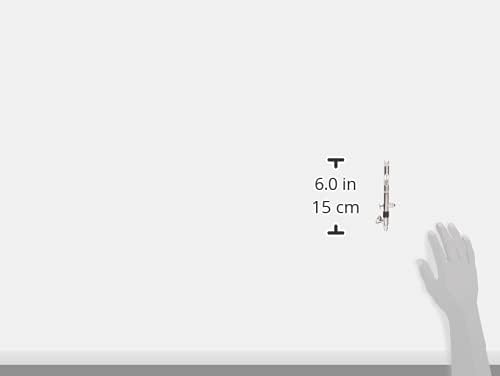
Image 8.1: Diagram showing the approximate dimensions of the Badger 360 Universal Airbrush.
9. Warranty and Support
For warranty information, technical support, or to inquire about replacement parts, please contact Badger Air-Brush Co. directly. Refer to their official website or the contact information provided with your purchase for the most current support details.
Manufacturer: Badger Air-Brush Co.


