1. Introduction
The ART USB Phono Plus PS is a versatile audio interface designed for converting analog audio sources, particularly vinyl records, into digital formats. It also functions as a high-performance audio interface for various analog and digital sources. Featuring a built-in low-noise RIAA phono preamp circuit with low-cut filters, it ensures high-fidelity audio capture. The unit can also serve as an audio playback source for any USB-enabled computer or laptop. Its robust all-aluminum black anodized case ensures durability, and it can be powered via an external power supply or directly through the USB port. The device is fully compliant with USB 2.0 specifications, utilizing USB adaptive mode for playback and USB asynchronous mode for recording, ensuring broad compatibility with Windows and Apple operating systems.
2. Key Features
- Vinyl to Digital Conversion: Easily transfer audio from vinyl records to a laptop or computer.
- Audio Interface: Functions as an audio interface between various analog and digital sources.
- RIAA Phono Preamp: Integrated low-noise phono preamp circuit adheres precisely to the RIAA standard.
- Low Cut Filter: Equipped with low-cut filters to reduce unwanted rumble and noise.
- Gain Control: Front-mounted gain control with a Signal/Clip LED for optimal input level adjustment.
- Monitor Output: Line Out jacks are always connected to the input preamp signal, allowing for source monitoring or use as a standalone phono preamp.
- USB Connectivity: USB 1.2 compliant, compatible with Windows 98SE/ME/2000/XP/Vista/7 USB audio device drivers and Apple OS9.1/OS-X.
- Power Options: Can be powered via an external power supply or directly through the USB port.
- Durable Construction: Encased in an all-aluminum black anodized case.
3. Package Contents
The ART USB Phono Plus PS package typically includes the following items:
- ART USB Phono Plus PS Audio Interface Unit
- External Power Supply (7-12VDC or 9-12VAC @ 150mA)
- Software CD-ROM (Sound Saver Express, Audacity)
- User Manual
- Note: A USB cable (Type A to Type B, "printer" type) is required for computer connection and is not always included.
4. Controls and Connections
Front Panel
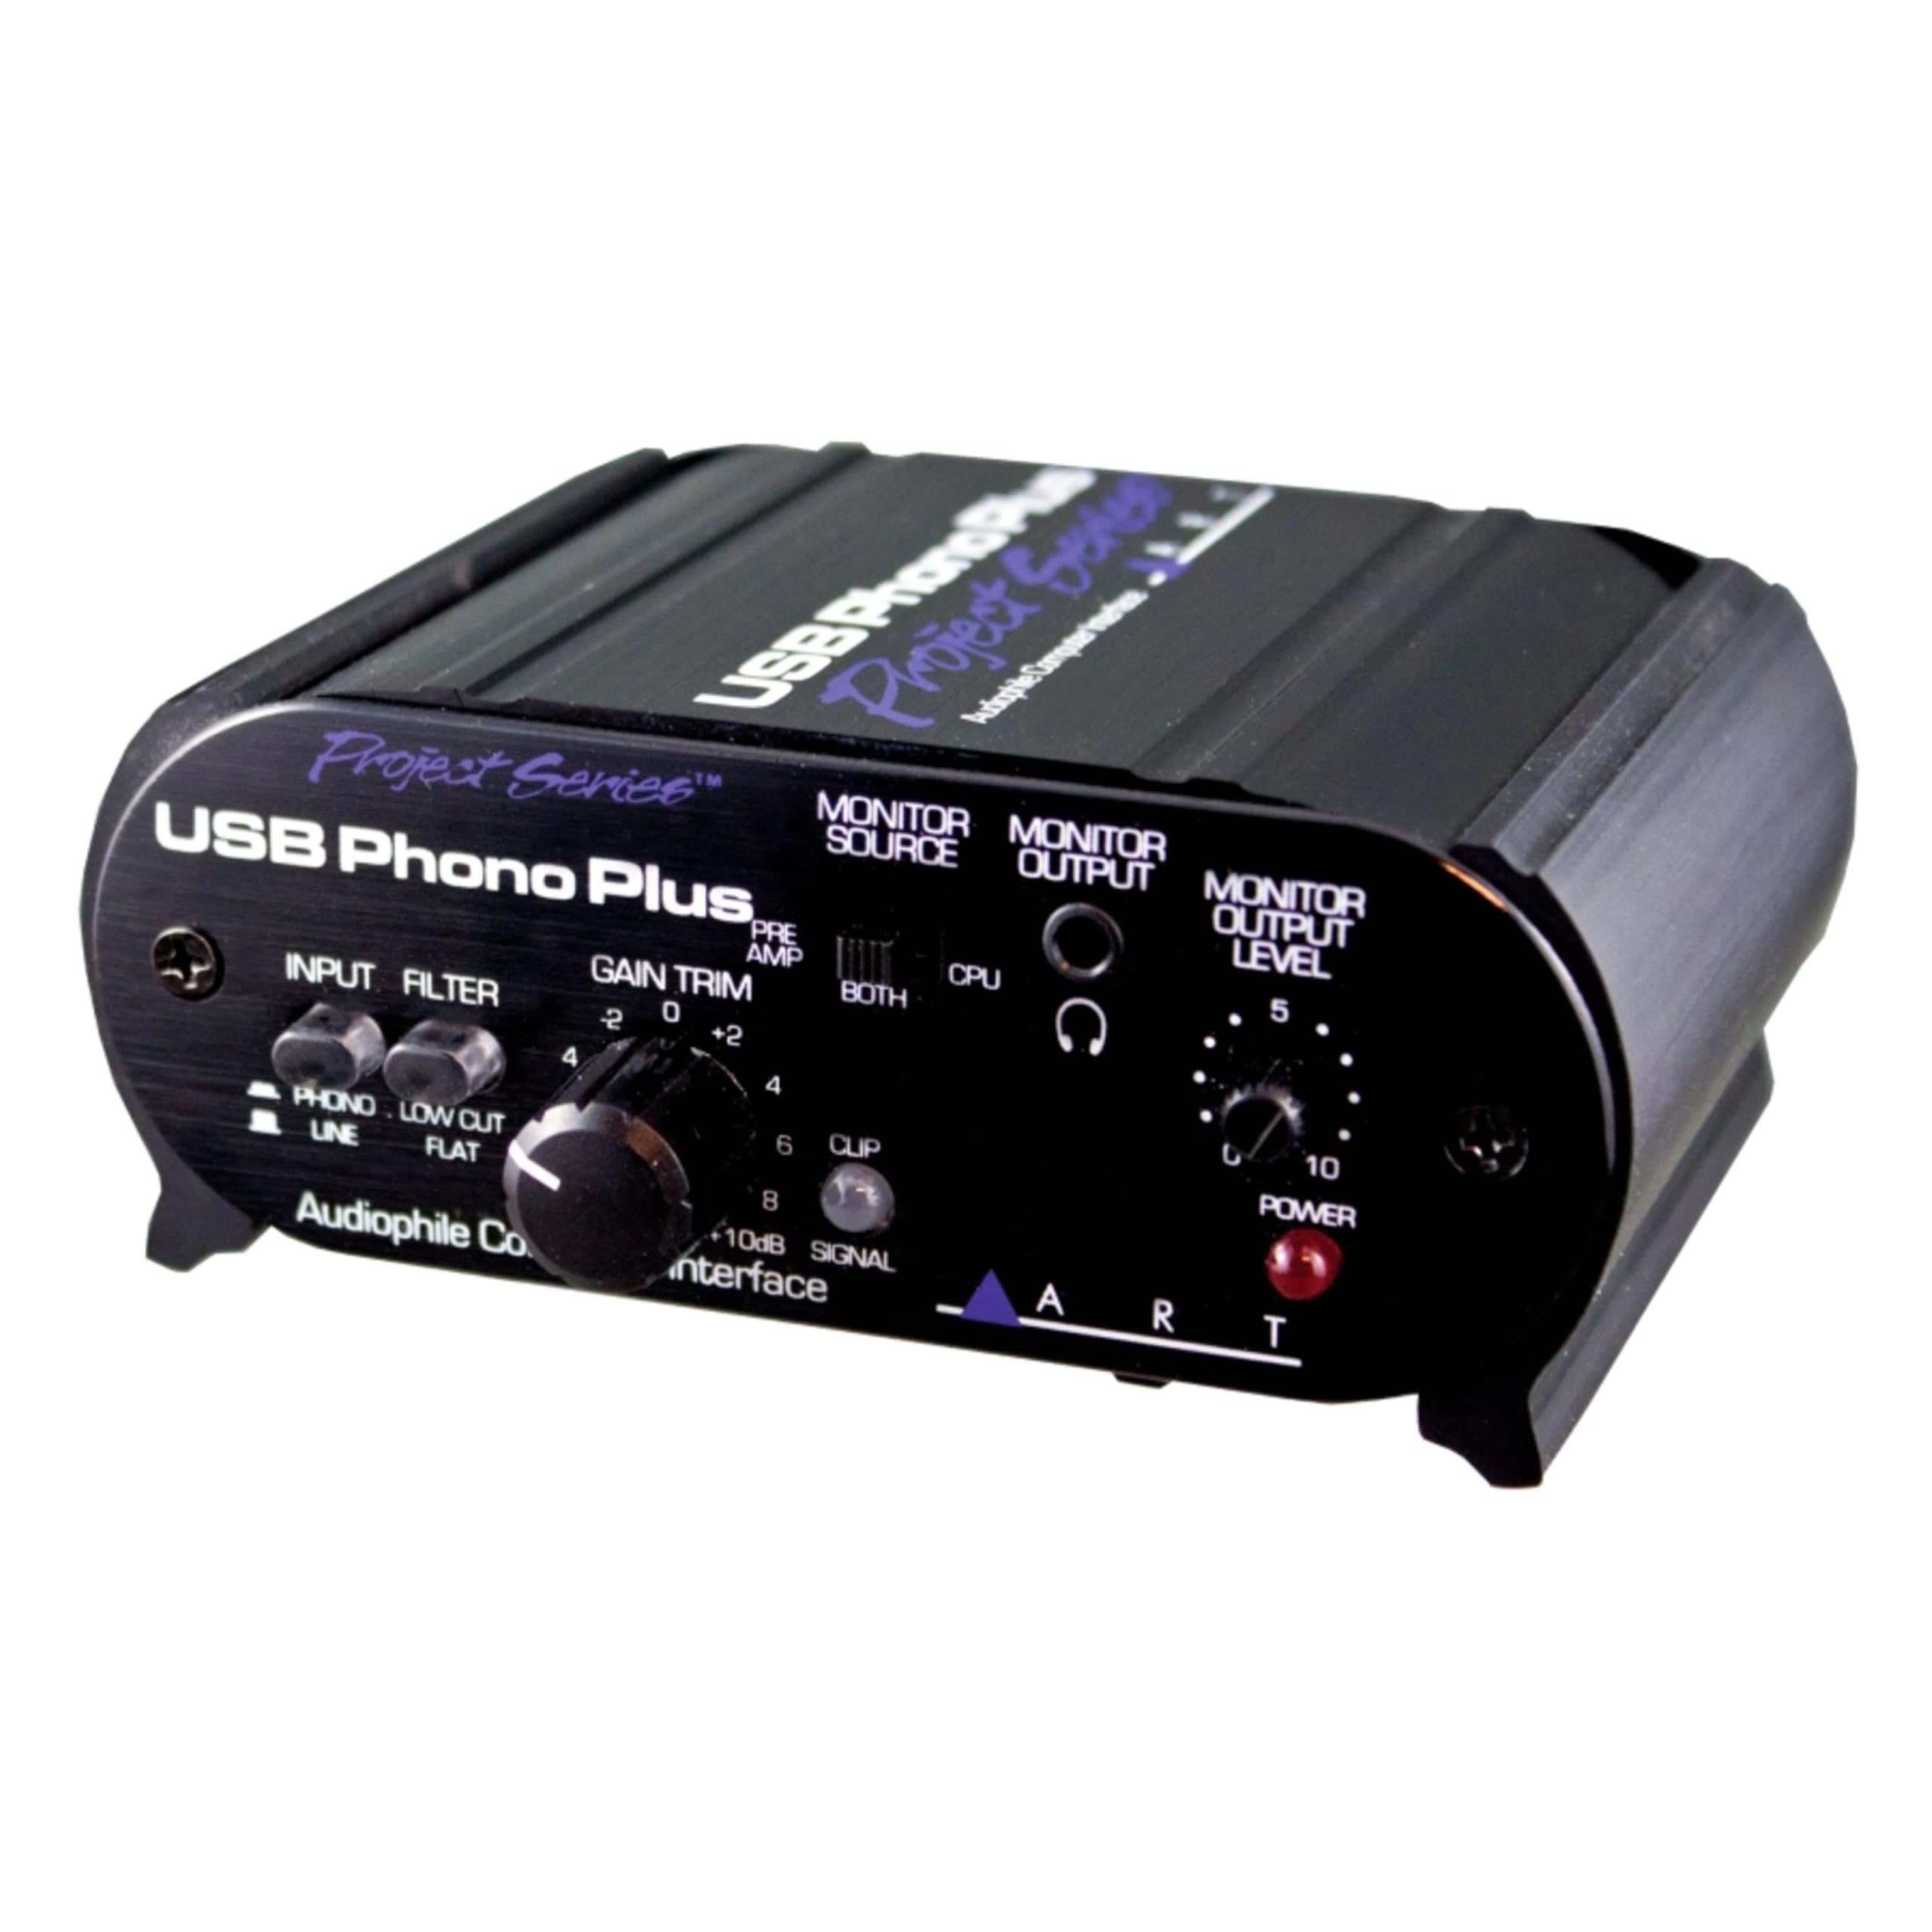
This image displays the front panel of the ART USB Phono Plus PS. Key controls visible include:
- INPUT (PHONO/LINE) Switch: Selects between phono (turntable) or line-level (CD player, tape deck) input.
- FILTER (LOW CUT/FLAT) Switch: Engages or disengages the low-cut filter to reduce low-frequency rumble.
- GAIN TRIM Knob: Adjusts the input gain level.
- SIGNAL/CLIP LED: Indicates signal presence (green) and clipping (red) for optimal gain setting.
- MONITOR SOURCE Switch (PRE AMP/BOTH/CPU): Selects the audio source for monitoring.
- MONITOR OUTPUT Level Knob: Adjusts the volume for the monitor output.
- MONITOR OUTPUT (1/8" Headphone Jack): For connecting headphones.
- POWER LED: Indicates the unit is powered on.
Rear Panel
This image shows the rear panel of the ART USB Phono Plus PS, highlighting the various input and output connections:
- PHONO/LINE INPUT (RCA L/R): Connect your turntable or line-level audio source here.
- GROUND Terminal: Connect the ground wire from your turntable to this screw terminal to reduce hum.
- USB Port (Type B): Connects to your computer for digital audio transfer and optional power.
- LINE OUTPUT (RCA L/R): Connects to your amplifier, powered speakers, or recording device.
- DIGITAL OUTPUT (TOSLINK Optical): For digital audio output to compatible devices.
- DIGITAL OUTPUT (S/PDIF Coaxial RCA): For digital audio output to compatible devices.
- POWER INPUT (DC 12V): Connect the included external power adapter here.
5. Setup Instructions
- Connect Your Turntable:
Connect the RCA output cables from your turntable to the PHONO/LINE INPUT (RCA L/R) jacks on the rear panel of the USB Phono Plus PS. If your turntable has a ground wire, connect it to the GROUND terminal on the USB Phono Plus PS.

This image illustrates the connection of RCA cables from a turntable to the input jacks of the ART USB Phono Plus PS. Ensure the left (white) and right (red) channels are correctly matched.
- Connect to Amplifier/Speakers:
Connect the LINE OUTPUT (RCA L/R) jacks on the rear panel of the USB Phono Plus PS to an available line-level input on your amplifier, powered speakers, or recording device. Do NOT connect to an amplifier's "Phono" input, as this unit already provides phono pre-amplification.
- Connect to Computer (Optional):
For digital recording or playback, connect a USB cable (Type A to Type B, not always included) from the USB Port on the rear panel of the USB Phono Plus PS to an available USB port on your computer. Install the provided Sound Saver Express or Audacity software if you plan to record.
- Power Connection:
Connect the included external power adapter to the POWER INPUT (DC 12V) on the rear panel, then plug the adapter into a wall outlet. The unit can also be bus-powered via USB when connected to a computer, but the external adapter is recommended for optimal performance and when not connected to a computer.
- Initial Settings:
- Set the INPUT switch on the front panel to PHONO for turntables or LINE for other audio sources.
- Set the FILTER switch to FLAT initially. You can switch to LOW CUT later if you experience excessive low-frequency rumble.
- Set the MONITOR SOURCE switch to PRE AMP to monitor the input signal directly.
- Turn the MONITOR OUTPUT Level knob fully counter-clockwise (minimum volume) before connecting headphones.
Video: Setting up a Phono Preamp
This video demonstrates the basic setup of a phono preamp, including connecting a turntable to the preamp and then connecting the preamp to an amplifier or speakers. It highlights the importance of proper cable management and grounding for optimal sound quality.
6. Operating Instructions
- Power On:
Once all connections are made, the POWER LED on the front panel should illuminate, indicating the unit is receiving power.
- Adjusting Input Gain:
Begin playing your audio source (e.g., a vinyl record). Slowly turn the GAIN TRIM knob clockwise until the green SIGNAL LED illuminates consistently. The red CLIP LED should only flash occasionally on the loudest peaks. If the CLIP LED stays red, reduce the GAIN TRIM. Proper gain staging is crucial for clear audio without distortion.
- Monitoring Audio:
If using headphones, connect them to the MONITOR OUTPUT jack and slowly increase the MONITOR OUTPUT Level knob to a comfortable listening volume. The MONITOR SOURCE switch allows you to listen to the input signal (PRE AMP), the computer's output (CPU), or a blend of both (BOTH).
- Using the Low Cut Filter:
If you hear unwanted low-frequency rumble (e.g., from a turntable motor or warped record), switch the FILTER to LOW CUT. This will attenuate frequencies below 22Hz, improving clarity without affecting audible bass.
- Recording to Computer:
If connected to a computer via USB, open your recording software (e.g., Sound Saver Express, Audacity). Select the USB Phono Plus PS as your audio input device. Adjust recording levels within the software, ensuring they do not clip. The unit uses USB adaptive mode for playback and USB asynchronous mode for recording.
7. Maintenance
- Cleaning: Use a soft, dry cloth to clean the exterior of the unit. Avoid using abrasive cleaners or solvents.
- Ventilation: Ensure the unit has adequate ventilation to prevent overheating. Do not block any ventilation openings.
- Storage: When not in use for extended periods, disconnect the power adapter and store the unit in a cool, dry place.
- Cable Care: Regularly check all cables for damage. Replace any frayed or damaged cables immediately to prevent signal loss or electrical hazards.
8. Troubleshooting
| Problem | Possible Cause | Solution |
|---|---|---|
| No sound or very low volume. | Incorrect input/output connections; incorrect INPUT switch setting; low GAIN TRIM. | Check all RCA and USB connections. Ensure INPUT switch is set to PHONO for turntables. Increase GAIN TRIM. Ensure amplifier/speaker volume is up. |
| Humming or buzzing noise. | Ground loop; ungrounded turntable; electromagnetic interference. | Connect turntable ground wire to the GROUND terminal. Ensure all audio components are on the same electrical circuit. Try moving the unit away from power cables or other electronic devices. |
| Distorted audio. | GAIN TRIM set too high (clipping); damaged cables. | Reduce GAIN TRIM until the CLIP LED only flashes occasionally. Check and replace any damaged audio cables. |
| Rumble or low-frequency noise. | Turntable motor noise; warped record. | Set the FILTER switch to LOW CUT. |
| No audio from headphones. | MONITOR OUTPUT Level too low; incorrect MONITOR SOURCE setting. | Increase MONITOR OUTPUT Level. Ensure MONITOR SOURCE is set to PRE AMP or BOTH. Check headphone connection. |
| Computer not recognizing the device. | USB cable issue; driver issue; incorrect audio settings on computer. | Try a different USB port or cable. Reinstall audio drivers. Check computer's sound settings to ensure USB Phono Plus PS is selected as input/output device. |
Video: Low Turntable Volume? This is Why PP-999 Phone Pre-Amp Here.
This video explains common issues with low turntable volume and how a phono preamp like the ART USB Phono Plus PS can resolve them. It covers basic connections and the function of a phono preamp in boosting the signal to line level.
9. Specifications
- Frequency Response: 10Hz - 50kHz, +/- 0.5dB
- THD (Total Harmonic Distortion): 0.01% Typical @ 1kHz
- Hum and Noise: >90dB below clipping
- Input Impedance: 47k Ohms/100pF (phono); 270k Ohms (line)
- Maximum Input Level: 40mVrms @ 1kHz (phono); +19dBu (line)
- Maximum Gain: 45dB @1kHz (phono); +6dB (line)
- Analog Output Connections: RCA (preamp line output); 1/8" (monitor/headphone output)
- Maximum Output Level: +6dBu (1.4Vrms)
- Filter Type/Response: Switchable, High Pass, -3dB @ 22Hz
- A/D & D/A: 16 bit, 44.1kHz or 48kHz, USB selectable
- Digital Audio Interface: TOSLINK in and out; S/PDIF coax (RCA) in
- Computer Interface: USB 1.2 compliant, Windows 98SE or newer, Mac OS9.1 or newer
- Power Requirements: 7-12VDC or 9-12VAC @ 150mA, or USB bus powered
- Dimensions: 1.75"H x 4.2"W x 3.5"D (44.5mm x 107mm x 89mm)
- Weight: 1.35 lbs. (0.61kg)
10. Warranty and Support
For warranty information and technical support, please refer to the documentation included with your product or visit the official ART website. Keep your purchase receipt as proof of purchase for any warranty claims.


