Introduction
This manual provides detailed instructions for using the Prime-Line P 7542 Screen Door Repair Kit. This kit is designed to facilitate the replacement of damaged or worn screen mesh on windows and patio doors, improving home appearance and keeping insects out. Please read all instructions carefully before beginning the installation process.
Safety Information
CAUTION:
- This product includes sharp tools and small parts. Keep out of reach of children and pets.
- Always use caution when handling and installing screen cloth and spline to avoid injury.
What's Included
The Prime-Line P 7542 Screen Door Repair Kit contains the following components:
- 48 inch x 84 inch Charcoal Fiberglass Screen Cloth
- 30 feet of .155 inch diameter Black Vinyl Spline
- 1 Rolling Tool with both concave and convex rolling ends
These components provide everything necessary for a quick and effective screen replacement project.

Image: The Prime-Line P 7542 Screen Door Repair Kit showing the fiberglass screen cloth, the roll of spline, and the spline rolling tool.
Installation Instructions
This section outlines the steps to replace a damaged screen or install new screen fabric into a screen frame. For visual guidance, please refer to the official product video below.
Video: Official Prime-Line tutorial demonstrating screen frame assembly and screen repair. This video provides a visual guide for the steps outlined below.
Step 1: Prepare the Screen Frame
If replacing an existing screen, carefully remove the old screen mesh and spline from the frame. Clean the spline groove thoroughly. Ensure the screen frame is clean and free of debris.
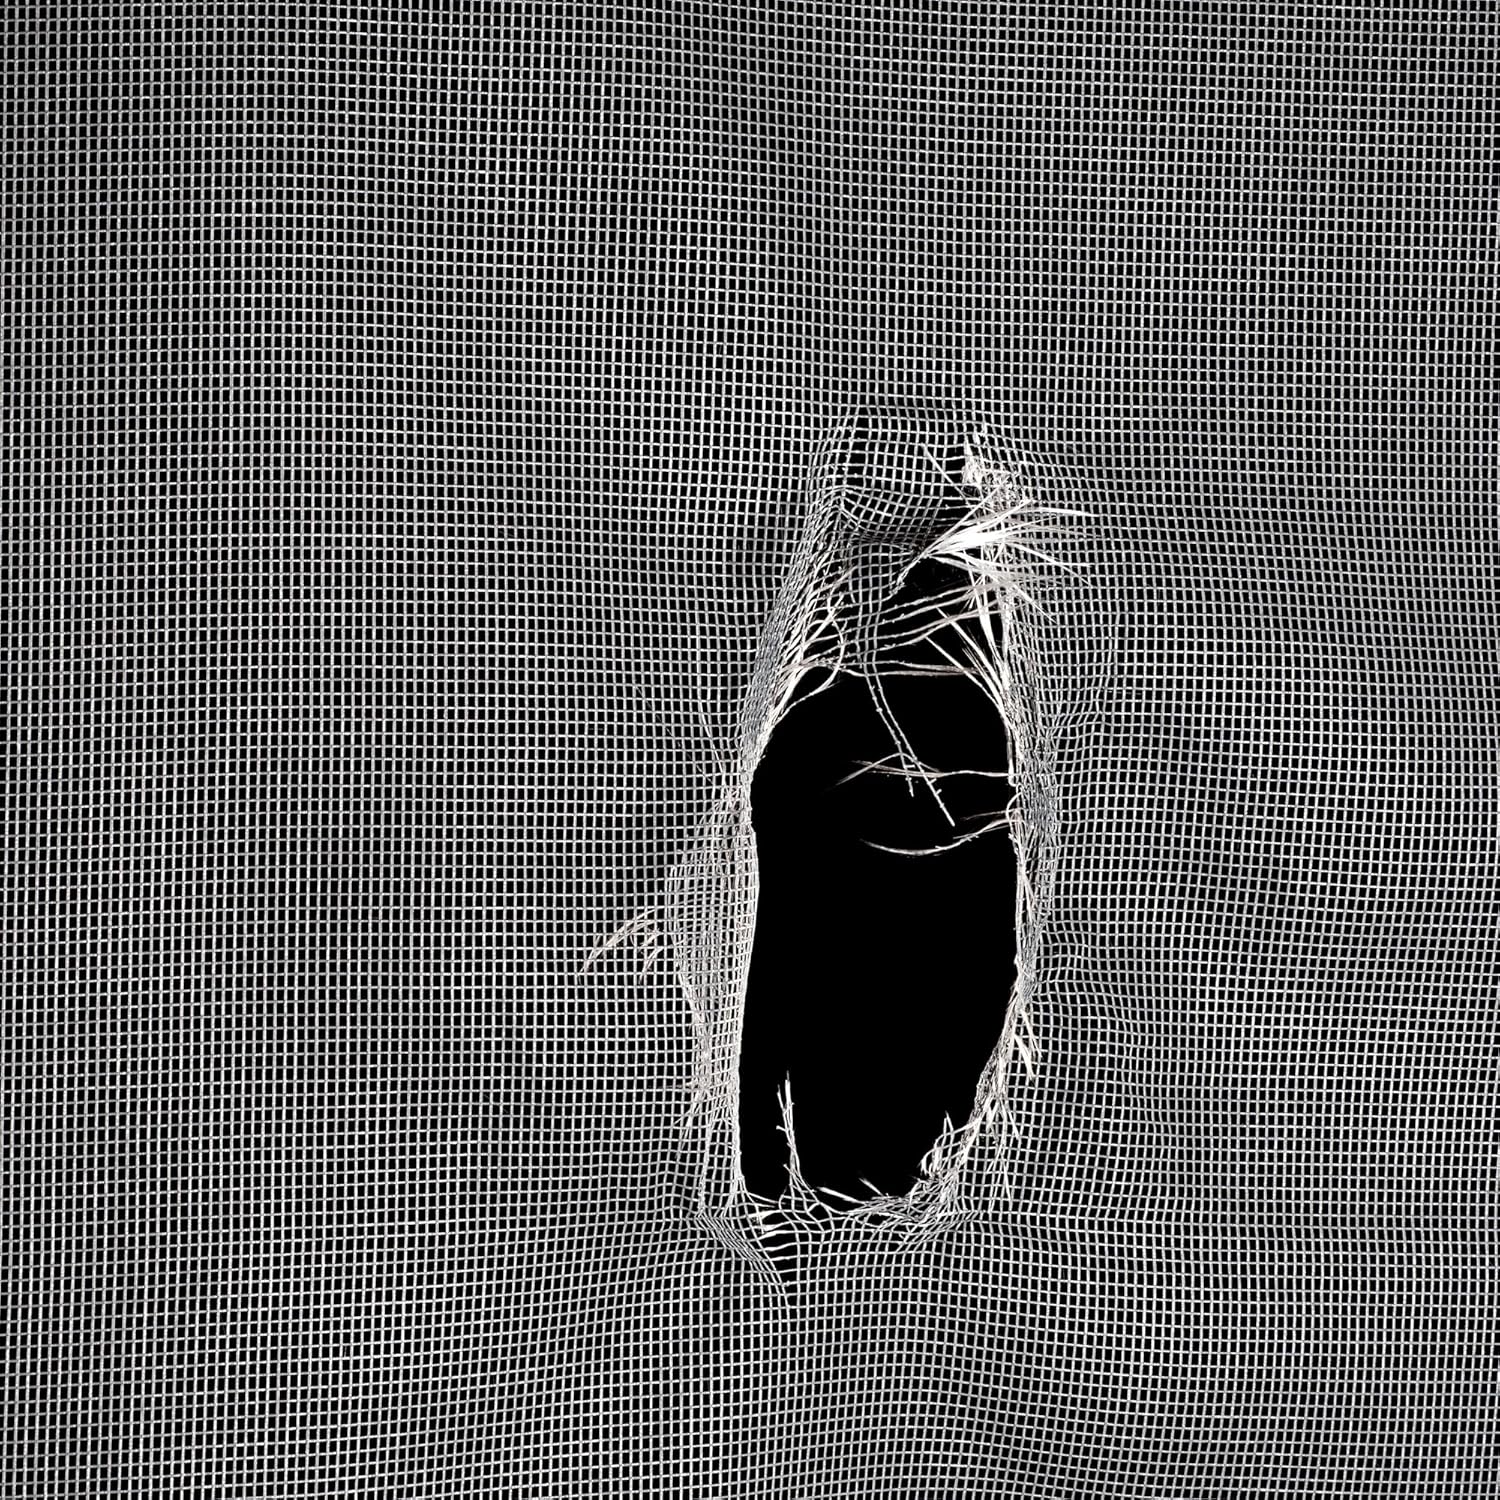
Image: A close-up view of a damaged screen, illustrating the type of repair this kit is designed for.
Step 2: Position the Screen Cloth
Lay the new fiberglass screen cloth over the clean screen frame, ensuring it overlaps the frame by at least an inch on all sides. Make sure the screen is evenly aligned and relatively taut, but do not stretch it excessively at this stage.
Step 3: Install the Spline
- Begin by pressing a small section of the spline into the spline groove at one corner of the frame using the concave (grooved) end of the rolling tool.
- Work your way along one side of the frame, gently pressing the spline into the groove. Do not push it all the way in yet; just enough to hold the fabric in place.
- Repeat this process for the opposite side of the frame, then the remaining two sides. This ensures even tension.
- Once all four sides have the spline partially inserted, go back around the frame using the convex (rounded) end of the rolling tool. Apply firm, even pressure to fully seat the spline into the groove, securing the screen cloth.
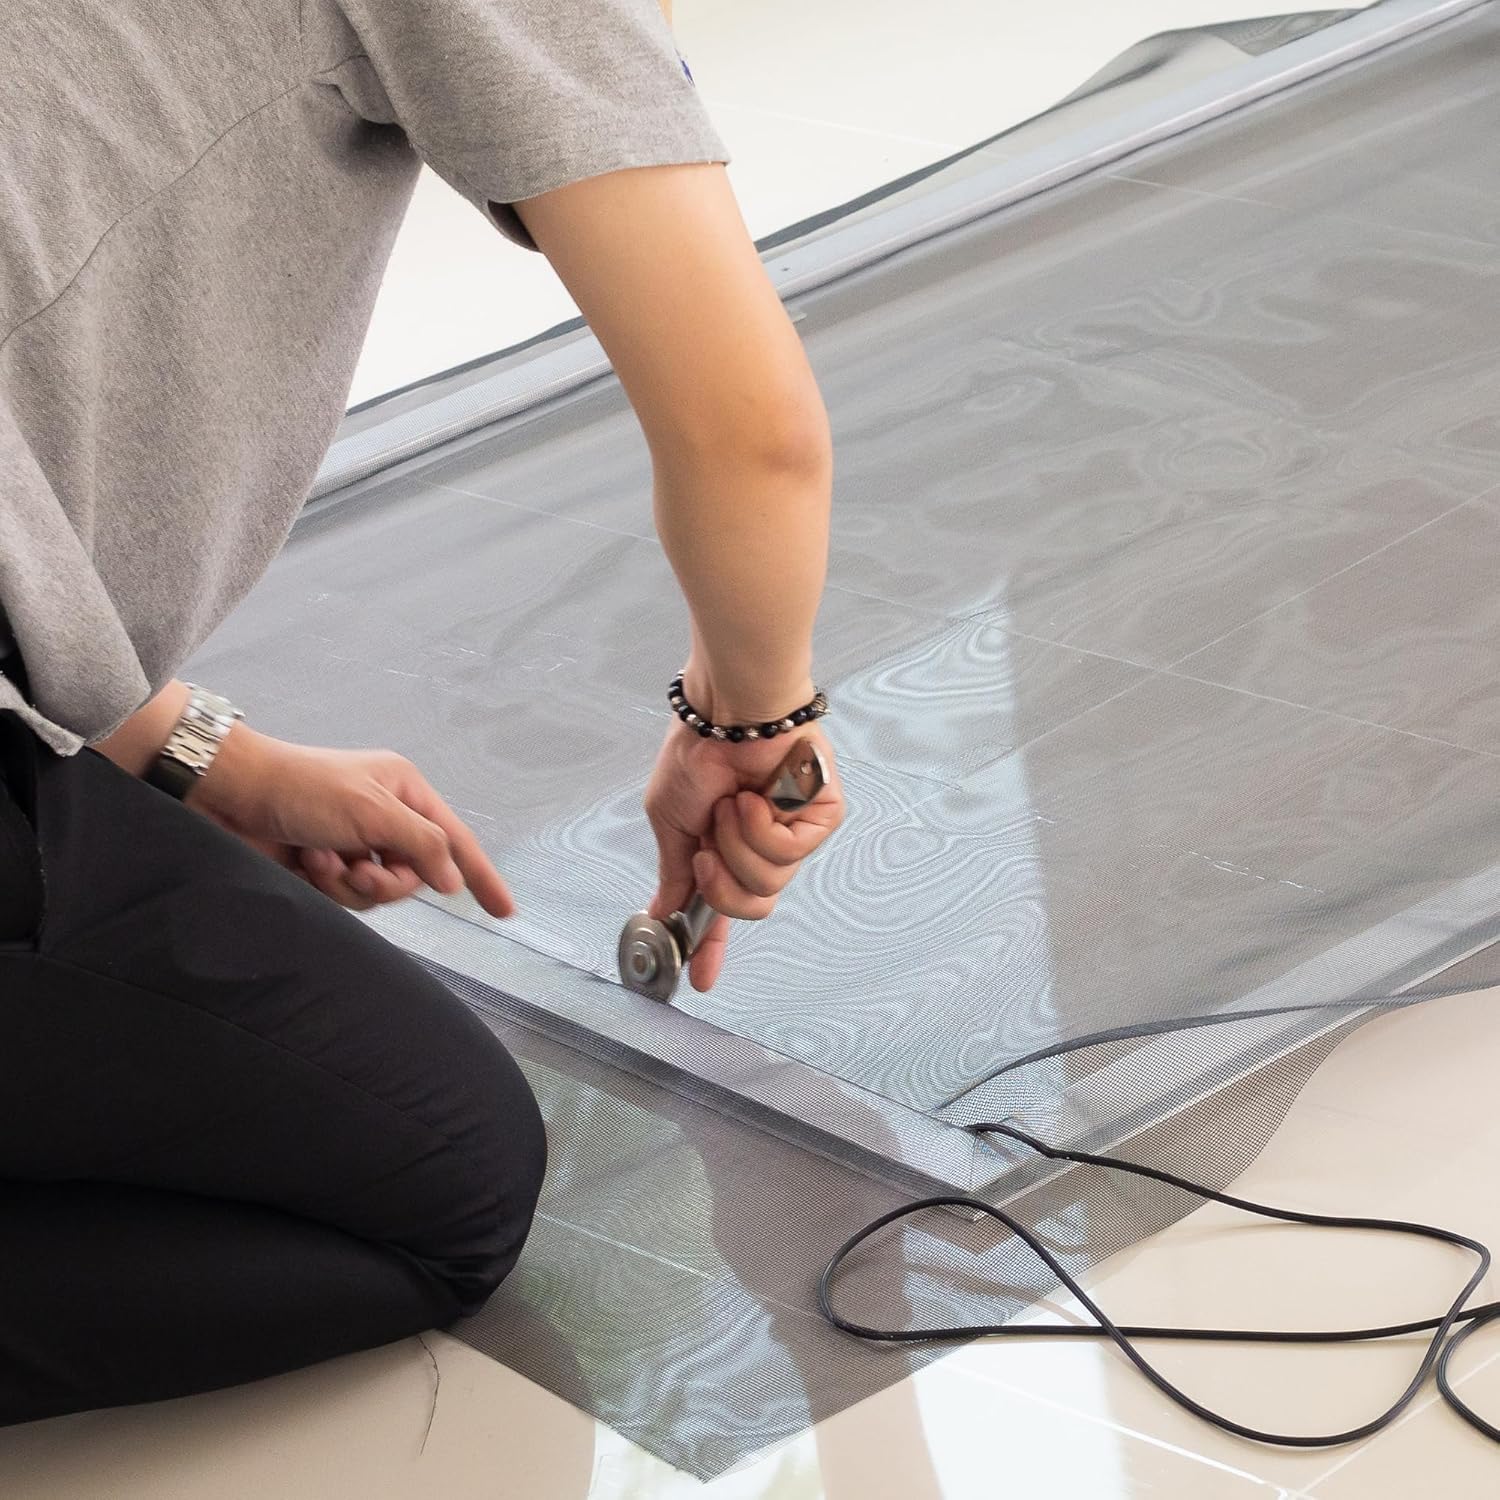
Image: A person demonstrating the use of the rolling tool to press the spline and screen mesh into the frame's groove.
Step 4: Trim Excess Screen and Spline
Once the spline is fully seated and the screen is taut, use a utility knife or a sharp blade to carefully trim away the excess screen cloth that extends beyond the spline. Cut along the outer edge of the spline for a clean finish. Trim any excess spline from the corners.
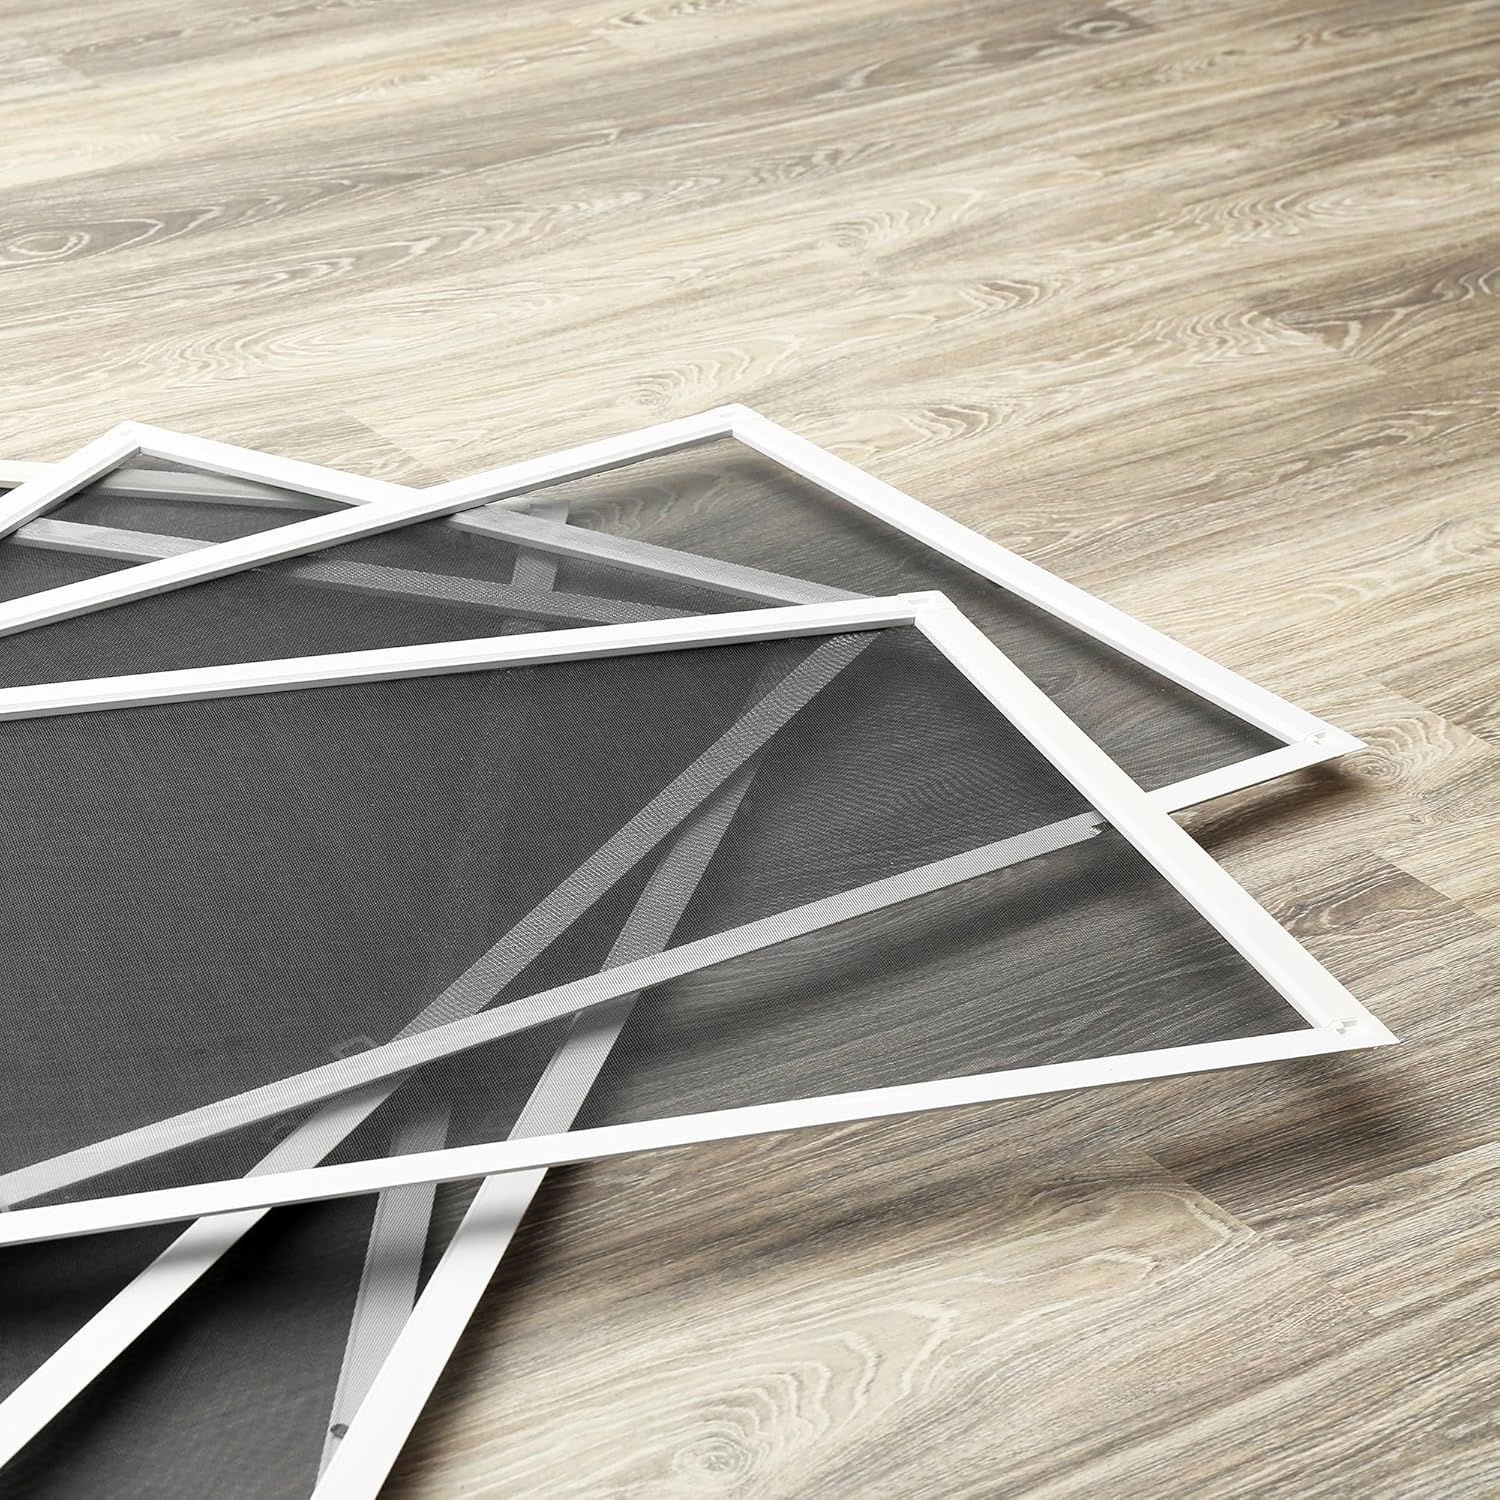
Image: Multiple finished screen frames, showcasing the result of a successful screen replacement.
Maintenance
To ensure the longevity of your newly installed screen, regular maintenance is recommended:
- Cleaning: Periodically clean the screen with mild soap and water using a soft brush or cloth. Rinse thoroughly with clean water.
- Inspection: Regularly inspect the screen for any signs of damage, tears, or loose spline. Address minor issues promptly to prevent further damage.
- Avoid Harsh Chemicals: Do not use abrasive cleaners or harsh chemicals on the screen, as this can degrade the fiberglass material.
Troubleshooting
If you encounter issues during or after installation, consider the following:
- Screen Sagging: If the screen appears loose or sags, it may not have been pulled taut enough during installation, or the spline may not be fully seated. Re-roll the spline with firm pressure, ensuring the screen is stretched evenly.
- Spline Not Seating: Ensure the spline is the correct diameter for your frame's groove. If slightly too thick, gently stretching the spline may help it to fit. The rolling tool should be used with consistent pressure.
- Tears During Installation: Apply even pressure with the rolling tool and avoid sharp objects near the screen. If a tear occurs, you may need to replace the screen cloth.
Specifications
| Feature | Detail |
|---|---|
| Brand | PRIME-LINE |
| Model Name | Screen Door Repair Kit with Rolling Tool |
| Screen Material | Fiberglass |
| Screen Color | Charcoal |
| Screen Dimensions | 48"W x 84"L |
| Spline Diameter | .155 inches |
| Included Components | Screening, Spline, and Spline Tool |
| Item Weight | 1.05 Pounds |
| Specific Uses | Screen repair and replacement for indoor windows and patio doors |
Warranty Information
Goods are warranted against manufacturing defects for 1 year. Prime-Line is not responsible for user-related damage or damage incurred during installation. The warranty is void if products are subjected to abnormal conditions, misapplication, or abuse.
Customer Support
For further assistance, questions, or to purchase additional components, please visit the official Prime-Line website or contact their customer service department. You can find more information and products at the Prime-Line Store on Amazon.


