
1. Introduction
The ScanGauge SG2 is an advanced 3-in-1 automotive computer designed to provide real-time information about your vehicle's performance. It functions as a trip computer, a diagnostic scan tool, and a set of customizable digital gauges. This device connects to your vehicle's On-Board Diagnostics II (OBD2) port, offering insights into fuel economy, engine parameters, and diagnostic trouble codes.
The ScanGauge SG2 is compatible with all 1996 and newer OBD2 compliant vehicles, including gasoline, diesel, propane, and hybrid models equipped with a 16-pin OBD2 port.
2. Safety Information
- Always ensure the vehicle is safely parked before attempting to install, remove, or operate the ScanGauge SG2.
- Do not attempt to operate the device or change settings while driving, as this can distract you and lead to accidents.
- Ensure the OBD2 cable is routed safely and does not interfere with the vehicle's pedals or other controls.
- If you are unsure about any installation or operation steps, consult a qualified automotive technician.
3. Package Contents
Verify that all items are present in your ScanGauge SG2 package:
- ScanGauge SG2 Unit
- OBD2 Cable
- Quick Start Guide
- User Manual
- Velcro Mounting Strips

Image: ScanGauge SG2 unit, user manual, quick start guide, OBD2 cable, and velcro mounting strips.
4. Product Overview
The ScanGauge SG2 features a compact design with a backlit LCD display and a 5-button interface for easy navigation and control. The unit connects directly to your vehicle's OBD2 port, drawing power and data without requiring external batteries.

Image: The ScanGauge SG2 unit displaying its menu interface within a vehicle's interior.
5. Setup and Installation
Installation of the ScanGauge SG2 is a straightforward process that requires no special tools.
- Locate the OBD2 Port: The OBD2 diagnostic connector is typically located under the dashboard on the driver's side of the vehicle. Refer to your vehicle's owner's manual if you have difficulty locating it.
- Connect the Cable: Plug one end of the provided OBD2 cable into the ScanGauge SG2 unit and the other end into your vehicle's OBD2 port. Ensure a secure connection.
- Route the Cable: Carefully route the cable to avoid interference with pedals, steering, or other vehicle controls.
- Mount the Unit: Use the included velcro mounting strips to secure the ScanGauge SG2 unit in a convenient and visible location on your dashboard or console. Ensure it does not obstruct your view of the road.
- Power On: Once connected, the ScanGauge SG2 will power on automatically when the vehicle's ignition is turned on. No external batteries are required.

Image: The ScanGauge SG2 being installed in a vehicle, highlighting its compact size and ease of connection.
6. Operating Instructions
6.1. Basic Navigation
The ScanGauge SG2 is operated using five buttons:
- <SCAN: Access the diagnostic scan tool functions.
- <TRIP: View trip computer data.
- GAUGE>: Display real-time digital gauges.
- MORE>: Access setup and advanced settings.
- Central Button: Used for selection, confirmation, or navigating within menus.
6.2. Digital Gauges
The ScanGauge SG2 can display up to 37 different digital gauges, providing real-time data from your vehicle's engine control unit (ECU). These gauges include:
- Fuel Consumption (Instant MPG, Average MPG)
- Engine Speed (RPM)
- Coolant Temperature
- Battery Voltage
- Engine Load
- Throttle Position
- And many more, depending on your vehicle's sensors.
Press the GAUGE> button to cycle through available gauge screens. You can customize which gauges are displayed and their layout in the settings menu.

Image: A close-up of the ScanGauge SG2 display showing real-time engine data.
6.3. Trip Computer
The trip computer function tracks various metrics for your current journey or historical data. To access trip data, press the <TRIP button. Information available includes:
- Distance Traveled
- Fuel Used
- Average Speed
- Trip Time
- Fuel Cost

Image: The ScanGauge SG2 displaying current fuel economy data.
6.4. Diagnostic Scan Tool
The ScanGauge SG2 can read and clear Diagnostic Trouble Codes (DTCs) that trigger your vehicle's "Check Engine" light. This allows you to identify potential issues and clear the light after repairs.
- Press the <SCAN button to enter the diagnostic mode.
- Follow the on-screen prompts to read current or pending DTCs.
- If a code is present, the device will display it. You can then research the code to understand the underlying issue.
- To clear codes and turn off the "Check Engine" light, select the appropriate option in the scan tool menu. Ensure the underlying problem has been resolved before clearing codes.

Image: The ScanGauge SG2 displaying a diagnostic trouble code.
6.5. Customization
The ScanGauge SG2 offers various customization options to suit your preferences:
- Display Color: Adjust the backlight color and intensity for optimal visibility.
- Units: Change measurement units (e.g., Fahrenheit/Celsius, Miles/Kilometers, Gallons/Liters).
- Gauge Selection: Choose which specific gauges are displayed on each screen.
Access these settings by pressing the MORE> button and navigating through the setup menus.
7. Troubleshooting
If you encounter issues with your ScanGauge SG2, consider the following common troubleshooting steps:
- No Power: Ensure the OBD2 cable is securely connected to both the ScanGauge unit and the vehicle's OBD2 port. Verify the vehicle's ignition is on.
- Incorrect Readings: Confirm that the vehicle's parameters (e.g., engine size, fuel type) are correctly entered in the ScanGauge settings. Some readings are vehicle-dependent.
- Difficulty Connecting: Ensure your vehicle is OBD2 compliant (1996 or newer). If issues persist, try disconnecting and reconnecting the unit.
- "Check Engine" Light Remains On: After clearing DTCs, if the "Check Engine" light reappears, the underlying issue has likely not been resolved. Further diagnosis and repair may be necessary.
For more detailed troubleshooting or specific error codes, refer to the full user manual or contact ScanGauge customer support.
8. Specifications
| Model | SG2 |
| Dimensions | 5 x 1 x 2 inches |
| Item Weight | 2.82 ounces |
| Compatibility | All 1996 or newer OBD2 cars, including gas, diesel, propane, and hybrid vehicles with 16-pin OBD2 port. |
| Manufacturer | Linear Logic |

Image: The ScanGauge SG2 unit with its physical dimensions indicated.
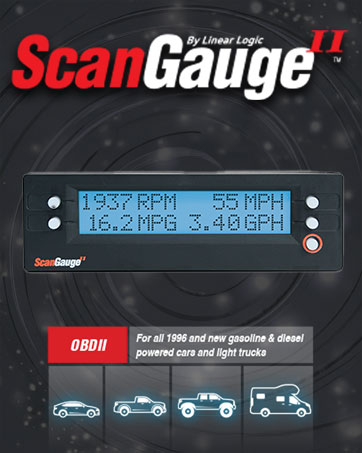
Image: Visual representation of ScanGauge SG2 compatibility with different vehicle types.
9. Warranty and Support
For warranty information, technical support, or further assistance with your ScanGauge SG2, please refer to the official ScanGauge website or contact their customer service department directly. Contact details can typically be found in the packaging or on the manufacturer's website.


