
Introduction
Thank you for choosing the Cat Mate Lockable Cat Flap with Door Liner. This product is designed to provide your cat with convenient access while offering security and weather protection for your home. Please read these instructions carefully before installation and use to ensure proper function and longevity of your cat flap.
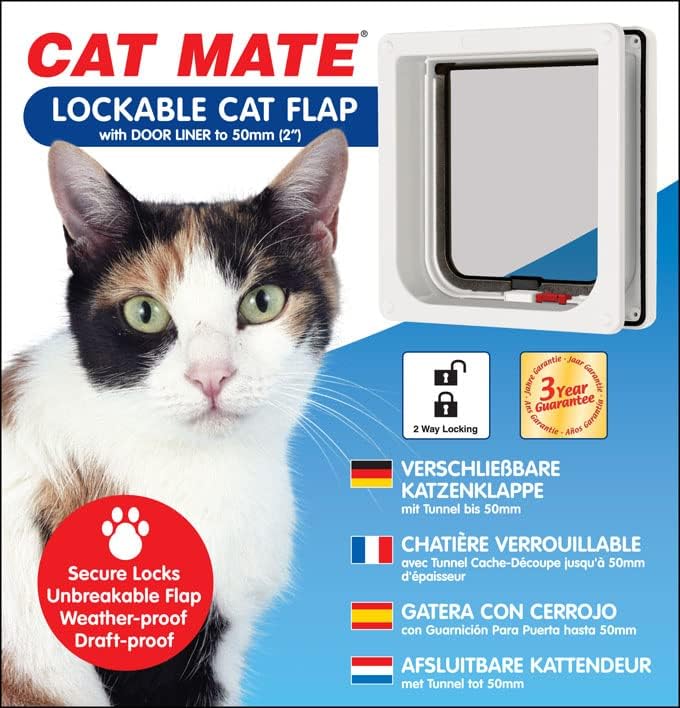
Figure 1: Cat Mate Lockable Cat Flap highlighting key features
Safety Information
- Always use appropriate safety gear (gloves, eye protection) when cutting into doors.
- Ensure the installation area is free from electrical wires, plumbing, or other obstructions.
- Keep small children away from the installation area.
- This product is intended for pet use only.
Package Contents
Verify that all components are present before beginning installation:
- Cat Mate Lockable Cat Flap (Front and Rear Frames)
- Door Liner (integrated or separate, depending on model)
- Installation Hardware (screws)
- Cutting Template
Product Specifications
| Model Number | 234W |
| Overall Dimensions (W x H) | 7.625" x 7.625" (19.37 cm x 19.37 cm) |
| Cut Out Size (W x H) | 6.5" x 6.88" (16.5 cm x 17.48 cm) |
| Maximum Door Thickness (Self-Lining) | Up to 2 inches (50 mm) |
| Material | Polymer |
| Color | White |
| Locking Mechanism | 2-Way Lockable |
| Item Weight | 13.6 ounces (385 grams) |

Figure 2: Overall Dimensions of the Cat Flap

Figure 3: Required Cutout Dimensions for Installation
Installation Instructions
This section outlines the steps for installing your Cat Mate Lockable Cat Flap.
Tools Required:
- Drill with appropriate drill bits (e.g., 9/64" for pilot holes)
- Jigsaw or similar cutting tool
- Pencil or marker
- Measuring tape
- Level
- Screwdriver
- Safety glasses and gloves
Installation Steps:
- Determine Placement: Choose a suitable location on your door. The bottom of the cat flap should be positioned at a height comfortable for your cat to pass through easily, typically aligning with their belly.
- Prepare Template: Secure the provided cutting template to the chosen location on your door using tape. Ensure the template is level before marking.
- Mark and Drill: Using a pencil or marker, trace the outline of the cutout area from the template onto the door. Drill pilot holes in the corners of the marked area to allow for the jigsaw blade.
- Cut Opening: Carefully cut along the marked lines using a jigsaw. Ensure the cut is clean and precise. The cutout size should be approximately 6.5" W x 6.88" H.
- Test Fit: Insert the cat flap frames into the cutout to ensure a snug fit. The self-lining feature accommodates doors up to 2 inches thick. If your door is thinner, the liner will adjust. Trim any excess material if necessary to prevent binding.
- Secure Frames: Position the inner and outer frames of the cat flap on either side of the door opening. Align them carefully.
- Drill Screw Holes: Mark the positions for the screw holes through the pre-drilled holes in the cat flap frames. Drill pilot holes into the door at these marks.
- Fasten: Insert the provided screws through the frames and into the door, securing the cat flap firmly in place. Do not overtighten.
- Seal (Optional): For enhanced weatherproofing, apply a bead of silicone sealant around the exterior frame of the cat flap.

Figure 4: Cat Mate Lockable Cat Flap, Front View

Figure 5: Cat Mate Lockable Cat Flap, Angled View
Operating Instructions
The Cat Mate Lockable Cat Flap features a simple 2-way locking mechanism to control your cat's access.
Locking Mechanism:
- Unlocked (Free Access): When the red slider is in the central position, the flap can swing freely in both directions, allowing your cat to enter and exit.
- Locked (No Access): Slide the red locking mechanism to the side (usually indicated by a lock icon) to prevent the flap from opening in either direction. This secures your home and keeps your cat indoors or outdoors as desired.
The flap is equipped with a magnetic closure to ensure it remains shut when not in use, providing a draft-proof seal.

Figure 6: Side View showing Locking Mechanism and Weather Strip
Care and Maintenance
Regular cleaning and inspection will help maintain the performance and appearance of your cat flap.
- Cleaning: Wipe the cat flap frames and flap with a damp cloth and mild detergent. Avoid abrasive cleaners that may scratch the surface.
- Brush Strip: Periodically check the brush weather strip for debris or wear. Clean as needed to ensure a good seal and silent action.
- Hinge and Latch: Inspect the flap's hinges and the locking mechanism for smooth operation. If the latch feels stiff, ensure no debris is obstructing its movement.
- Frame Seal: Check the frame rain seal for any damage or gaps that could compromise weatherproofing.
Troubleshooting
| Problem | Possible Cause | Solution |
|---|---|---|
| Flap does not close properly. | Debris in brush strip or magnetic closure area; damaged magnet. | Clean the brush strip and magnet area. Check if the magnet is still functional. |
| Flap is stiff or difficult to open/close. | Obstruction in hinges; untrimmed molding flash (from manufacturing); misaligned installation. | Inspect hinges for debris. Check for any plastic molding flash that might be causing friction and carefully trim if present. Ensure the frame is not distorted from overtightening during installation. |
| Cat is reluctant to use the flap. | Unfamiliarity; fear of the flap's movement or sound. | Prop the flap open initially to allow the cat to get used to the opening. Gradually lower the flap, encouraging use with treats and positive reinforcement. Allow time for adjustment. |
| Drafts or water ingress around the flap. | Damaged frame seal; improper installation; worn brush strip. | Inspect the frame rain seal and brush strip for damage and replace if necessary. Ensure the cat flap was installed correctly and sealed adequately. |
Warranty Information
The Cat Mate Lockable Cat Flap (Model 234W) comes with a 3-year guarantee from the date of purchase. This warranty covers manufacturing defects and material faults under normal use. Please retain your proof of purchase for any warranty claims.
For full terms and conditions, or to make a warranty claim, please refer to the official Cat Mate website or contact customer support.
Customer Support
Should you have any questions, require assistance with installation, or need to report a fault, please contact Cat Mate customer support.
- Website: Visit the official Cat Mate Store for product information and FAQs.
- Manufacturer: Ani Mate - Pet Products


