
Sunbeam 005891-000-000
Sunbeam Programmable Bread Maker
Model: 005891-000-000
Brand: Sunbeam
Introduction
Welcome
Thank you for choosing the Sunbeam Programmable Bread Maker. This appliance is designed to simplify the bread-making process, allowing you to enjoy fresh, homemade bread with minimal effort. Please read this manual thoroughly before first use to ensure safe and efficient operation.
Important Safeguards
- Read all instructions before using the bread maker.
- Do not touch hot surfaces. Use oven mitts when handling hot parts.
- To protect against electrical shock, do not immerse cord, plugs, or the appliance in water or other liquid.
- Close supervision is necessary when any appliance is used by or near children.
- Unplug from outlet when not in use and before cleaning. Allow to cool before putting on or taking off parts.
- Avoid contact with moving parts.
- Do not operate any appliance with a damaged cord or plug or after the appliance malfunctions or has been damaged in any manner.
Product Components
Bread Maker Unit

Front view of the Sunbeam Programmable Bread Maker, showcasing its compact design and control panel.
Control Panel and Display
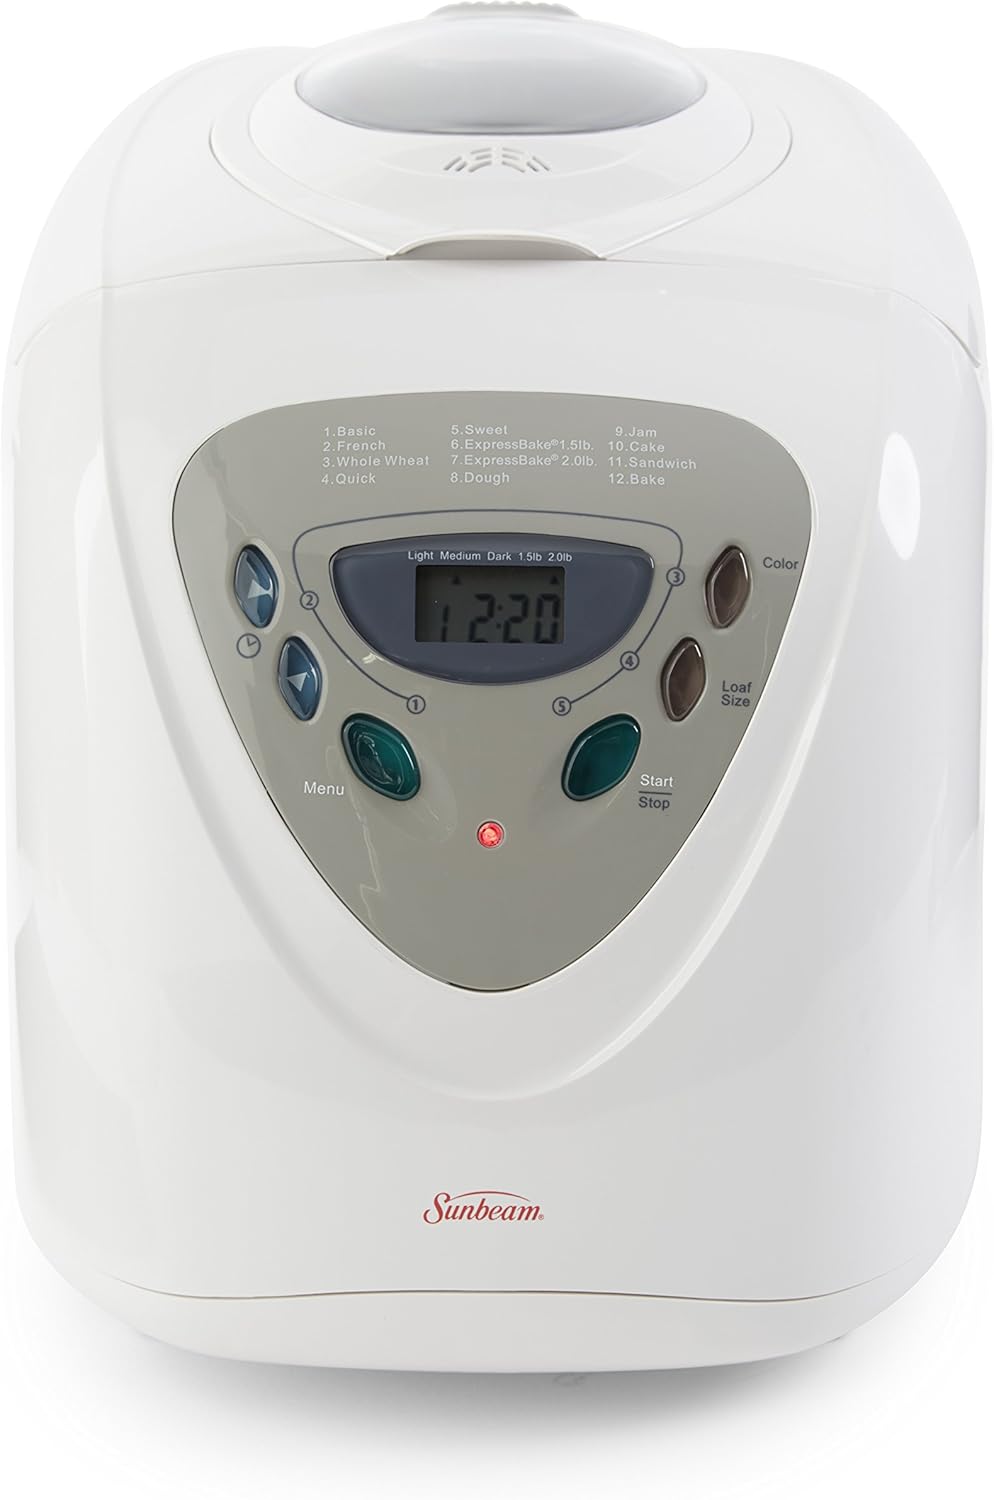
Close-up of the bread maker's control panel, featuring an LED display, menu buttons, and options for crust color and loaf size.
Removable Baking Pan & Kneading Paddle
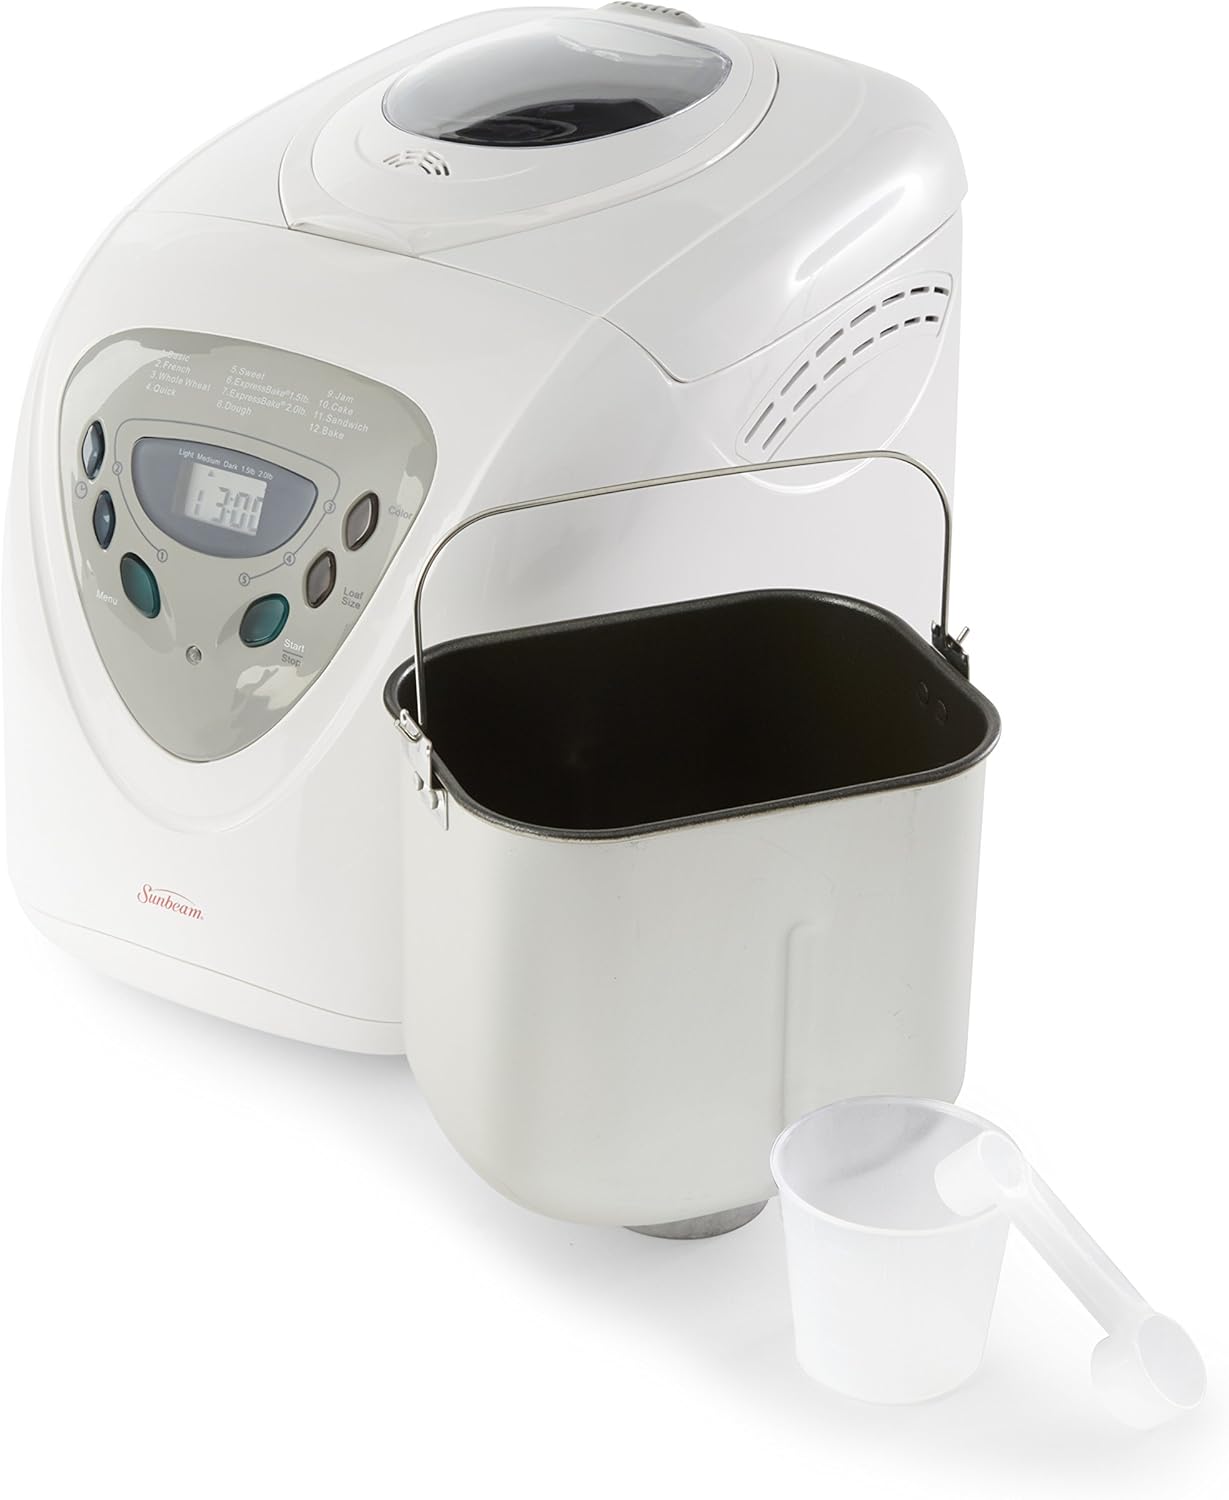
The bread maker unit with its removable non-stick baking pan and included measuring cup and spoon, ready for use.

Top-down view of the non-stick baking pan, showing the central spindle for the kneading paddle.
Interior View

The bread maker with its lid open, revealing the interior cavity designed to hold the baking pan and the heating element.
Setup Guide
Unpacking
- Remove all packaging materials and promotional labels from the bread maker.
- Wash the baking pan, kneading paddle, and any included accessories (measuring cup, spoon) with warm, soapy water. Rinse thoroughly and dry completely.
- Wipe the exterior of the bread maker unit with a damp cloth.
Placement
- Place the bread maker on a stable, flat, and heat-resistant surface.
- Ensure there is adequate space and ventilation around the unit, especially above the lid, to allow heat to escape during operation.
First Use
- Plug the bread maker into a grounded electrical outlet.
- It is recommended to run a short "Bake" cycle (Program 12) without any ingredients for about 10 minutes during the first use. This helps to burn off any manufacturing oils and may produce a slight odor, which is normal and will dissipate.
Operating Instructions
Adding Ingredients
- Ensure the kneading paddle is securely attached to the shaft at the bottom of the baking pan.
- Add ingredients to the baking pan in the following order: liquids (water, milk, eggs), then dry ingredients (flour, sugar, salt, dry milk), and finally yeast. Ensure yeast does not come into direct contact with liquids or salt initially.
- Place the filled baking pan into the bread maker unit. Twist gently to lock it into place.
- Close the lid firmly.
Selecting a Program
- Press the "Menu" button repeatedly to cycle through the 12 available baking programs. The corresponding program number will be displayed on the LED screen.
- Available Programs: 1. Basic, 2. French, 3. Whole Wheat, 4. Quick, 5. Sweet, 6. ExpressBake 1.5lb, 7. ExpressBake 2.0lb, 8. Dough, 9. Jam, 10. Cake, 11. Sandwich, 12. Bake.
Crust Color and Loaf Size
- Press the "Color" button to select your desired crust shade: Light, Medium, or Dark.
- Press the "Loaf Size" button to select the loaf weight: 1.5 lb or 2.0 lb. (Note: Not all programs support both loaf sizes.)
Delay Bake Function
- To delay the start of the baking cycle, use the timer buttons (up/down arrows) to set the desired delay time, up to 13 hours. The display will show the total time until completion.
- Caution: Do not use the delay bake function with perishable ingredients such as fresh milk, eggs, cheese, or fresh fruit, as they may spoil.
Starting the Cycle
- Once all settings are chosen, press the "Start/Stop" button to begin the program. The display will show the remaining time.
During the Cycle
- The bread maker will automatically perform kneading, rising, and baking stages.
- Some programs may beep during the kneading cycle to indicate the optimal time to add fruits, nuts, or other additional ingredients.
- Avoid opening the lid frequently during the baking stage to prevent heat loss, which can affect bread quality.
End of Cycle
- When the baking cycle is complete, the bread maker will beep several times.
- Press and hold the "Start/Stop" button for a few seconds to turn off the unit and the keep-warm function.
- Carefully remove the baking pan from the bread maker using oven mitts, as it will be hot.
- Invert the pan to release the bread onto a wire cooling rack. If the kneading paddle remains embedded in the bread, carefully remove it using a non-metallic utensil.
- Allow the bread to cool completely on the wire rack before slicing for best results.
Care and Maintenance
Cleaning
- Always unplug the bread maker from the power outlet and allow it to cool completely before cleaning.
- Baking Pan & Kneading Paddle: Wash the non-stick baking pan and kneading paddle with warm, soapy water. Do not use abrasive cleaners, metal scourers, or put them in a dishwasher, as this can damage the non-stick coating.
- Exterior: Wipe the exterior of the bread maker with a soft, damp cloth. Do not immerse the main unit in water or any other liquid.
- Interior: Use a damp cloth to wipe the interior cavity of the bread maker and the heating element. Remove any crumbs or residue.
Storage
- Ensure all parts are thoroughly clean and dry before storing the appliance.
- Store the bread maker in a cool, dry place, away from direct sunlight or heat sources.
Troubleshooting
If you encounter issues with your Sunbeam Bread Maker, please consult the following common problems and solutions:
- Bread Does Not Rise:
- Check the expiration date of your yeast. Old yeast will not activate.
- Ensure the liquid temperature is correct (around 105-115°F or 40-46°C). Too hot or too cold water can kill or inhibit yeast.
- Verify all ingredient measurements are accurate, especially yeast, sugar, and salt.
- Bread is Too Dense/Heavy:
- Too much flour or not enough liquid. Adjust measurements carefully.
- Yeast may be inactive or insufficient.
- Bread Collapses/Sinks:
- Too much liquid or too much yeast. Reduce slightly in future recipes.
- High humidity can sometimes cause bread to collapse.
- Kneading Paddle Stuck in Bread:
- This is common. Allow the bread to cool slightly.
- Use a non-metallic utensil (e.g., plastic spatula) to gently dislodge the paddle.
- Machine Does Not Start:
- Ensure the power cord is securely plugged into a working electrical outlet.
- Verify that the lid is fully closed and the baking pan is correctly seated.
- Check that a program has been selected on the control panel.
- Unusual Odor During First Use:
- A slight burning smell is normal during the first few uses as manufacturing oils burn off. This will dissipate with continued use.
Specifications
| Feature | Detail |
|---|---|
| Brand | Sunbeam |
| Model Number | 005891-000-000 |
| Color | White |
| Wattage | 600 watts |
| Number of Programs | 12 |
| Loaf Capacity | Up to 2 lb |
| Product Dimensions | 15 x 10 x 13 inches |
| Item Weight | 16.9 pounds |
| First Available | October 2, 2001 |
Warranty and Support
For detailed warranty information and customer support, please refer to the official user manual provided with your product. The manual contains specific terms, conditions, and contact information for service and inquiries. You can also visit the Sunbeam Store for additional resources. A downloadable PDF version of the user manual is available here.
Related documents005891-000-000


Ask a question about this manual
Ask about setup, troubleshooting, compatibility, parts, safety, or missing instructions. Manuals+ will review the question and use this page’s manual context to help answer it.