Important Safety Instructions
Please read these safety instructions carefully before operating the unit. Keep this manual for future reference.
- Power Source: Ensure the power supply voltage matches the rating indicated on the unit.
- Water and Moisture: Do not expose this appliance to rain, moisture, dripping, or splashing. Do not place objects filled with liquids, such as vases, on the apparatus.
- Ventilation: Do not block any ventilation openings. Install in accordance with the manufacturer's instructions.
- Heat: Do not install near any heat sources such as radiators, heat registers, stoves, or other apparatus (including amplifiers) that produce heat.
- Cleaning: Unplug this product from the wall outlet before cleaning. Use a dry cloth for cleaning.
- Servicing: Do not attempt to service this product yourself as opening or removing covers may expose you to dangerous voltage or other hazards. Refer all servicing to qualified service personnel.
Package Contents
Verify that all items listed below are included in your package:
- Elta 3502 Hi-Fi Radio Unit
- Power Cable
- User Manual (this document)
Product Overview
Familiarize yourself with the components and controls of your Elta 3502 Hi-Fi Radio.
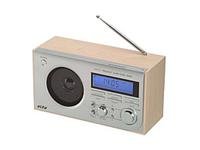
Image: Front view of the Elta 3502 Hi-Fi Radio, showcasing the LCD display, tuning and volume knobs, and various function buttons. The unit features a silver finish with wooden side panels.
Front Panel Controls
- LCD Display: Shows current time, radio frequency, and alarm status.
- Power Button: Turns the unit on or off.
- Function/Mode Button: Switches between FM, MW, and Clock modes.
- Tuning Knob: Adjusts radio frequency for station selection.
- Volume Knob: Controls the audio output level.
- Alarm Set Button: Enters alarm setting mode.
- Time Set Button: Enters clock setting mode.
- Snooze Button: Temporarily silences the alarm.
Rear Panel
- AC Power Input: Connects the power cable.
- Telescopic Antenna: Extend for optimal FM reception.
Setup
1. Power Connection
- Ensure the unit is placed on a stable, flat surface.
- Connect the power cable to the AC Power Input on the rear panel of the radio.
- Plug the other end of the power cable into a standard wall outlet.
2. Antenna Setup
- For FM reception, fully extend the telescopic antenna located on the rear panel. Adjust its position for the best signal.
- For MW (AM) reception, the unit uses a built-in ferrite bar antenna. Rotate the entire radio unit for optimal reception.
Operating Instructions
1. Basic Radio Operation
- Press the Power Button to turn on the radio. The LCD display will illuminate.
- Press the Function/Mode Button repeatedly to select either FM or MW band. The selected band will be shown on the display.
- Rotate the Tuning Knob to search for radio stations. The frequency will change on the LCD display.
- Adjust the Volume Knob to your desired listening level.
- To turn off the radio, press the Power Button again.
2. Setting the Clock
- Ensure the radio is in standby mode (off).
- Press and hold the Time Set Button until the hour digits start flashing on the LCD display.
- Rotate the Tuning Knob to adjust the hour.
- Press the Time Set Button again to confirm the hour and move to minute setting. The minute digits will flash.
- Rotate the Tuning Knob to adjust the minutes.
- Press the Time Set Button one last time to save the time and exit clock setting mode.
3. Setting the Alarm
- Ensure the radio is in standby mode (off).
- Press and hold the Alarm Set Button until the alarm hour digits start flashing on the LCD display.
- Rotate the Tuning Knob to adjust the alarm hour.
- Press the Alarm Set Button again to confirm the alarm hour and move to minute setting. The alarm minute digits will flash.
- Rotate the Tuning Knob to adjust the alarm minutes.
- Press the Alarm Set Button one last time to save the alarm time. The alarm icon will appear on the display, indicating the alarm is active.
- To deactivate the alarm, press the Alarm Set Button briefly when the radio is in standby mode. The alarm icon will disappear.
- When the alarm sounds, press the Snooze Button to temporarily silence it for a few minutes. To turn off the alarm completely, press the Power Button.
Maintenance
Proper care will ensure long-lasting performance from your Elta 3502 Hi-Fi Radio.
- Cleaning: Always unplug the unit before cleaning. Use a soft, dry cloth to wipe the exterior surfaces. Do not use abrasive cleaners, waxes, or solvents as they may damage the finish.
- Storage: If the unit is not used for an extended period, unplug it from the power outlet and store it in a cool, dry place, away from direct sunlight and extreme temperatures.
Troubleshooting
If you encounter any issues with your radio, refer to the table below for common problems and solutions.
| Problem | Possible Solution |
|---|---|
| No power | Check if the power cable is securely connected to both the radio and the wall outlet. Ensure the wall outlet is functional. |
| Poor radio reception (FM) | Fully extend and adjust the telescopic antenna. Try repositioning the radio unit. |
| Poor radio reception (MW/AM) | Rotate the entire radio unit to find the best signal direction for the internal antenna. |
| Alarm does not sound | Ensure the alarm is activated (alarm icon visible on display). Verify the alarm time is set correctly. |
| Display is blank or flickering | Unplug the unit for a few minutes, then plug it back in to reset. If the problem persists, contact customer support. |
Specifications
Technical details of the Elta 3502 Hi-Fi Radio:
| Feature | Detail |
|---|---|
| Brand | Elta |
| Model | 3502 |
| Dimensions (L x W x H) | 11 x 26.6 x 15.9 cm |
| Weight | 1.4 Kilograms |
| Radio Bands Supported | AM, FM |
| Display Type | LCD |
| Special Features | Digital Clock, Alarm Function, Telescopic Antenna |
| Power Source | AC Power |
Warranty and Support
This Elta 3502 Hi-Fi Radio comes with a standard manufacturer's warranty. For specific warranty terms and conditions, please refer to the warranty card included with your purchase or contact your retailer.
For technical support, service, or inquiries regarding your product, please contact Elta customer service through their official website or the contact information provided by your retailer.