Introduction
This instruction manual provides detailed guidance for assembling the Italeri 7402 1:9 scale Triumph Motorcycle plastic model kit. Please read all instructions carefully before beginning assembly. This kit is designed for model enthusiasts aged 15 years and up, requiring precision and attention to detail.

Image: The product box for the Italeri 7402 1:9 Triumph Motorcycle model kit, showing the completed model illustration.
Safety Information
WARNING: SMALL PARTS. This model kit contains small parts which may pose a choking hazard. Keep out of reach of small children. Adult supervision is recommended during assembly, especially for younger modelers. Always use tools carefully and in a well-ventilated area when painting or using adhesives.
Package Contents
Upon opening the box, verify that all components are present and undamaged. The kit typically includes:
- Multiple plastic sprues containing various motorcycle parts.
- Clear plastic sprue for transparent parts (e.g., headlights).
- Rubber tires.
- Decal sheet.
- Instruction booklet.

Image: Plastic sprue A, containing parts for the seat, a wheel, and fender components.

Image: Plastic sprue B, featuring various engine and frame parts.
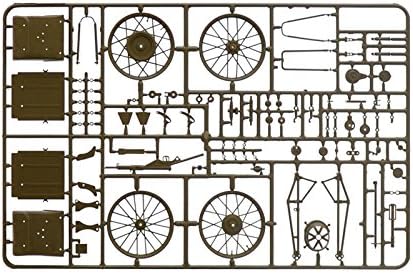
Image: Plastic sprue C, including parts for wheels, additional frame elements, and saddlebags.

Image: Plastic sprue D, showing components such as the fuel tank, fenders, and engine details.

Image: Clear plastic sprue, containing transparent parts like headlight lenses.

Image: Two rubber tires, designed for the motorcycle model's wheels.
Recommended Tools
The following tools are recommended for optimal assembly and finishing of your model kit:
- Plastic cement (e.g., Italeri Plastic Cement with Brush, Art. Nr. 510003990)
- Hobby knife with spare blades (e.g., Italeri Professional Hobby Knife with Blades, Art. Nr. 5100050825)
- Side cutters or sprue nippers
- Tweezers (e.g., Italeri Precision Tweezers, straight, Art. Nr. 5100050814)
- Sanding sticks or fine-grit sandpaper
- Paint brushes (various sizes)
- Masking tape (e.g., Italeri Masking Film Roll 3mm, Art. Nr. 5100050826; 6mm, Art. Nr. 5100050827)
- Cutting mat (e.g., Italeri Cutting Mat A 230x160mm, Art. Nr. 5100050829)
- Pin vise with drill bits (e.g., Italeri Hand Drill with 5 Drills, Art. Nr. 5100050831)
- Acrylic thinner (e.g., Italeri Acrylic Thinner 60ml, Art. Nr. 510005049)

Image: A visual guide to recommended tools for model building, including cutters, a hobby knife, and various adhesives.
Painting Guide
Achieving an authentic finish requires careful painting. Refer to the following list for recommended paint colors and optional aging washes. All listed items are Italeri brand unless otherwise specified.
Paints Required:
| Art. Nr. | Description |
|---|---|
| 510004695 | IT Acrylfabe Schwarz glänzend 20ml (Gloss Black) |
| 510004677 | IT Acrylfabe Aluminium matt 20ml (Matt Aluminum) |
| 510004605 | IT Acrylfabe Rot glänzend 20ml (Gloss Red) |
| 510004681 | IT Acrylfabe Metallgrau matt 20ml (Matt Gunmetal) |
| 510004768 | IT Acrylfabe Schwarz matt 20ml (Matt Black) |
| 510004678 | IT Acrylfabe Silber glänzend 20ml (Gloss Silver) |
| 510004709 | IT Acrylfabe Dkl. Braun/Tan matt 20ml (Dark Brown/Tan Matt) |
| 510004726 | IT Acrylfabe Dkl. Grün matt 20ml (Dark Green Matt) |
| 510004728 | IT Acrylfabe US Braunoliv matt 20ml (US Brown Olive Matt) |
Optional Aging Washes:
| Art. Nr. | Description |
|---|---|
| 510004951 | IT Dunkelbraun (Acryl Model Wash) (Dark Brown Model Wash) |
| 510004952 | IT Schwarz (Acryl Model Wash) (Black Model Wash) |
| 510004953 | IT Oiled Earth (Acryl Model Wash) |
| 510004954 | IT Rost (Acryl Model Wash) (Rust Model Wash) |
| 510004955 | IT Grau (Acryl Model Wash) (Grey Model Wash) |
| 510004956 | IT Dunkelgrün (Acryl Model Wash) (Dark Green Model Wash) |

Image: A detailed chart showing required paints and optional aging washes with their respective Italeri article numbers and descriptions.
Assembly Instructions
Follow the numbered steps in the included instruction booklet for precise assembly. General steps include:
- Part Preparation: Carefully remove parts from the sprues using side cutters. Clean any excess plastic (flash) with a hobby knife or sandpaper. Test fit parts before applying cement.
- Sub-Assemblies: Begin by assembling smaller sections such as the engine block, transmission, and wheel hubs. Allow cement to dry completely before proceeding.
- Frame Assembly: Construct the main frame of the motorcycle. Ensure proper alignment as this forms the foundation of the model.
- Engine and Drivetrain Installation: Mount the assembled engine and drivetrain components onto the frame. Attach the chain and gears, ensuring they fit correctly.
- Wheel Assembly: Assemble the wheels, attaching the rubber tires to the plastic rims. Install the wheels onto the forks and swingarm.
- Bodywork and Details: Attach the fuel tank, fenders, handlebars, exhaust pipes, and other detailed components. Use clear parts for headlights and other transparent elements.
- Painting: Apply paints as per the painting guide. It is often easier to paint certain sub-assemblies before final attachment.
- Decal Application: Apply decals to the painted surfaces once the paint is dry. Refer to the decal application section for best practices.
- Final Touches: Add any remaining small details and perform touch-up painting as needed.

Image: An illustration depicting the fully assembled Italeri 1:9 Triumph Motorcycle model, showcasing its detailed design.
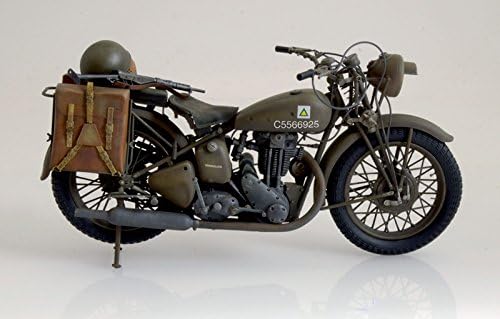
Image: A photograph of the completed Italeri 1:9 Triumph Motorcycle model, highlighting its realistic appearance and intricate details.
Decal Application
Decals add important markings and realism to your model. Follow these steps for proper application:
- Ensure the surface where the decal will be applied is clean and smooth. A gloss coat is often recommended for best results.
- Cut out the desired decal from the sheet as close to the image as possible, without cutting into the image itself.
- Dip the decal in lukewarm water for 10-20 seconds until it slides freely on its backing paper.
- Carefully slide the decal from the backing paper onto the model surface using tweezers or a soft brush.
- Position the decal correctly. You can use a small amount of water on the model surface to allow for minor adjustments.
- Gently blot away excess water with a soft, lint-free cloth or cotton swab.
- Once dry, a decal setting solution can be used to help the decal conform to irregular surfaces and eliminate silvering.
- After the decals are completely dry, a clear topcoat (gloss or matt, depending on the desired finish) can be applied to protect them.

Image: The decal sheet provided with the Italeri 7402 kit, featuring various markings and logos for the Triumph motorcycle model.
Specifications
- Brand: Italeri
- Model Name: Triumph Motorcycle
- Model Number: 510007402 (also known as 7402)
- Scale: 1:9
- Material: Plastic
- Completed Size (approx.): 23.1 cm (length)
- Recommended Age: 15 years and up
- Item Weight: Approximately 0.5 Kilograms (1.1 pounds)
- Theme: Vehicle (Motorcycle)
- Style: Military (referring to the specific Triumph 3HW model)
Warranty and Support
Italeri model kits are manufactured to high standards. In the event of missing or defective parts, please contact Italeri customer support directly. Keep your proof of purchase and the product's model number (7402 or 510007402) readily available when contacting support. Specific warranty details may vary by region; refer to the manufacturer's official website or contact their customer service for the most accurate information.
For further assistance or inquiries, please visit the official Italeri website or consult your local hobby retailer.