
Audio-Technica PRO41
Audio-Technica PRO41 Cardioid Dynamic Handheld Microphone User Manual
Model: PRO41
Introduction
The Audio-Technica PRO41 is a professional-grade cardioid dynamic handheld microphone designed for clear, full-range vocal reproduction in various performance settings. Its robust construction ensures durability for daily use, while advanced internal features minimize handling noise and isolate the desired sound source effectively.
Key Features
- Natural, Full-Range Vocal Reproduction: Optimized for close-up vocal use, delivering clear and articulate sound.
- Superior Internal Shock Mounting: Engineered to significantly reduce handling noise, ensuring clean audio capture.
- Cardioid Polar Pattern: Effectively minimizes pickup of sounds from the sides and rear, enhancing isolation of the primary sound source and reducing feedback.
- Hi-ENERGY Neodymium Magnet: Provides high output and articulate vocal reproduction.
- Two-Stage Ball-Type Head Case: Offers excellent "pop" protection, reducing plosive sounds for smoother vocals.
Package Contents
Upon opening the package, verify that all components are present:
- Audio-Technica PRO41 Handheld Microphone
- Microphone Stand Clamp (AT8470)
- 5/8"-27 to 3/8"-16 Threaded Adapter
- Soft Protective Pouch
- XLR Cable (if included with specific model variant)
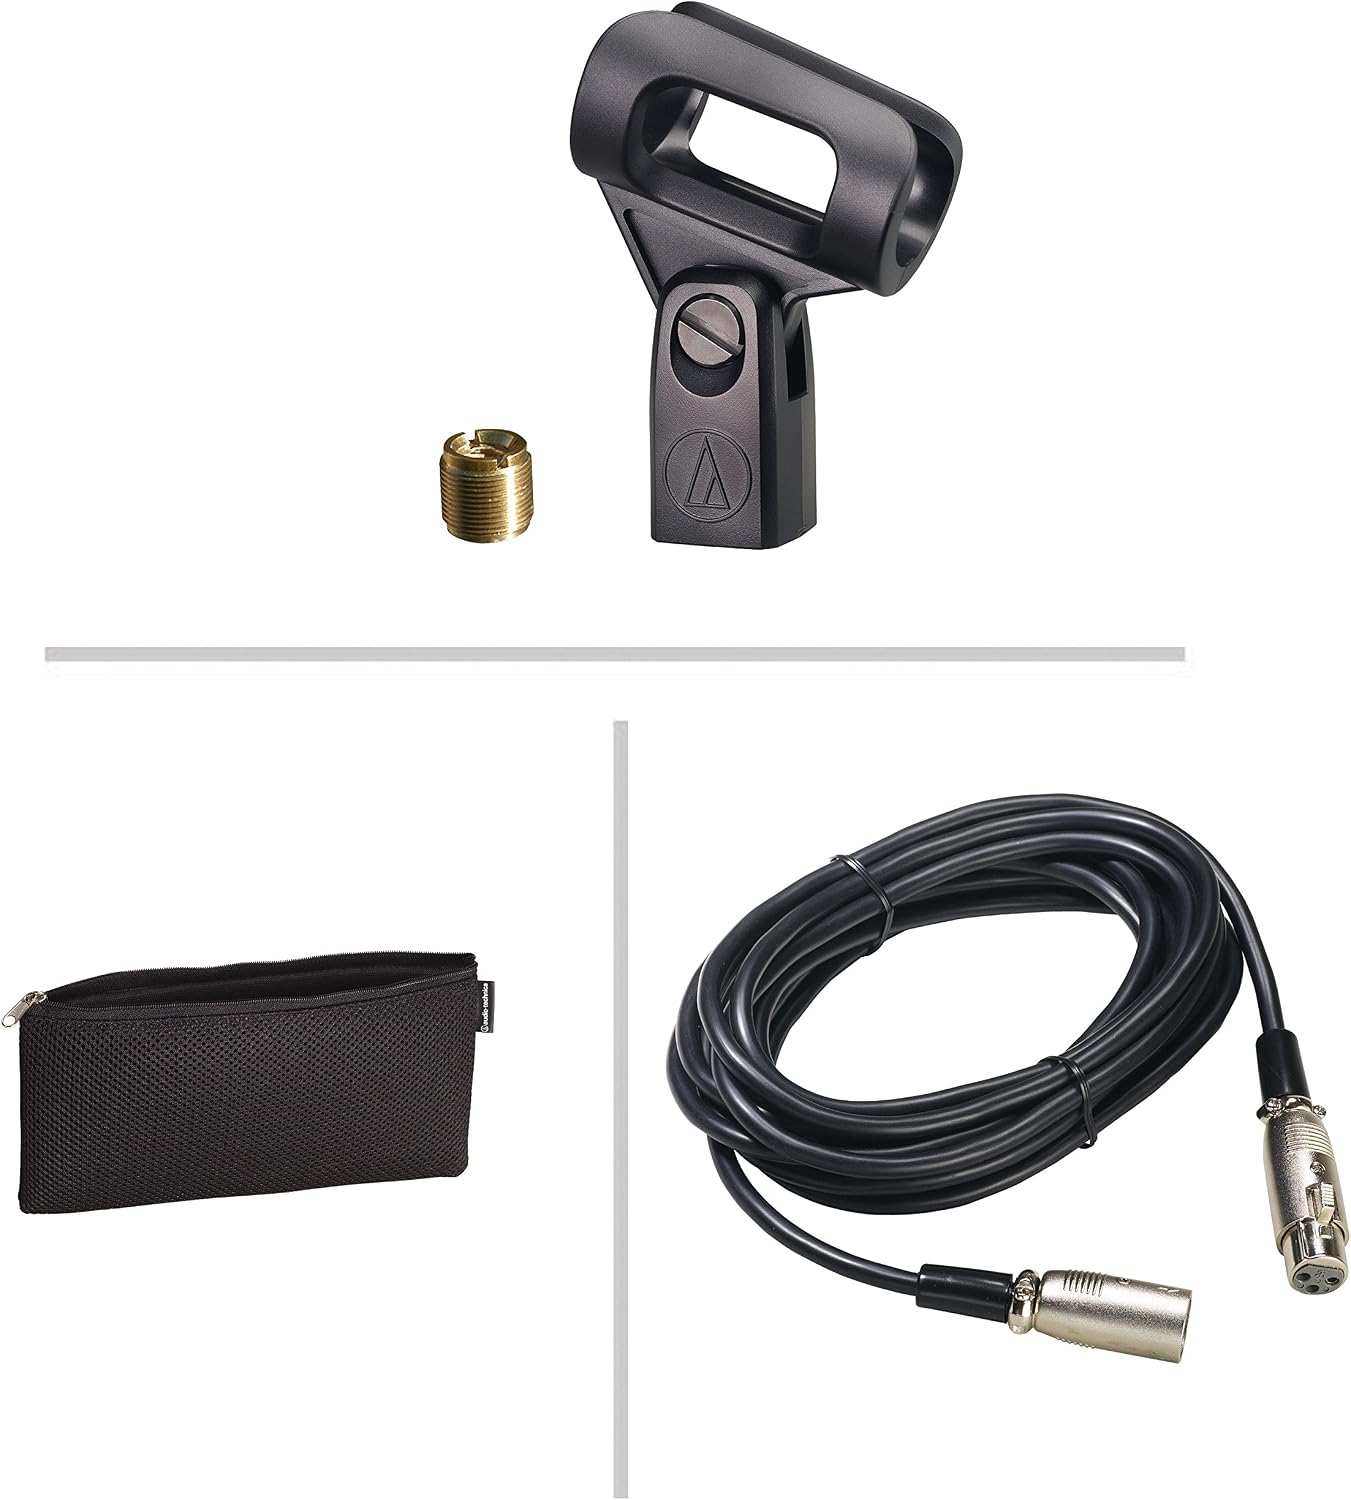
Image: Included accessories for the PRO41 microphone. This includes the microphone clip, a threaded adapter for different stand types, a soft carrying pouch, and an XLR cable for connection.
Setup
- Unpacking: Carefully remove the microphone and all accessories from the packaging.
- Attaching to a Stand (Optional):
- Screw the provided microphone stand clamp (AT8470) onto a standard microphone stand. If your stand has a different thread size, use the included threaded adapter.
- Gently insert the PRO41 microphone into the clamp, ensuring it is securely held.

Image: The PRO41 microphone securely attached to a microphone stand, demonstrating a typical setup for performance or recording.
- Connecting the Cable:
- Locate the XLR connector at the base of the microphone.
- Connect one end of a standard XLR cable (3-pin) to the microphone's XLR output.
- Connect the other end of the XLR cable to the microphone input of your mixer, audio interface, amplifier, or other compatible audio equipment. Ensure a secure connection.
Operating Instructions
The PRO41 is designed for straightforward operation. Follow these guidelines for optimal performance:
- Powering On/Off:
- The PRO41 features an integrated on/off switch located on the microphone body.
- Slide the switch to the "ON" position to activate the microphone.
- Slide the switch to the "OFF" position to deactivate the microphone when not in use or during setup changes to prevent unwanted noise.

Image: A close-up of the PRO41 microphone, highlighting the prominent on/off switch for easy control during live performances or recording sessions.
- Microphone Placement:
- For vocal applications, hold the microphone approximately 1-6 inches (2.5-15 cm) from your mouth. Experiment with distance to achieve the desired vocal presence and tone.
- Due to its cardioid polar pattern, the microphone is most sensitive to sounds directly in front of it. Point the top of the microphone directly at the sound source you wish to capture.
- To minimize feedback, avoid pointing the microphone directly at loudspeakers or monitors.
- Gain Staging:
- Adjust the gain (input level) on your mixer or audio interface to ensure a strong signal without clipping (distortion).
- Start with the gain low and gradually increase it while speaking or singing into the microphone at your typical performance volume.
Maintenance
Proper maintenance will extend the life and performance of your PRO41 microphone:
- Cleaning: Use a soft, dry cloth to wipe down the microphone body. For the grille, a soft brush can be used to remove debris. Do not use liquid cleaners directly on the microphone.
- Storage: When not in use, store the microphone in its protective pouch to shield it from dust, moisture, and physical damage.
- Handling: Avoid dropping the microphone or subjecting it to strong impacts, as this can damage internal components.
- Environmental Conditions: Keep the microphone away from extreme temperatures, high humidity, and direct sunlight.
Troubleshooting
| Problem | Possible Cause | Solution |
|---|---|---|
| No Sound Output |
|
|
| Low Volume / Weak Signal |
|
|
| Feedback (Squealing Sound) |
|
|
| Distorted Sound |
|
|
Specifications
| Feature | Detail |
|---|---|
| Microphone Type | Dynamic |
| Polar Pattern | Cardioid (Unidirectional) |
| Frequency Response | 90 Hz - 16,000 Hz |
| Connectivity Technology | XLR |
| Connector Type | XLR |
| Item Weight | 1.9 pounds (approx. 0.86 kg) |
| Product Dimensions (L x W x H) | 9.8 x 5.1 x 2.9 inches (approx. 24.9 x 13 x 7.4 cm) |
| Included Components | Handheld Microphone, Stand Clamp, Threaded Adapter, Soft Pouch |
| Color | Black |
Note: Specifications are subject to change without notice.
Warranty and Support
Audio-Technica products are manufactured to high quality standards and are backed by a limited warranty. For specific warranty terms and conditions, please refer to the warranty card included with your product or visit the official Audio-Technica website.
For technical support, service, or replacement parts, please contact Audio-Technica customer service through their official website or the contact information provided in your product documentation. When contacting support, please have your product model (PRO41) and serial number (if applicable) ready.
Official Website: www.audio-technica.com
Ask a question about this manual
Ask about setup, troubleshooting, compatibility, parts, safety, or missing instructions. Manuals+ will review the question and use this page’s manual context to help answer it.