
1. Introduction
This manual provides comprehensive instructions for the proper setup, operation, and maintenance of your DW Drum Workshop CP9300 9000 Series Heavy Duty Snare Stand. Please read this manual thoroughly before use to ensure optimal performance and longevity of your equipment.
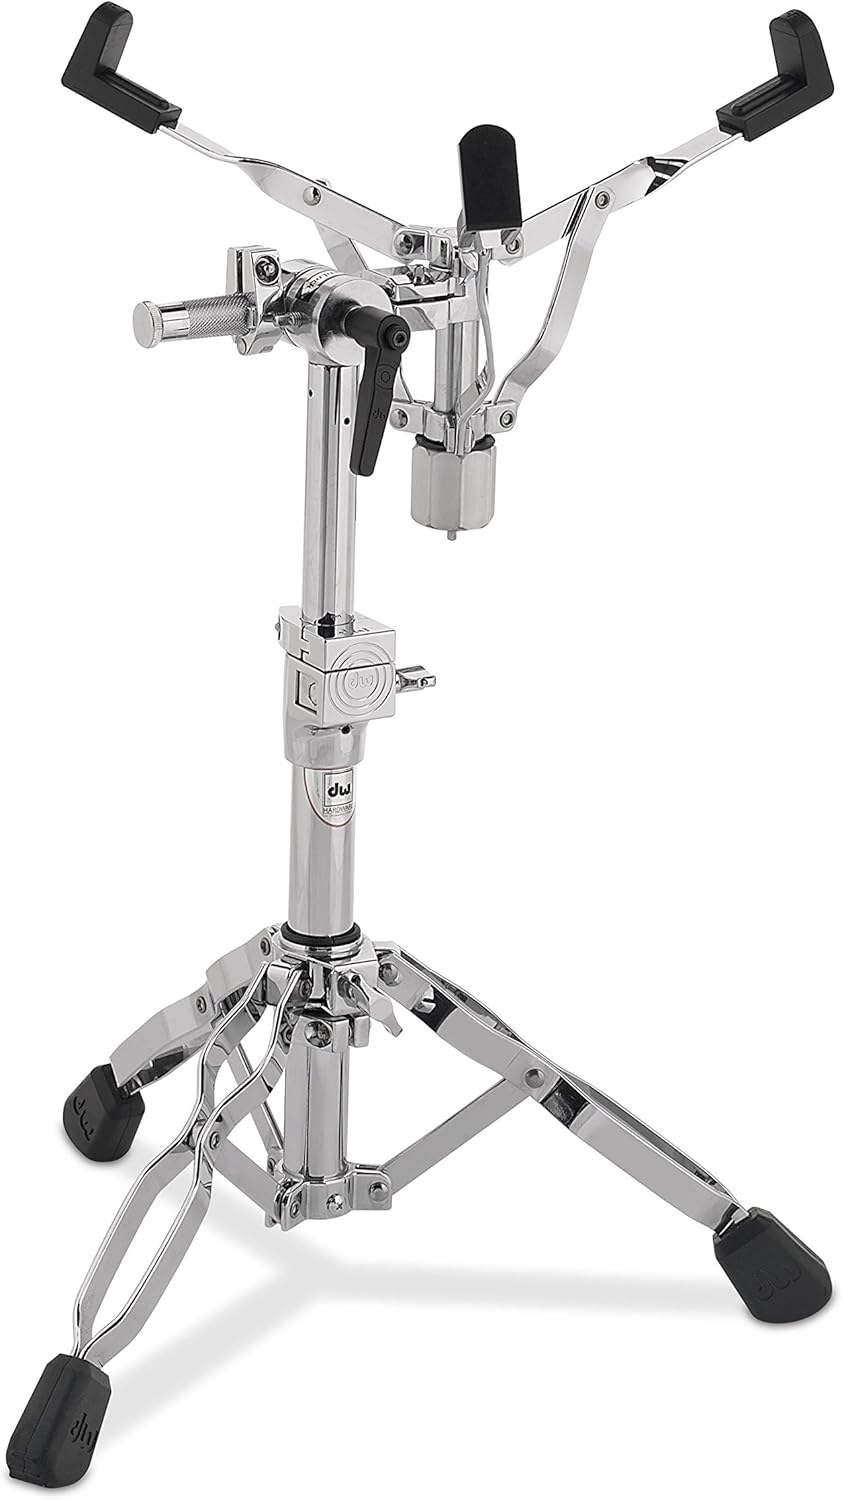
Figure 1: Fully assembled DW CP9300 Snare Stand.
2. Setup
2.1 Unpacking
- Carefully remove all components from the packaging.
- Verify that all parts are present: main stand assembly (legs and lower tube), snare basket assembly (upper tube and basket).
- Retain packaging for future storage or transport.

Figure 2: Main components of the DW CP9300 Snare Stand, showing the base and the snare basket assembly separated.
2.2 Assembly
- Place the main stand assembly (legs and lower tube) on a flat, stable surface.
- Loosen the wing screw on the main stand's upper tube clamp.
- Insert the lower end of the snare basket assembly into the main stand's upper tube. Ensure the internal nylon bushing aligns properly.
- Adjust to the desired initial height and tighten the wing screw securely. Ensure the memory lock is positioned correctly for consistent height settings.

Figure 3: Detail of the snare basket assembly's lower tube, showing the connection point for insertion into the main stand.

Figure 4: Close-up of the height adjustment clamp with the DW logo, used to secure the upper tube.
3. Operating Instructions
3.1 Adjusting Snare Basket Angle and Position
- The snare basket features a Techlock toothless tilter for precise angle adjustments.
- Loosen the large black lever on the side of the snare basket assembly.
- Adjust the snare drum to the desired angle and rotation. The offset snare basket arm allows for flexible positioning.
- Once the desired position is achieved, firmly tighten the black lever.
- For additional security, a drum key can be used to tighten the small set screw on the Techlock mechanism.

Figure 5: Close-up view of the snare basket and its adjustment mechanism, showing the lever for angle and rotation.

Figure 6: Detailed view of the Techlock toothless tilter, providing infinite angle adjustments.
3.2 Adjusting Stand Height
- Loosen the wing screw on the main stand's upper tube clamp (refer to Figure 4).
- Raise or lower the snare basket assembly to the desired height.
- Tighten the wing screw firmly to secure the height.
- Utilize the memory lock to quickly return to a preferred height setting after disassembly.
3.3 Positioning Legs
- The double-braced legs provide stability. Spread the legs evenly for maximum support.
- The rubber feet on the legs prevent slipping and protect floor surfaces.

Figure 7: View of the robust double-braced legs and durable rubber feet, designed for stability.
4. Maintenance
- Cleaning: Wipe down chrome surfaces with a soft, dry cloth after each use to prevent smudges and corrosion. For stubborn dirt, use a mild chrome cleaner.
- Lubrication: Periodically apply a small amount of silicone-based lubricant to moving parts, such as the wing screws and the internal mechanisms of the tilter, to ensure smooth operation. Avoid over-lubrication.
- Inspection: Regularly check all screws, bolts, and rubber feet for tightness and wear. Replace any worn or damaged parts immediately to maintain stability and safety.
- Storage: When not in use, store the stand in a dry environment to prevent rust and damage.
5. Troubleshooting
| Issue | Possible Cause | Solution |
|---|---|---|
| Stand is unstable or wobbly. | Legs not fully spread; loose connections; uneven surface. | Ensure legs are fully extended and evenly spread. Check all wing screws and bolts for tightness. Move stand to a level surface. |
| Snare drum slips or changes angle. | Tilter lever not tightened sufficiently; worn tilter components. | Firmly tighten the Techlock tilter lever. If slipping persists, check for wear on the tilter mechanism and contact support if necessary. |
| Difficulty adjusting height. | Wing screw too tight; dirt/grime in tube; lack of lubrication. | Loosen the wing screw completely. Clean the inner and outer tubes. Apply a small amount of silicone lubricant to the inner tube. |
6. Specifications
| Model Number | DWCP9300 |
| Brand | Drum Workshop |
| Material | Steel, Nylon |
| Finish Type | Painted (Chrome) |
| Base Type | Leg (Double-braced) |
| Item Weight | 13 Pounds |
| Product Dimensions (L x W x H) | 22 x 7 x 7 inches |
| UPC | 647139107240 |
7. Warranty and Support
DW Drum Workshop products are manufactured to high standards and are backed by a limited warranty against defects in materials and workmanship. For specific warranty details, duration, and terms, please refer to the warranty card included with your purchase or visit the official Drum Workshop website.
For technical assistance, replacement parts, or any other inquiries, please contact Drum Workshop customer support through their official channels. When contacting support, please have your model number (DWCP9300) and purchase information readily available.
Official Website: www.dwdrums.com


