1. Introduction
This user manual provides comprehensive instructions for operating your Konica Minolta Dimage XG digital camera. Designed for ease of use, the Dimage XG features a 3.2-megapixel sensor, a 3x optical zoom lens, and various shooting modes to capture high-quality images and videos. Please read this manual thoroughly to ensure proper use and to maximize your camera's capabilities.
2. Safety Information
- Battery Safety: Use only the specified NP-200 lithium-ion battery and BC-700 charger. Do not expose batteries to excessive heat or dispose of them in fire. Keep batteries out of reach of children.
- Water and Moisture: This camera is not water-resistant. Avoid exposing it to rain, moisture, or high humidity to prevent damage.
- Cleaning: Use a soft, dry cloth for cleaning the camera body. For the lens and LCD screen, use a lens cleaning cloth and specialized cleaning solution if necessary. Avoid harsh chemicals.
- Operating Temperature: Operate the camera within recommended temperature ranges. Extreme temperatures can affect performance and battery life.
- Disassembly: Do not attempt to disassemble or modify the camera. Repairs should only be performed by authorized service personnel.
3. Package Contents
Verify that your package contains the following items:
- Konica Minolta Dimage XG Digital Camera
- Rechargeable Lithium-Ion Battery (NP-200)
- Battery Charger (BC-700)
- Hand Strap
- USB Cable
- 16 MB SD Memory Card
- CD-ROM with Dimage Viewer Software
4. Camera Overview
4.1 Front and Top View

This image displays the front and top of the Konica Minolta Dimage XG camera, highlighting the lens, flash, and power button. The Konica Minolta logo is visible on the silver casing.
4.2 Rear View
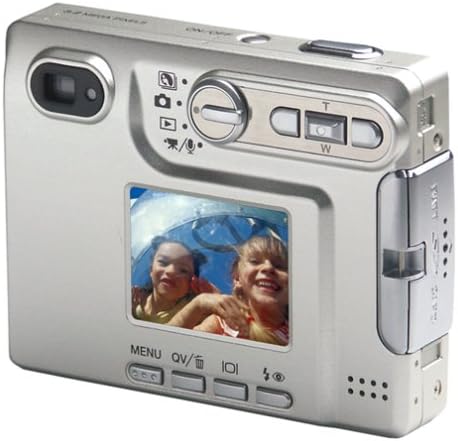
The rear view of the Dimage XG shows the 1.6-inch LCD screen, control buttons for menu navigation, playback, and the zoom rocker (W/T buttons).
4.3 Ergonomics and Size
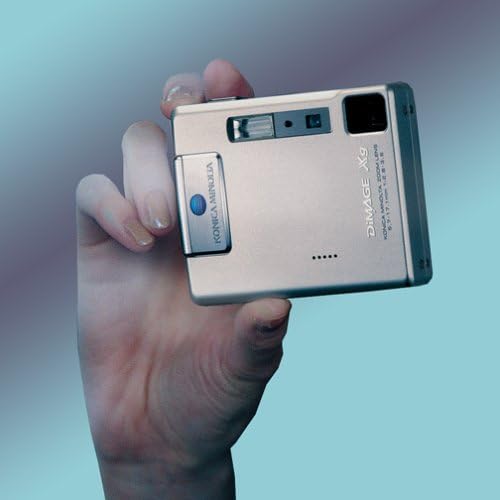
This image illustrates the compact size of the Konica Minolta Dimage XG, shown held comfortably in a hand, emphasizing its portability.
5. Setup
5.1 Charging the Battery
- Remove the NP-200 battery from the camera.
- Insert the battery into the BC-700 battery charger, ensuring correct orientation.
- Plug the charger into a power outlet. The charging indicator light will illuminate.
- Charging is complete when the indicator light changes or turns off (refer to charger instructions for specific behavior).
- Once charged, remove the battery from the charger.
5.2 Inserting the Battery
- Open the battery compartment cover on the camera.
- Insert the charged NP-200 battery according to the polarity indicators inside the compartment.
- Close the battery compartment cover securely.
5.3 Inserting a Memory Card
- Locate the memory card slot (compatible with SD or MultiMediaCard).
- Insert the memory card with the contacts facing the correct direction until it clicks into place.
- To remove, gently push the card in until it springs out.
6. Basic Operation
6.1 Powering On/Off
Press the ON/OFF button to power the camera on or off. The camera has a fast startup time of approximately 0.8 seconds.
6.2 Taking Still Photos
- Turn on the camera. The LCD monitor will display the live view.
- Frame your shot using the LCD or the optical viewfinder.
- Press the shutter button halfway down to activate autofocus. The camera will focus on the subject.
- Press the shutter button fully down to capture the image.
6.3 Using the Zoom
Use the W (Wide) and T (Telephoto) buttons to adjust the zoom. The camera features a 3x optical zoom and a 4x digital zoom, combining for a total of 12x zoom.
6.4 Flash Modes
Press the flash button to cycle through available flash modes:
- Auto Flash: Camera automatically determines if flash is needed.
- Fill Flash (Forced Flash): Flash fires regardless of ambient light.
- Red-Eye Reduction: Emits a pre-flash to reduce red-eye effect.
- Flash Off: Flash does not fire.
6.5 Subject Program Selection
The Dimage XG can automatically select the best recording mode. You can also manually select from:
- Portrait: Optimizes settings for portraits.
- Sports Action: Uses faster shutter speeds to freeze motion.
- Landscape: Enhances depth and color for scenic shots.
- Sunset: Captures the warm tones of sunsets.
- Night Portrait/Night View: For shooting in low-light conditions.
7. Advanced Features
7.1 Movie Recording with Audio
The Dimage XG can record video clips with audio. Available resolutions are 320x240 pixels or 160x120 pixels, both at 30 frames per second. Recording length is limited only by the memory card capacity.
- Night Movie: Enables color movies to be taken in dark environments.
- Movie Frame Capture: Allows isolating and saving individual frames from recorded video.
- Movie Clip Capture: Enables isolating and saving specific clips from recorded video.
7.2 Remote Camera Function
Connect the Dimage XG to your PC via the USB cable to use it as a webcam for video conferencing with standard Windows programs like Microsoft NetMeeting.
7.3 Voice Memo and Audio Caption
- Voice Memo: Record up to 15 seconds of sound immediately after taking a photo.
- Audio Caption: Record audio simultaneously during image playback, up to 180 minutes depending on memory card size.
- Audio-Only Erase: Delete only voice memos or audio captions without affecting the image.
7.4 Email Copy Function
Create compressed JPEG images (640x480 or 160x120 pixels) for easy transfer to a PC and transmission via email.
7.5 Multi-Frame Mode
Capture 9 sequential images in a 3x3 grid within a single frame.
7.6 Crop Frame
Trim unwanted parts of a captured image and save the edited version as a separate file.
7.7 PictBridge Direct Printing
Connect the Dimage XG directly to a PictBridge-compatible printer via USB to print photos without needing a computer.
7.8 Dark Noise Reduction
This user-selectable feature automatically activates for exposures of one second or longer to reduce graininess in low-light or long-exposure photographs.
8. Maintenance
- Cleaning the Lens: Use a soft lens brush or a blower to remove dust. For smudges, use a lens cleaning cloth with a small amount of lens cleaning fluid.
- Cleaning the LCD Screen: Wipe gently with a soft, dry cloth. Avoid pressing hard on the screen.
- Camera Body: Wipe with a soft, dry cloth. Do not use organic solvents or strong cleaning agents.
- Storage: When not in use for extended periods, remove the battery and store the camera in a cool, dry place away from direct sunlight and extreme temperatures.
9. Troubleshooting
| Problem | Solution |
|---|---|
| Camera does not power on. | Ensure the battery is fully charged and correctly inserted. Check if the battery contacts are clean. |
| Images are blurry. | Ensure the lens is clean. Press the shutter button halfway to allow the camera to focus before fully pressing. Check lighting conditions; use flash if necessary. |
| Flash does not fire. | Check the flash mode setting. Ensure it is not set to "Flash Off". Allow time for the flash to recharge between shots. |
| Memory card error. | Ensure the memory card is inserted correctly. Try reformatting the card (this will erase all data). Try a different compatible memory card. |
| Cannot transfer images to computer. | Ensure the USB cable is securely connected to both the camera and the computer. Verify that the Dimage Viewer software is installed and running. |
10. Specifications
- Image Sensor: 3.2 Megapixel CCD
- Lens: 3x Optical Zoom (37-111mm equivalent), 4x Digital Zoom
- Display: 1.6-inch TFT LCD
- Storage Media: SD Card / MultiMediaCard
- File Formats: JPEG (Still Images), MOV (Video), WAV (Audio)
- Video Resolution: 320x240, 160x120 at 30 fps with audio
- Shutter Speed: 4 to 1/1000 seconds
- ISO Sensitivity: Auto, equivalent to ISO 400
- Flash Modes: Auto, Fill Flash, Red-Eye Reduction, Flash Off
- Connectivity: USB
- Battery: Rechargeable Lithium-Ion (NP-200)
- Dimensions (WxHxD): Approximately 3.4 x 2.6 x 0.8 inches
- Weight: Approximately 4.2 ounces (without battery/media)
11. Warranty and Support
For warranty information, please refer to the warranty card included with your product or contact Konica Minolta customer support. Keep your proof of purchase for warranty claims.
For further assistance or technical support, please visit the official Minolta website or contact their customer service department.
You can find more information about Minolta products at the Minolta Store.