1. Introduction
The Orion 9823 Apex 102mm Maksutov-Cassegrain Telescope is a versatile optical instrument designed for both astronomical and terrestrial observations. Its compact design and powerful optics make it suitable for viewing celestial objects such as the Moon, planets, and bright deep-sky objects, as well as distant wildlife and scenery.
This telescope features a 102mm (4-inch) aperture and a 1300mm focal length, providing clear and detailed images. The fully multi-coated curved front meniscus lens ensures high light transmission for bright, crisp views. The Maksutov-Cassegrain optical design allows for a long focal length in a short optical tube, making it highly portable.
Please read this manual thoroughly to understand the proper setup, operation, and care of your Orion 9823 Apex 102mm Maksutov-Cassegrain Telescope.
2. Included Components
Your Orion 9823 Apex 102mm Maksutov-Cassegrain Telescope package includes the following items:
- Orion Apex 102mm Maksutov-Cassegrain Optical Tube
- 25mm Sirius Plossl 1.25" Eyepiece
- 6x26 Correct-Image Finder Scope
- 45-Degree Correct-Image Diagonal
- Soft Carry Case
- Starry Night Software (CD-ROM)
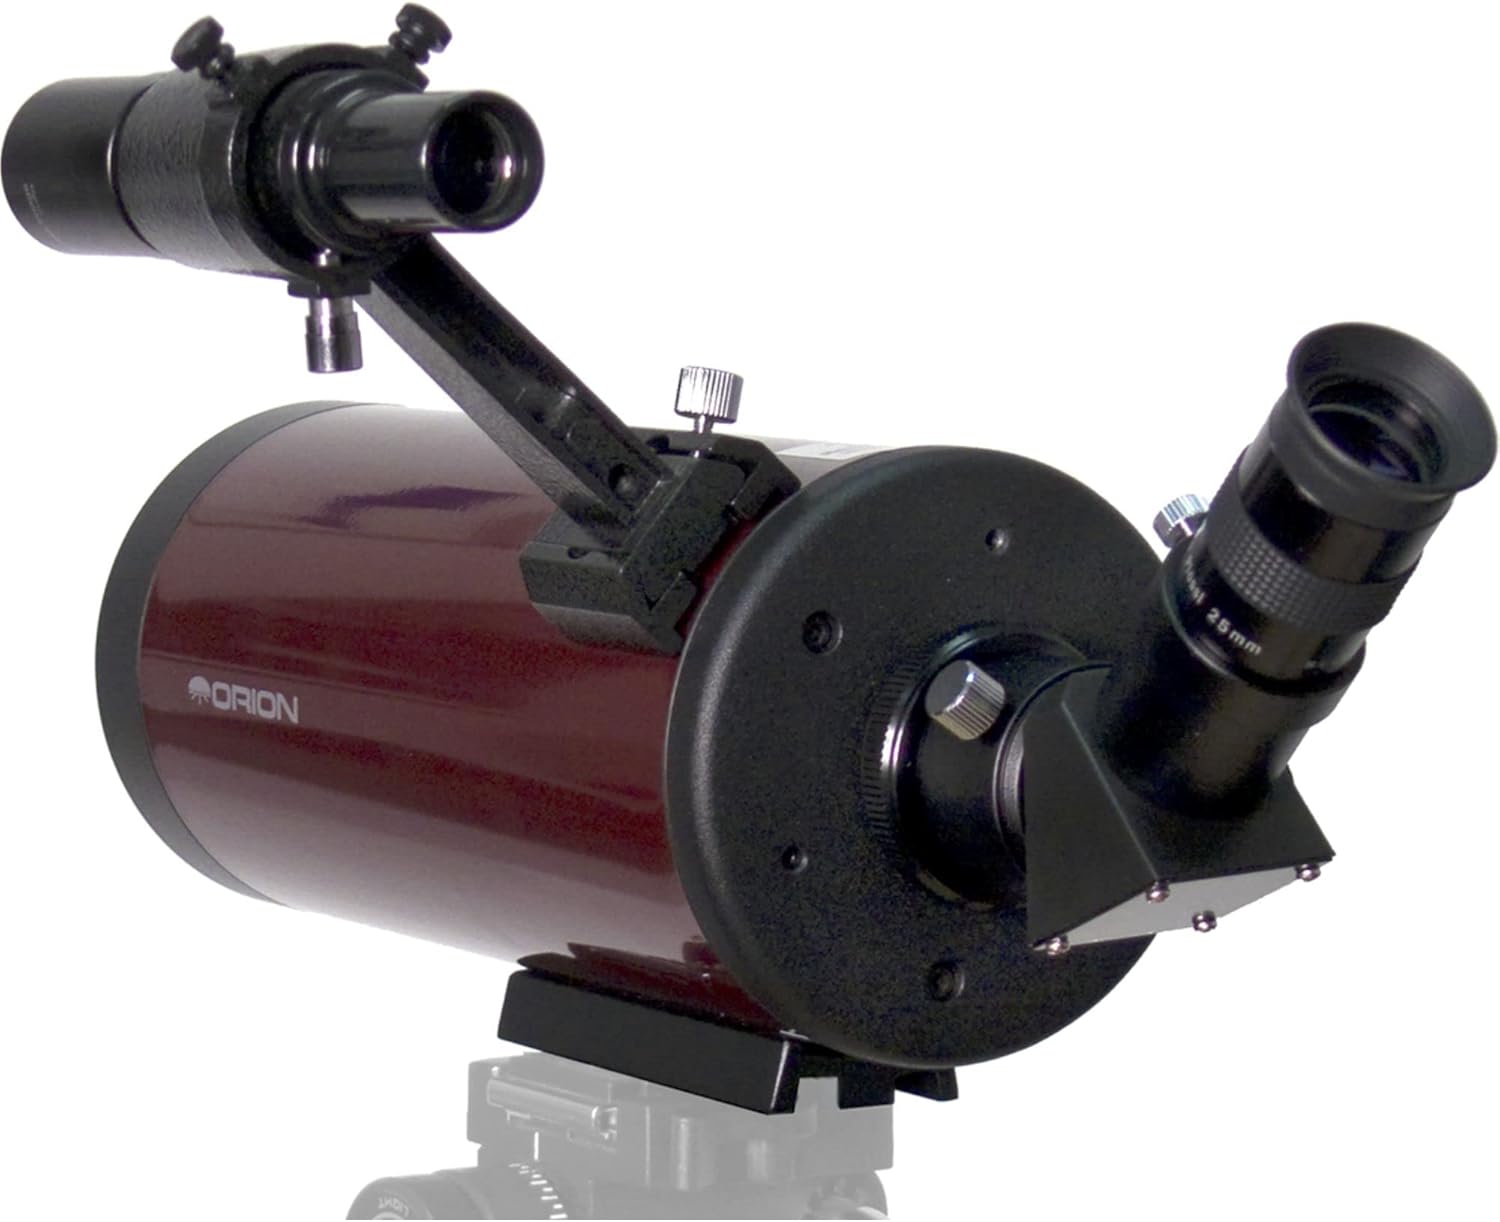
Figure 2.1: Orion 9823 Apex 102mm Maksutov-Cassegrain Telescope with the 45-degree correct-image diagonal and 25mm eyepiece installed.

Figure 2.2: Starry Night software included with the telescope.

Figure 2.3: The soft padded carry case for the telescope and accessories.
3. Setup
Follow these steps to set up your telescope for observation:
3.1 Attaching to a Mount or Tripod
The Orion 9823 Apex 102mm telescope does not include a tripod or mount. It is designed to be attached to a compatible astronomical mount or a standard camera tripod using its built-in 1/4"-20 adapter plate. Ensure your chosen mount or tripod is sturdy enough to support the telescope's weight (approximately 2.3 kg or 5 lbs) and provide stable viewing.
- Locate the 1/4"-20 adapter plate on the bottom of the telescope tube.
- Align the adapter plate with the mounting screw on your tripod or mount.
- Securely fasten the telescope to the mount by tightening the screw. Do not overtighten.
3.2 Installing the Finder Scope
The 6x26 correct-image finder scope helps in locating objects before viewing them through the main telescope.
- Slide the finder scope into its bracket on the telescope tube.
- Tighten the small thumbscrews on the bracket to hold the finder scope securely in place.
3.3 Inserting the Diagonal and Eyepiece
The 45-degree correct-image diagonal provides a comfortable viewing angle and ensures images are correctly oriented for terrestrial use.
- Loosen the thumbscrew on the visual back (the rear port) of the telescope.
- Insert the chrome barrel of the 45-degree correct-image diagonal into the visual back.
- Tighten the thumbscrew to secure the diagonal.
- Loosen the thumbscrew on the diagonal.
- Insert the chrome barrel of the 25mm Sirius Plossl eyepiece into the diagonal.
- Tighten the thumbscrew on the diagonal to secure the eyepiece.

Figure 3.1: The Orion 9823 Apex 102mm Maksutov-Cassegrain Telescope fully assembled with finder scope, diagonal, and eyepiece.
4. Operating the Telescope
Once assembled, your telescope is ready for use. Proper operation involves aligning the finder scope, focusing, and selecting appropriate eyepieces.
4.1 Aligning the Finder Scope
The finder scope must be aligned with the main telescope for easy object location.
- Point the main telescope at a distant, stationary object (e.g., a tree or building) during daylight hours.
- Look through the 25mm eyepiece and center the object in the main telescope's field of view.
- Now, look through the finder scope. Use the adjustment screws on the finder scope bracket to move the finder scope until the same object is centered in its crosshairs.
- Check the alignment by switching between the main telescope and the finder scope. The object should remain centered in both.
4.2 Focusing
The Orion 9823 Apex 102mm features manual focus.
- Look through the eyepiece.
- Rotate the focus knob, typically located near the visual back, until the image appears sharp and clear.
4.3 Terrestrial Viewing
For daytime viewing of land objects, the 45-degree correct-image diagonal provides an upright and correctly oriented image, similar to binoculars.
- Ensure the 45-degree diagonal is installed.
- Use the finder scope to locate your desired object.
- Look through the eyepiece and adjust focus for a clear view.
4.4 Astronomical Viewing
For observing celestial objects, the telescope provides excellent views of the Moon, planets, and brighter deep-sky objects.
- Choose a location away from significant light pollution for optimal viewing.
- Use the finder scope to locate your target celestial object.
- Look through the eyepiece and adjust focus.
- The included 25mm eyepiece provides 52x magnification (1300mm focal length / 25mm eyepiece focal length). For higher magnifications, additional eyepieces can be purchased separately.
5. Maintenance
Proper care and maintenance will ensure the longevity and performance of your telescope.
5.1 Cleaning Optics
Optical surfaces should be cleaned as infrequently as possible to avoid damage. When cleaning is necessary:
- Use a soft brush or compressed air to remove loose dust particles.
- For smudges or fingerprints, use a specialized optical cleaning solution and a clean, soft microfiber cloth. Apply the solution to the cloth, not directly to the lens.
- Wipe gently in a circular motion from the center outwards.
5.2 Storage
When not in use, store your telescope in a clean, dry, and dust-free environment. The included soft carry case is ideal for protection during storage and transport.
- Ensure all caps are placed on the front of the telescope, the visual back, and the eyepiece.
- Store the telescope in its soft carry case to protect it from dust and minor impacts.
- Avoid storing the telescope in areas with extreme temperature fluctuations or high humidity.
5.3 Environmental Considerations
The telescope is not waterproof and does not include a dew shield or sunshade. Take precautions to protect the optics from moisture and direct sunlight when observing.
6. Troubleshooting
If you encounter issues with your telescope, refer to the following common problems and solutions:
6.1 Blurry or Unclear Images
- Check Focus: Ensure the focus knob has been adjusted correctly for a sharp image.
- Atmospheric Conditions: Hazy skies, heat waves, or air turbulence can cause blurry views, especially at high magnifications. Wait for more stable atmospheric conditions.
- Telescope Acclimatization: If the telescope has been moved from a warm indoor environment to cold outdoor air, the optics may need time to cool down and equalize with the ambient temperature.
6.2 Difficulty Locating Objects
- Finder Scope Alignment: Verify that your finder scope is accurately aligned with the main telescope (refer to Section 4.1).
- Eyepiece Magnification: Start with the lowest magnification eyepiece (the 25mm eyepiece) to get the widest field of view, making it easier to locate objects. Once found, you can switch to higher magnification eyepieces.
6.3 Poor Astronomical Views
- Light Pollution: Observing from areas with significant artificial light will severely limit the visibility of faint celestial objects. Seek darker skies if possible.
- Object Brightness: Some deep-sky objects are inherently faint and may require very dark skies and averted vision to be seen.
7. Specifications
| Brand | Orion |
| Model Number | 9823 |
| Optical Design | Maksutov-Cassegrain |
| Objective Lens Diameter | 102 mm (4 inches) |
| Focal Length | 1300 mm |
| Focal Ratio | f/12.7 |
| Eyepiece (Included) | 25mm Sirius Plossl 1.25" |
| Finder Scope | 6x26 Correct-Image |
| Diagonal | 45-Degree Correct-Image |
| Telescope Mount Description | Altazimuth Mount (Telescope does not include mount) |
| Focus Type | Manual Focus |
| Lens Coating Description | Multi-Coated |
| Item Weight | 2300 Grams (approx. 5 lbs) |
| Field Of View | 0.83 Degrees |
| UPC | 759270098230 |
8. Warranty and Support
For warranty information and technical support, please refer to the documentation provided with your purchase or visit the official Orion Telescopes & Binoculars website. Keep your proof of purchase for warranty claims.