1. Introduction
Thank you for choosing the MAC AUDIO Red Attack 4800 2-Channel Amplifier. This high-quality amplifier is designed to enhance your car audio experience by providing powerful and clear sound reproduction. This manual provides essential information for proper installation, operation, and maintenance of your amplifier. Please read it thoroughly before use to ensure optimal performance and safety.
2. Safety Instructions
Always observe the following safety precautions to prevent injury or damage to the amplifier and vehicle:
- Power Disconnection: Before any installation or wiring, disconnect the vehicle's negative battery terminal to prevent electrical shorts.
- Professional Installation: If you are unsure about the installation process, seek assistance from a qualified professional car audio installer.
- Proper Wiring: Use appropriate gauge wiring for power, ground, and speaker connections as specified in this manual to prevent overheating and damage.
- Ventilation: Ensure the amplifier is mounted in a location with adequate ventilation to prevent overheating. Do not block cooling fins or vents.
- Moisture Exposure: Do not expose the amplifier to moisture, water, or extreme temperatures.
- Fuse Protection: Always use the correct fuse rating as specified. Never replace a blown fuse with one of a higher amperage.
- Volume Levels: Prolonged exposure to high volume levels can cause hearing damage. Adjust volume responsibly.
3. Product Overview
The MAC AUDIO Red Attack 4800 is a robust 2-channel amplifier engineered for reliable performance in car audio systems. It features a durable design and essential controls for sound customization.
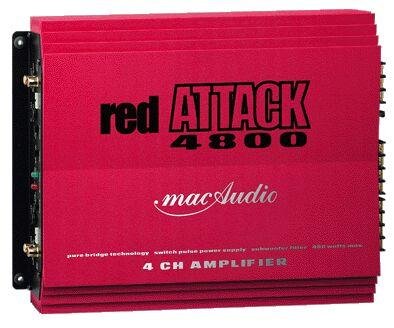
Figure 1: Front view of the MAC AUDIO Red Attack 4800 2-Channel Amplifier, showing input and output terminals, and control knobs.
This amplifier is designed to deliver clean power to your speakers, enhancing the clarity and impact of your music. Its compact design allows for flexible installation options within your vehicle.
4. Setup and Installation
Careful installation is crucial for the amplifier's performance and longevity. Follow these steps for a successful setup.
4.1. Mounting Location
- Choose a dry, well-ventilated location away from direct sunlight and heat sources.
- Ensure sufficient airflow around the amplifier's heat sinks.
- Mount the amplifier securely to a solid surface using appropriate screws to prevent movement during vehicle operation.
4.2. Wiring Connections
Before making any connections, ensure the vehicle's battery negative terminal is disconnected.
4.2.1. Power and Ground Wiring
- Power (B+): Connect a heavy-gauge power cable (e.g., 8 AWG or 4 AWG depending on power requirements) directly from the positive terminal of the vehicle's battery to the amplifier's B+ terminal. Install an in-line fuse holder with the correct amperage fuse (refer to specifications) within 18 inches (45 cm) of the battery.
- Ground (GND): Connect a heavy-gauge ground cable of the same length and gauge as the power cable from the amplifier's GND terminal to a clean, unpainted metal surface on the vehicle's chassis. Ensure a good electrical connection by scraping away any paint or rust.
- Remote (REM): Connect a smaller gauge wire (e.g., 18 AWG) from the amplifier's REM terminal to the remote output of your car stereo or head unit. This wire turns the amplifier on and off with the stereo.
4.2.2. Audio Input Wiring
- Connect RCA cables from the pre-out outputs of your car stereo to the RCA input jacks on the amplifier. Ensure correct channel matching (Left to Left, Right to Right).
4.2.3. Speaker Output Wiring
- Connect your speakers to the amplifier's speaker output terminals. Observe correct polarity (+ to + and - to -) for each speaker. Incorrect polarity can lead to poor sound quality and reduced bass response.
- Ensure the total impedance of the connected speakers matches the amplifier's minimum impedance rating (refer to specifications).
4.3. Initial Settings
After all wiring is complete and verified, reconnect the vehicle's negative battery terminal.
- Gain Control: Start with the gain control set to minimum. Play a familiar piece of music at a moderate volume on your head unit. Slowly increase the amplifier's gain control until you hear distortion, then back it off slightly. This sets the amplifier's input sensitivity to match your head unit's output.
- Crossover Settings: If your amplifier has built-in crossover filters (e.g., Low Pass Filter, High Pass Filter), adjust them according to your speaker type and system configuration. For full-range speakers, you might use a high-pass filter to protect them from low frequencies. For subwoofers, a low-pass filter is essential.
5. Operating the Amplifier
Once installed and configured, operating your MAC AUDIO Red Attack 4800 amplifier is straightforward.
- Power On/Off: The amplifier will automatically turn on when your car stereo is powered on (via the remote wire) and turn off when the stereo is off.
- Volume Control: Adjust the overall system volume using your car stereo's volume control. The amplifier's gain control should only be used for initial level matching, not as a volume knob.
- Sound Adjustments: Fine-tune your sound using the crossover controls and any bass boost features available on the amplifier or your head unit. Make small adjustments and listen carefully to the changes.
6. Maintenance
Regular maintenance ensures the longevity and optimal performance of your amplifier.
- Cleaning: Periodically clean the amplifier's exterior with a soft, dry cloth. Do not use harsh chemicals or abrasive cleaners. Ensure cooling fins are free of dust and debris.
- Connection Check: Occasionally check all wiring connections (power, ground, remote, RCA, speaker) to ensure they are secure and free from corrosion. Loose connections can cause performance issues or damage.
- Ventilation: Ensure that the amplifier's mounting location remains clear of obstructions to maintain proper airflow.
7. Troubleshooting
If you encounter issues with your amplifier, refer to the following troubleshooting guide before contacting support.
| Problem | Possible Cause | Solution |
|---|---|---|
| Amplifier does not turn on. | No power, poor ground, remote wire not connected or faulty, blown fuse. | Check power (B+) and ground (GND) connections. Verify remote (REM) wire connection to head unit. Check in-line fuse and amplifier's internal fuses. |
| No sound output. | RCA cables disconnected, speaker wires disconnected or shorted, amplifier in protection mode, head unit settings. | Check RCA input connections. Verify speaker wire connections and ensure no shorts. Check if protection LED is on. Confirm head unit output is active. |
| Distorted sound. | Gain set too high, poor ground, speaker impedance mismatch, damaged speakers. | Reduce gain setting. Check ground connection. Verify speaker impedance. Inspect speakers for damage. |
| Amplifier overheats. | Insufficient ventilation, impedance too low, prolonged high volume. | Ensure adequate airflow around the amplifier. Check speaker impedance. Reduce volume or operating time. |
8. Specifications
The following are general specifications for the MAC AUDIO Red Attack 4800 amplifier. Specific performance figures may vary.
- Brand: MAC AUDIO
- Model Number: RED 4800 Attack
- Number of Channels: 2
- Mounting Type: Freestanding
- Item Weight: 10 g (Note: This weight seems unusually low for an amplifier and might be a data entry error. Please refer to product packaging for accurate weight.)
- GTIN: 04023037264807
- ASIN: B0000WR722
Note: For detailed power output ratings (RMS/Max power), frequency response, signal-to-noise ratio, and other electrical specifications, please refer to the official product packaging or manufacturer's website.
9. Warranty and Support
MAC AUDIO products are manufactured to high-quality standards. For information regarding warranty coverage, terms, and conditions, please refer to the warranty card included with your product or visit the official MAC AUDIO website. For technical support or service inquiries, please contact your authorized MAC AUDIO dealer or the manufacturer directly.
Keep your purchase receipt as proof of purchase for warranty claims.