1. Introduction
Thank you for choosing the Solac A-018-G2 Portable Bagless Vacuum Cleaner. This manual provides essential information for the safe and efficient use of your appliance. Please read these instructions carefully before operating the vacuum cleaner and retain them for future reference.
The Solac A-018-G2 is designed for effective cleaning of various surfaces, including carpets and hard floors, offering portability and convenience with its bagless design.
2. Important Safety Instructions
Always follow basic safety precautions when using electrical appliances to reduce the risk of fire, electric shock, or injury.
- Ensure the voltage indicated on the vacuum cleaner matches your local mains voltage before connecting.
- Do not use the vacuum cleaner on wet surfaces or to pick up liquids.
- Do not pick up burning or smoking objects, such as cigarettes, matches, or hot ashes.
- Keep hair, loose clothing, fingers, and all parts of the body away from openings and moving parts.
- Unplug from the outlet when not in use and before cleaning or servicing.
- Do not operate the vacuum cleaner with a damaged cord or plug.
- This appliance is for household use only.
3. Product Overview and Components
Familiarize yourself with the main unit and its accessories.
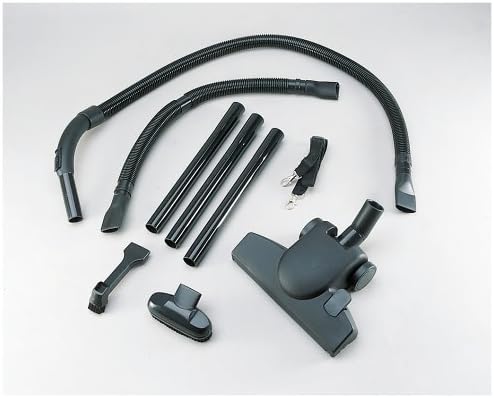
Figure 3.1: The compact main unit of the Solac A-018-G2 vacuum cleaner, featuring its portable design.
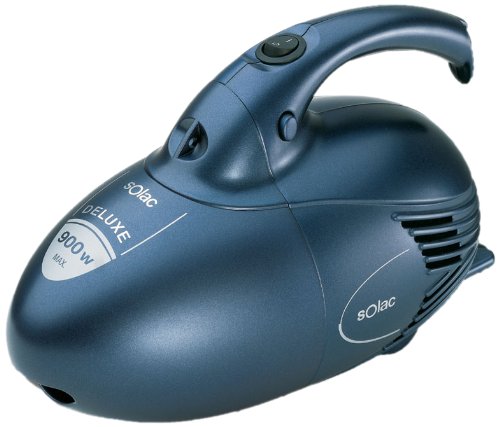
Figure 3.2: Included accessories for the Solac A-018-G2, featuring flexible hoses, extension wands, a floor nozzle, a crevice tool, a brush tool, and a shoulder strap for versatile cleaning.
Components:
- Main Vacuum Unit
- Flexible Hoses (various lengths)
- Extension Wands
- Floor Nozzle
- Crevice Tool
- Brush Tool
- Shoulder Strap
- Power Cord
4. Setup and Assembly
Follow these steps to assemble your Solac A-018-G2 vacuum cleaner for first use:
- Attach the Hose: Insert one end of the flexible hose firmly into the suction inlet on the main vacuum unit until it clicks into place.
- Connect Extension Wands (Optional): For extended reach, connect the extension wands to the free end of the flexible hose. Ensure they are securely fitted.
- Attach Cleaning Tool: Select the appropriate cleaning tool (floor nozzle, crevice tool, or brush tool) and attach it to the end of the extension wand or directly to the hose if not using wands.
- Attach Shoulder Strap (Optional): For portable use, attach the shoulder strap to the designated points on the main unit.
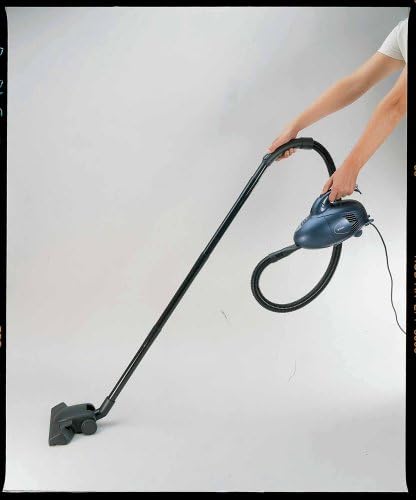
Figure 4.1: Demonstration of the Solac A-018-G2 vacuum cleaner assembled with extension wands and floor nozzle, ready for use.
5. Operating Instructions
- Power Connection: Plug the power cord into a suitable 220-volt electrical outlet.
- Power On/Off: Locate the power switch on the main unit and press it to turn the vacuum cleaner ON. Press it again to turn OFF.
- Cleaning: Guide the chosen cleaning tool over the surface to be cleaned. The powerful suction will collect dust and debris into the bagless dust container.
- Portable Use: For handheld cleaning or reaching high areas, use the shoulder strap to carry the main unit, or detach extension wands for a more compact setup.
- After Use: Turn off the vacuum cleaner and unplug it from the power outlet.
6. Maintenance and Cleaning
Regular maintenance ensures optimal performance and extends the life of your vacuum cleaner.
Emptying the Dust Container:
- Ensure the vacuum cleaner is unplugged.
- Locate the dust container release button or latch on the main unit.
- Remove the dust container and empty its contents into a waste bin.
- Reattach the dust container securely until it clicks into place.
Cleaning the Filter:
The Solac A-018-G2 features a bagless design with a washable filter. Clean the filter regularly to maintain suction power.

Figure 6.1: A blue fabric component, likely part of the filter system or a protective cover for the filter, which requires regular cleaning.
- Unplug the vacuum cleaner.
- Remove the dust container as described above.
- Carefully remove the filter assembly from the dust container.
- Tap the filter gently over a waste bin to remove loose dust.
- If heavily soiled, rinse the filter under cold running water. Do not use detergents.
- Allow the filter to air dry completely for at least 24 hours before reinserting it. Do not use a hairdryer or other heating devices.
- Reassemble the filter and dust container, then attach them back to the main unit.
Cleaning Accessories:
Wipe down hoses, wands, and nozzles with a damp cloth as needed. Ensure all parts are dry before storage.
7. Troubleshooting
| Problem | Possible Cause | Solution |
|---|---|---|
| Vacuum cleaner does not turn on. | No power supply. | Check if the plug is securely inserted into the outlet. Test the outlet with another appliance. |
| Low suction power. | Dust container is full. Filter is clogged. Hose or attachment is blocked. | Empty the dust container. Clean or replace the filter. Check hoses and attachments for blockages and remove them. |
| Unusual noise during operation. | Blockage in the hose or nozzle. Motor issue. | Turn off and unplug the unit. Check for and remove any blockages. If the noise persists, contact customer support. |
If you encounter problems not listed here, or if the suggested solutions do not resolve the issue, please contact Solac customer support.
8. Specifications
- Brand: Solac
- Model Number: A018G2
- Model Name: a018
- Special Feature: Portable, Bagless
- Surface Recommendation: Carpet, Hard floor
- Voltage: 220 Volts
- Wattage/Power: 900 Watts
- Item Weight: 3.31 Pounds (approx. 1.5 kg)
- Form Factor: Handheld
- Noise Level: 79 Decibels
- Manufacturer: Taurus ES
9. Warranty and Customer Support
For information regarding your product's warranty, please refer to the warranty card included with your purchase or visit the official Solac website. For technical assistance, spare parts, or any other inquiries, please contact Solac customer support through their official channels.