1. Product Overview
The Kidde i12040A is an AC/DC powered, ionization smoke alarm designed to provide early warning of fire. It operates on a 120V power source and includes a 9V battery backup for continuous protection during power outages. This alarm utilizes ionization sensing technology, which is effective at detecting invisible fire particles often associated with fast-flaming fires. It also features a Smart Hush button to temporarily silence nuisance alarms.

Figure 1.1: Front view of the Kidde i12040A Smoke Alarm with its wiring harness.
2. Key Features
- Easy Installation: Features a front battery pull tab for activation without removing the alarm from its mounting bracket. A large mounting base simplifies installation and covers surface imperfections.
- Pre-stripped Wiring Harness: Includes an easy-off cap and tinned strands for increased conductivity and wire nut grip, eliminating the need for a stripper tool.
- User-Friendly Features: One-button design for easy operation, controlling both Hush and alarm test functions.
- Battery Run-Down Protection: Shuts down alarm memory when AC power is absent, reducing low battery chirps.
- Dust Cover: Protects the sensor from contaminants during construction, reducing nuisance alarms.
- Tamper-Resistant Locking Feature: Deters alarm theft and tampering.
- Alarm Memory: Flashes a red LED to indicate which unit was the initiating alarm in an interconnected system.
- Interconnectable: Can connect with up to 24 compatible Kidde devices (including smoke, CO, and heat alarms), with up to 18 initiating devices.
- Battery Backup: Includes a 9V battery for continued operation during power outages.
- UL Listed: Meets Underwriters Laboratories (UL) requirements for safety and performance.

Figure 2.1: Visual representation of the Kidde i12040A's primary features.
3. Technical Specifications
| Specification | Detail |
|---|---|
| Brand | Kidde |
| Model Number | i12040A |
| Power Source | Hardwired (120V AC) with 9V Battery Backup |
| Sensor Type | Ionization |
| Color | White |
| Item Weight | 10.9 ounces |
| Product Dimensions | 2 x 6 x 6 inches |
| Compatible Devices | Up to 24 Kidde devices (18 initiating) |
| Warranty | 5 Year Limited |
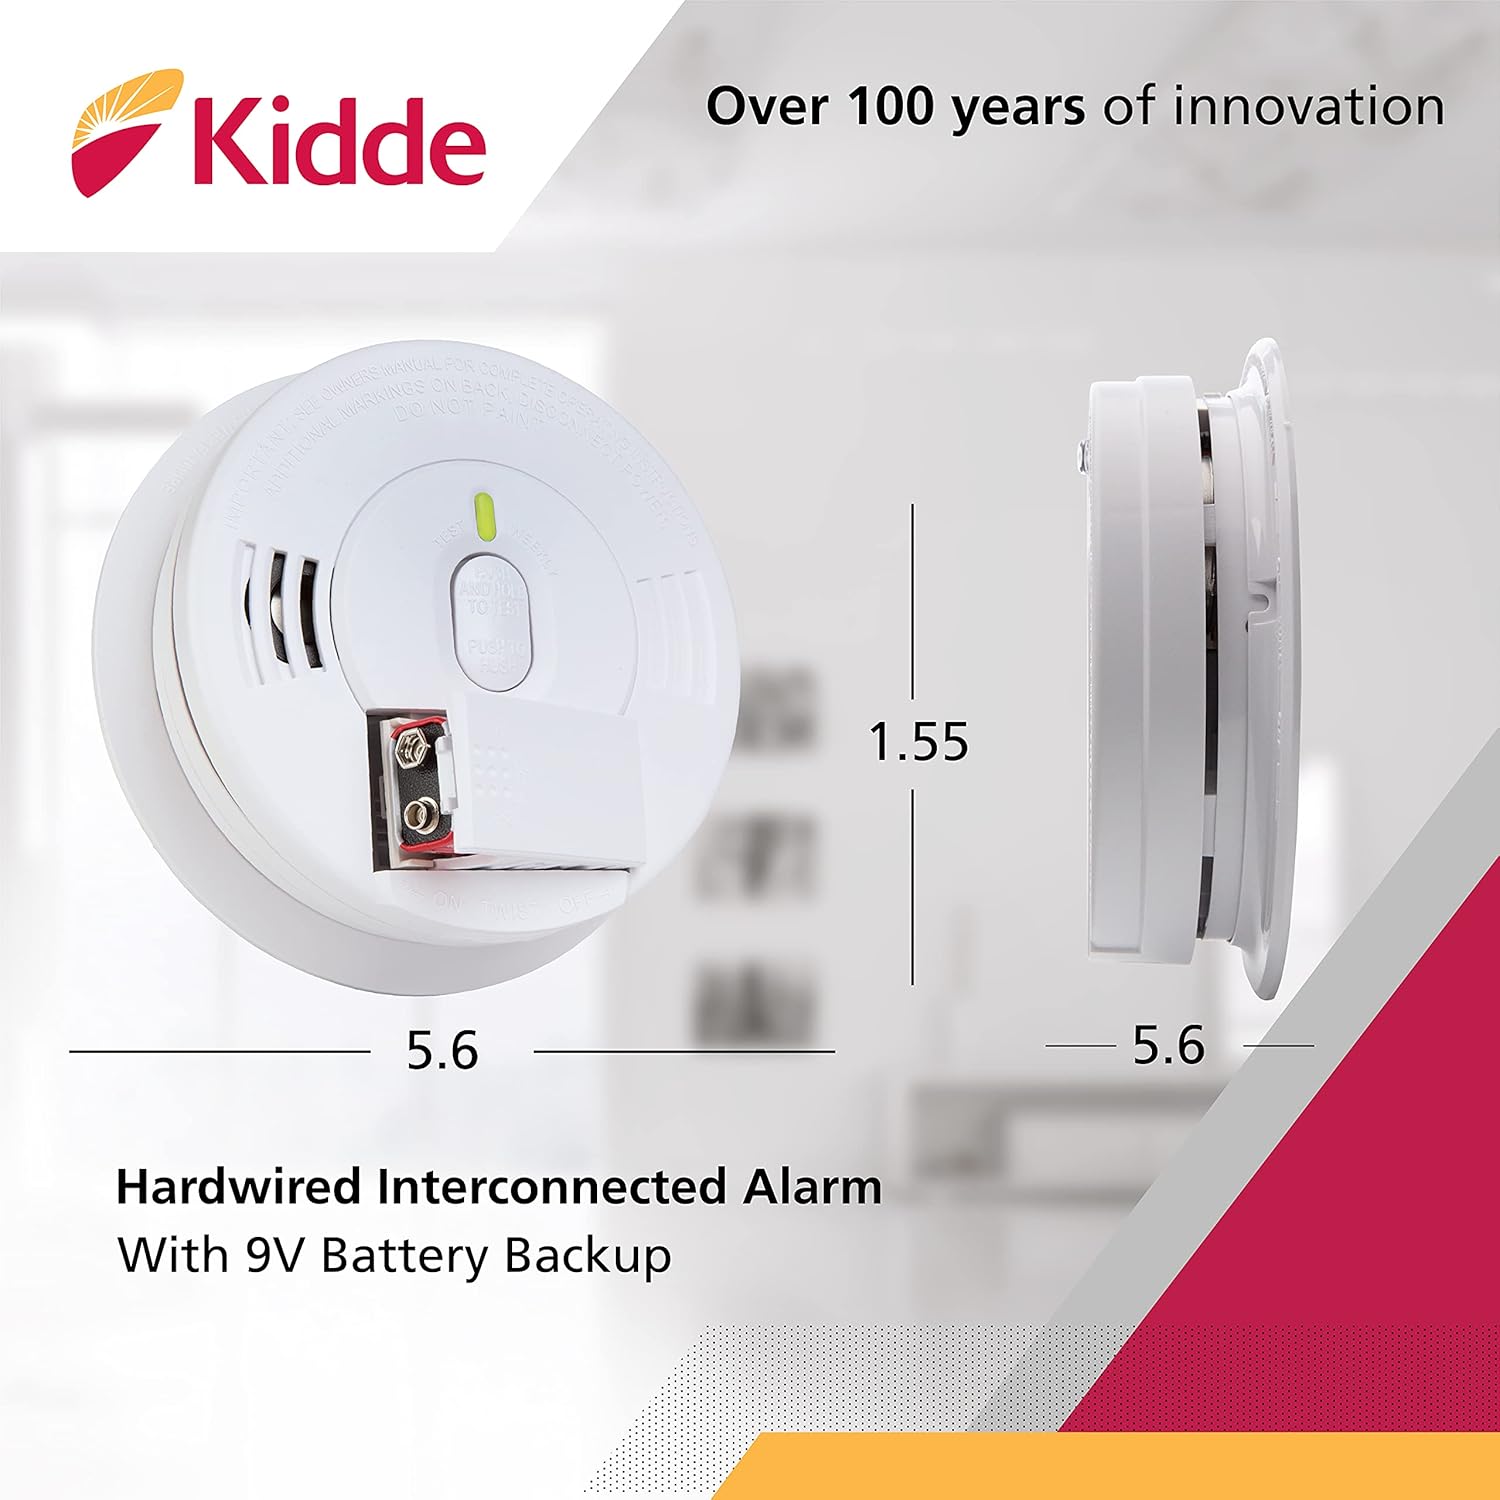
Figure 3.1: Dimensions of the Kidde i12040A Hardwired Interconnected Alarm.
4. Installation
4.1. What's in the Box
- One Kidde i12040 120V AC Wire-In Smoke Alarm
- One 9-volt battery
- Operating and installation instructions (this manual)
4.2. Mounting the Alarm
The Kidde i12040A is designed for hardwired installation. Ensure power is OFF at the circuit breaker before beginning installation.
- Attach the mounting plate to an electrical junction box on the ceiling or wall. The large mounting base helps cover imperfections and provides a stable surface.
- Connect the alarm's pre-stripped wiring harness to your household wiring. The easy-off cap and tinned strands facilitate secure connections.
- Insert the included 9V battery into the battery compartment. The front battery pull tab allows for activation without fully dismounting the alarm.
- Align the alarm with the mounting plate and twist clockwise to secure it in place.
- Restore power at the circuit breaker. The alarm should chirp once and the LED indicator will flash.

Figure 4.1: The mounting plate for the Kidde i12040A smoke alarm.

Figure 4.2: Proper installation of the smoke alarm on a ceiling.
4.3. Interconnectivity
This smoke alarm features a smart interconnect system, allowing it to communicate with up to 24 compatible Kidde devices. When one interconnected alarm senses smoke, all connected alarms will sound, providing enhanced warning throughout your home. Refer to the full user manual for detailed instructions on setting up an interconnected system.
5. Operation
5.1. Testing the Alarm
It is crucial to test your smoke alarm weekly to ensure proper operation. Press and hold the Test/Hush button on the alarm. The alarm should sound a loud, pulsating alarm. Release the button to stop the alarm. If the alarm does not sound, refer to the Troubleshooting section.
5.2. Smart Hush Feature
The Smart Hush feature allows you to temporarily silence nuisance alarms caused by non-emergency situations, such as cooking smoke. To activate, press the Test/Hush button. The alarm will be desensitized for approximately seven minutes. During this period, the alarm will chirp every 30 to 40 seconds to remind you it is in Hush mode. If smoke density is too high, the Hush feature will be overridden, and the alarm will continue to sound. The alarm automatically resets at the end of the seven minutes.
5.3. Alarm Memory
In an interconnected system, if one alarm triggers the others, the initiating alarm will flash its red LED indicator. This feature helps identify the source of the alarm, which can be useful for troubleshooting or understanding the event.
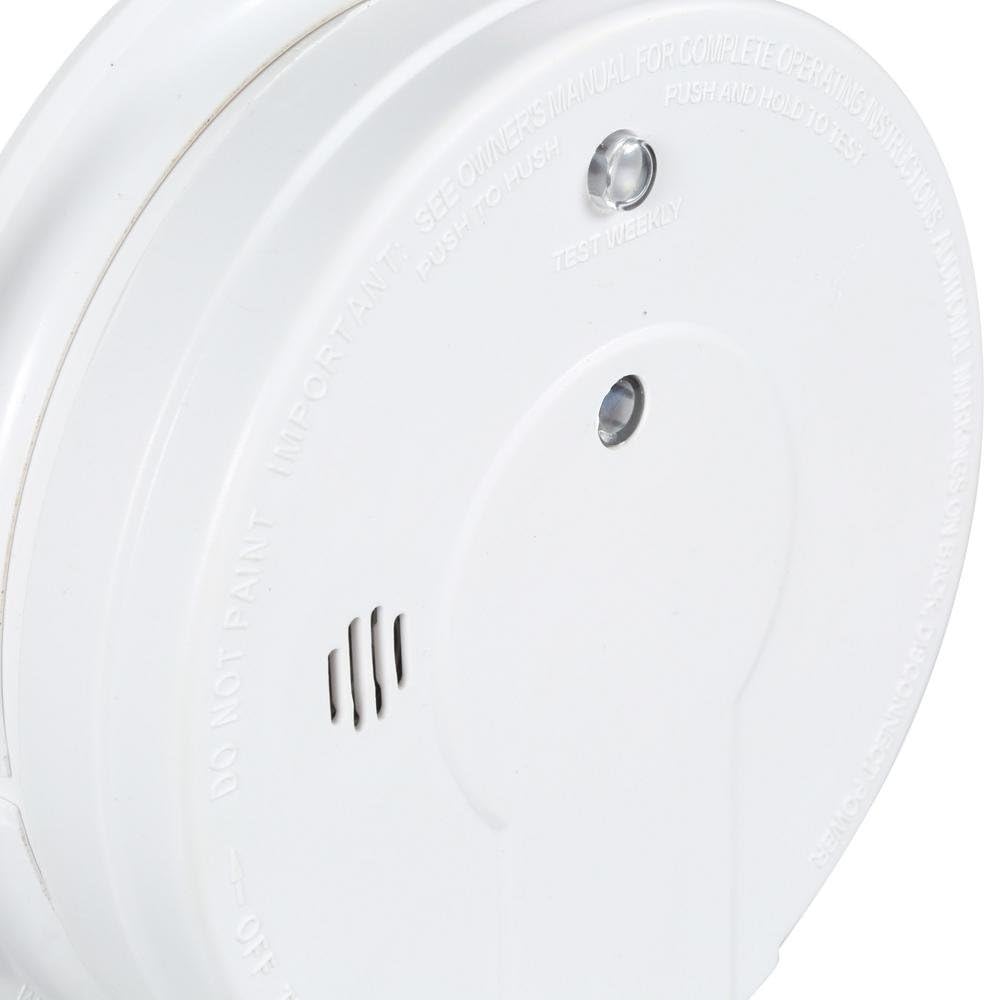
Figure 5.1: Detail of the alarm's control interface.
6. Placement Guidelines
For optimal protection, install smoke alarms on every level of your home, including the basement. Place alarms inside each bedroom and outside of all sleeping areas. For homes with multiple levels, install an alarm in the hallway or at the top of the stairs on each level. Avoid placing alarms near windows, doors, or air vents where drafts could interfere with smoke detection. Also, keep alarms at least 10 feet away from cooking appliances to minimize nuisance alarms.

Figure 6.1: Recommended alarm and safety equipment placement throughout a home.
6.1. Fire Preparedness Tips
Understanding fire safety and preparedness is crucial for protecting your home and family. The following video provides general tips on fire preparedness.
Video 6.1: Fire Preparedness Tips. This video offers general advice on home fire safety, including the importance of smoke alarms, fire extinguishers, and emergency planning.
7. Maintenance
7.1. Cleaning Your Alarm
Dust and debris can accumulate on the smoke alarm, potentially affecting its performance. Gently vacuum the alarm's cover and vents monthly using a soft brush attachment. Do not paint the alarm, as this can block the openings and interfere with the sensor.
7.2. Battery Replacement
The 9V battery provides backup power during outages. Replace the battery annually, or immediately if the alarm begins to chirp intermittently (approximately once per minute), indicating a low battery. Use only the specified 9V battery type as recommended by Kidde.
7.3. End-of-Life Replacement
Smoke alarms have a limited lifespan. This Kidde i12040A smoke alarm should be replaced 10 years from the date of manufacture. The manufacturing date is typically printed on the back of the alarm.
8. Troubleshooting
| Problem | Possible Cause | Solution |
|---|---|---|
| Alarm chirps intermittently (approx. once per minute) | Low battery | Replace the 9V battery. |
| Alarm sounds without visible smoke | Nuisance alarm (e.g., cooking smoke, steam, dust) | Press the Hush button to temporarily silence. Ventilate the area. Clean the alarm if dust is suspected. |
| Alarm does not sound during test | No power, faulty unit, or dead battery | Ensure AC power is on. Check battery. If issues persist, replace the unit. |
| Alarm LED flashes red after an event | Alarm memory activated (this unit was the initiating alarm) | No action required unless the alarm continues to sound. This is an informational feature. |
9. Warranty and Support
9.1. Limited Warranty
The Kidde i12040A Smoke Alarm comes with a 5-year limited warranty from the date of purchase. This warranty covers defects in materials and workmanship under normal use and service. For full warranty details, please refer to the complete user manual or contact Kidde customer support.
9.2. Further Assistance
For more detailed information, installation diagrams, or troubleshooting steps, please refer to the official User Manual PDF available online or contact Kidde customer support. You can often find the full user manual on the product's support page on the manufacturer's website or via the link provided with your purchase documentation.


