SUNPAK 144PC
SUNPAK Auto 144-PC Electronic Flash Instruction Manual
Model: 144PC
Introduction
This manual provides detailed instructions for the proper use and maintenance of your SUNPAK Auto 144-PC electronic flash unit. The Auto 144-PC is a thyristor electronic flash designed for non-dedicated camera platforms, offering automatic and manual flash capabilities to enhance your photography.
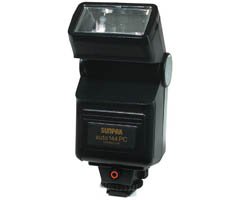
Figure 1: SUNPAK Auto 144-PC Electronic Flash Unit. This image displays the compact design of the flash unit, highlighting its flash head and general form factor.
Safety Information
Please read all safety instructions before using the SUNPAK Auto 144-PC flash unit to prevent injury or damage to the product. Keep this manual for future reference.
- Do not attempt to disassemble or modify the flash unit. High voltage components are present.
- Keep the flash unit away from water and moisture.
- Avoid direct eye exposure to the flash, especially at close range, as it can cause temporary vision impairment.
- Use only the specified battery type (AA batteries). Ensure correct polarity when inserting batteries.
- Do not mix old and new batteries, or different types of batteries.
- Remove batteries if the unit will not be used for an extended period.
Package Contents
Verify that all items are present in the package:
- SUNPAK Auto 144-PC Electronic Flash Unit
- Camera Connect Cord
- Instruction Manual (this document)
Setup
1. Battery Installation
- Locate the battery compartment cover on the flash unit.
- Open the cover by sliding or lifting it according to the markings.
- Insert four (4) AA batteries, ensuring correct polarity (+/-) as indicated inside the compartment.
- Close the battery compartment cover securely.
2. Mounting the Flash Unit
- Ensure your camera is powered off.
- Slide the flash unit's mounting foot into your camera's hot shoe or accessory shoe.
- Secure the flash unit by tightening the locking mechanism (if present) on the flash foot.
3. Connecting to Camera
For non-dedicated camera platforms, use the supplied camera connect cord to establish communication between the flash and the camera.
- Plug one end of the camera connect cord into the sync terminal on the flash unit.
- Plug the other end of the cord into the appropriate sync terminal on your camera. Consult your camera's manual for the exact location of its sync terminal.
Operating Instructions
1. Powering On/Off
- To power on the flash, slide the power switch to the "ON" position.
- Allow a few seconds for the flash to charge. The ready light will illuminate when the flash is ready to fire.
- To power off, slide the power switch to the "OFF" position.
2. Flash Modes
The SUNPAK Auto 144-PC offers both automatic and manual flash modes.
Automatic Mode
In automatic mode, the flash uses its built-in sensor to measure the light reflected from the subject and automatically adjusts the flash output for correct exposure. The auto range for this unit is approximately 2.3 to 33 feet (0.7 to 10 meters).
- Set the flash mode switch to "AUTO".
- Set your camera's aperture to the recommended f-stop for the chosen auto mode (usually indicated on the flash unit or in its specifications).
- Ensure your camera's shutter speed is set to its flash sync speed (e.g., 1/250 or 1/200 second).
Manual Mode
In manual mode, the flash fires at full power. You will need to manually calculate the correct aperture setting based on the guide number, subject distance, and film/sensor ISO.
- Set the flash mode switch to "MANUAL".
- Calculate the required aperture using the formula: Aperture = Guide Number / Subject Distance.
- Set your camera's aperture accordingly.
- Ensure your camera's shutter speed is set to its flash sync speed.
3. Guide Number
The guide number (GN) of the SUNPAK Auto 144-PC is 66 (feet at ISO 100). This number helps determine the flash's power output relative to distance and aperture.
4. Flash Sync Speed
The flash sync speed refers to the fastest shutter speed at which the camera's shutter is fully open when the flash fires. For the Auto 144-PC, compatible sync speeds are typically 1/250 or 1/200 second, depending on your camera model. Refer to your camera's manual for its specific flash sync speed.
Maintenance
- Cleaning: Use a soft, dry cloth to clean the exterior of the flash unit. For stubborn dirt, slightly dampen the cloth with water. Do not use solvents or abrasive cleaners.
- Storage: When not in use, store the flash unit in a cool, dry place, away from direct sunlight and extreme temperatures. Remove batteries if storing for an extended period to prevent leakage.
- Battery Care: Replace all four AA batteries simultaneously. Do not mix battery types or brands.
Troubleshooting
| Problem | Possible Cause | Solution |
|---|---|---|
| Flash does not fire. |
|
|
| Photos are too dark (underexposed). |
|
|
| Photos are too bright (overexposed). |
|
|
Specifications
| Feature | Detail |
|---|---|
| Model | 144PC |
| Type | Thyristor Electronic Flash |
| Guide Number (ISO 100) | 66 feet |
| Auto Range | 2.3 to 33 feet (0.7 to 10 meters) |
| Power Source | 4 x AA batteries |
| Flash Sync Speed | 1/250 or 1/200 second (camera dependent) |
| Compatible Mountings | Canon, Nikon, Sony (non-dedicated hot shoe) |
| Included Components | Camera connect cord |
| Product Dimensions | 9 x 9 x 9 inches |
| Item Weight | 8 ounces |
| Color | Daylight |
Warranty and Support
For warranty information and technical support, please refer to the documentation provided at the time of purchase or visit the official SUNPAK website. Keep your proof of purchase for any warranty claims.
Note: Product specifications and appearance are subject to change without notice.