
Chef's Choice 320000
Chef'sChoice Professional Electric Knife Sharpener FlexHone/Strop Model 320 User Manual
Model: 320000
1. Introduction
The Chef'sChoice Professional Electric Knife Sharpener FlexHone/Strop Model 320 is designed to provide exceptionally sharp, long-lasting edges for both straight-edge and serrated knives. Utilizing advanced 100% diamond abrasives and precision angle guides, this sharpener ensures optimal sharpening results with minimal effort. Its two-stage sharpening process creates a durable, razor-sharp edge suitable for various cutting tasks.
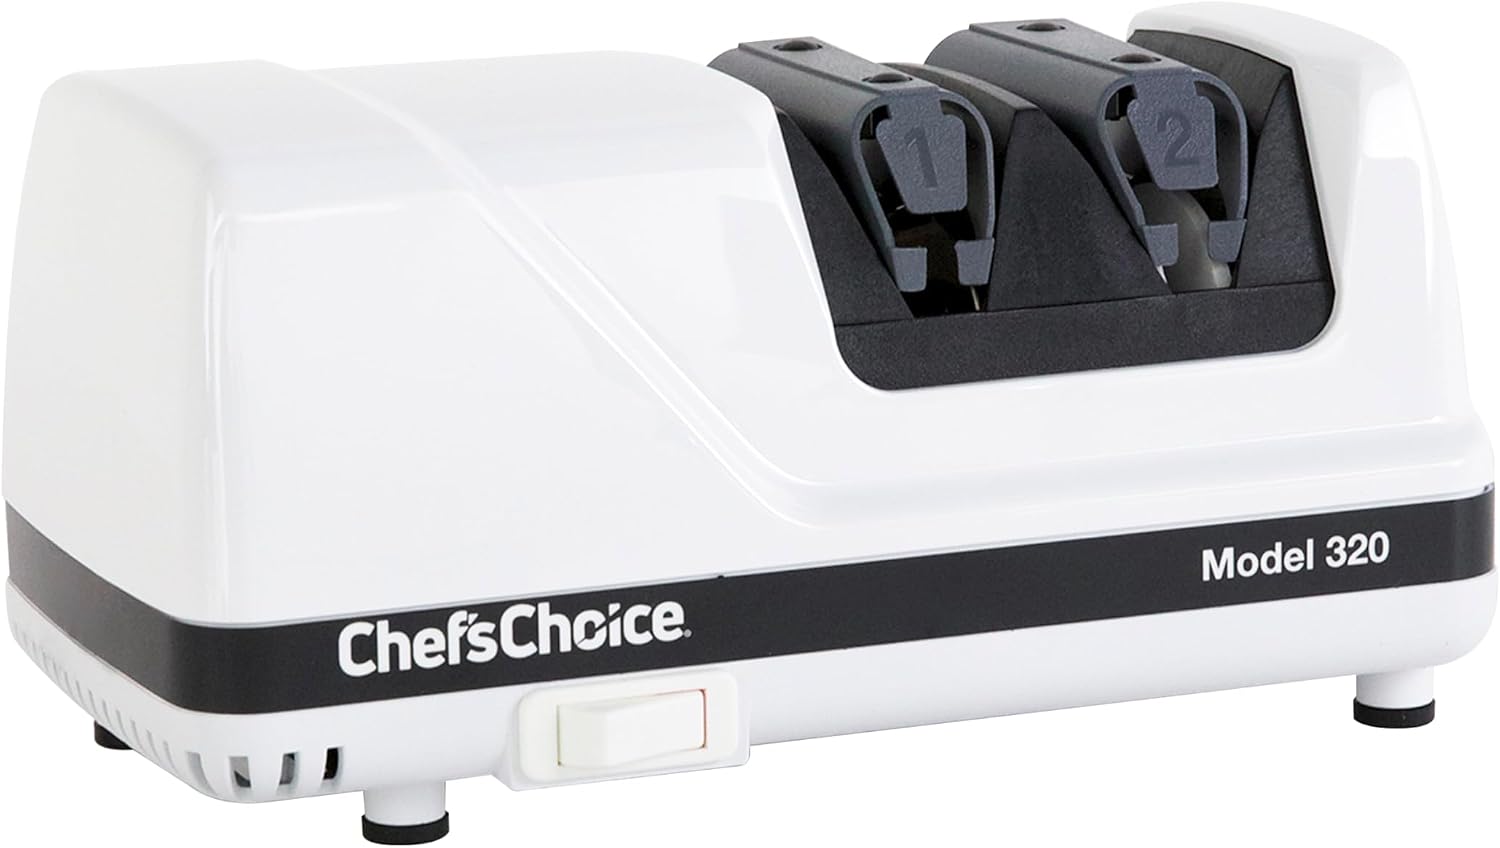
Figure 1: Chef'sChoice Professional Electric Knife Sharpener Model 320.
2. Important Safeguards
When using electrical appliances, basic safety precautions should always be followed, including the following:
- Read all instructions carefully before using the sharpener.
- To protect against electrical hazards, do not immerse the sharpener in water or other liquid.
- Unplug from outlet when not in use, before putting on or taking off parts, and before cleaning.
- Avoid contact with moving parts.
- Do not operate any appliance with a damaged cord or plug, or after the appliance malfunctions, or is dropped or damaged in any manner.
- The use of attachments not recommended or sold by the manufacturer may cause fire, electric shock, or injury.
- Do not use outdoors.
- Do not let cord hang over edge of table or counter or touch hot surfaces.
- This appliance is intended for household use only.
- Always ensure the sharpener is placed on a stable, flat surface during operation.
3. Setup
Before first use, unpack the Chef'sChoice Model 320 sharpener and ensure all components are present and undamaged.
- Place the sharpener on a stable, dry, and flat countertop or work surface.
- Ensure the power switch is in the "OFF" position.
- Plug the power cord into a standard electrical outlet.

Figure 2: Rear view of the sharpener with power cord.
4. Operating Instructions
The Chef'sChoice Model 320 features two sharpening stages for optimal results. Stage 1 uses 100% fine diamond abrasives to create the initial bevel, while Stage 2 uses advanced micron-size 100% diamond abrasives to ultra-hone and polish the edge.
4.1 Sharpening Straight-Edge Knives
- Turn the power switch to the "ON" position.
- Stage 1 (Coarse Sharpening): Insert the knife blade into the left slot of Stage 1 (marked "1"). Allow the blade to rest against the left guide plane. Pull the knife towards you, applying moderate downward pressure, until the blade exits the slot. Repeat this process in the right slot of Stage 1, allowing the blade to rest against the right guide plane. Alternate between the left and right slots of Stage 1, performing 2-3 full pulls in each slot. Listen for a slight change in motor sound, indicating the blade is making contact with the abrasives.
- Check for a Burr: After 2-3 alternating pulls in Stage 1, carefully check for a burr along the edge of the blade. A burr is a slight wire-like edge that forms on the opposite side of the blade from where you are sharpening. You can feel it by gently running your fingertip across the edge (away from the sharp edge). If a burr is present along the entire length of the blade, proceed to Stage 2. If not, continue with 1-2 more alternating pulls in Stage 1 until a burr is formed.
- Stage 2 (Honing and Polishing): Insert the knife blade into the left slot of Stage 2 (marked "2"). Allow the blade to rest against the left guide plane. Pull the knife towards you, applying very light downward pressure, until the blade exits the slot. Repeat this process in the right slot of Stage 2, allowing the blade to rest against the right guide plane. Perform 2-3 very light, alternating pulls in each slot of Stage 2. This stage polishes the edge and removes the burr, resulting in a razor-sharp finish.
- Turn the power switch to the "OFF" position and carefully remove the knife.

Figure 3: Sharpening slots for Stage 1 and Stage 2.

Figure 4: Proper insertion of a knife into the sharpening slot.
4.2 Sharpening Serrated Knives
Serrated knives should only be sharpened in Stage 2 of the Chef'sChoice Model 320.
- Turn the power switch to the "ON" position.
- Insert the serrated knife blade into the left slot of Stage 2 (marked "2"). Apply very light downward pressure and pull the knife towards you until it exits the slot.
- Repeat this process in the right slot of Stage 2.
- Perform 2-3 very light, alternating pulls in each slot of Stage 2. This will hone the tips of the serrations and polish the edge.
- Turn the power switch to the "OFF" position and carefully remove the knife.
Important: Do not use Stage 1 for serrated knives, as this can damage the serrations.
5. Maintenance
The Chef'sChoice Model 320 is designed for minimal maintenance.
- Cleaning: Unplug the sharpener before cleaning. Wipe the exterior with a damp cloth. Do not use abrasive cleaners or immerse the unit in water.
- Metal Dust Shavings: The sharpener is equipped with a clean-out tray to collect metal dust shavings. Periodically, or approximately once a year with regular use, remove the clean-out tray (located at the bottom of the unit) and empty the shavings. Reinsert the tray securely before use.
- No lubrication is necessary for the motor, bearings, or sharpening surfaces.
6. Troubleshooting
| Problem | Possible Cause | Solution |
|---|---|---|
| Knife not sharpening effectively. | Insufficient pressure or too few pulls in Stage 1. Incorrect angle. Worn abrasive disks. | Ensure moderate downward pressure in Stage 1. Perform more pulls if the knife is very dull. Verify the blade is resting against the guide planes. If disks are worn, contact customer support. |
| Burr not forming or inconsistent burr. | Not enough pulls in Stage 1. Uneven pressure. | Continue alternating pulls in Stage 1 until a consistent burr is felt along the entire edge. Ensure even pressure throughout the pull. |
| Sharpener makes unusual noise. | Excessive pressure. Foreign object in slot. | Reduce pressure. Unplug the unit and inspect slots for obstructions. If noise persists, discontinue use and contact customer support. |
| Unit does not turn on. | Not plugged in. Power switch off. | Ensure the unit is securely plugged into a live outlet. Check that the power switch is in the "ON" position. |
7. Specifications
- Model: 320000
- Material: Stainless Steel
- Color: White
- Product Dimensions: 10.6"L x 6.4"W x 6.3"H
- Item Weight: 1.3 Pounds (approximately 1.25 pounds)
- Grit Type: Fine (Diamond Abrasives)
- Number of Stages: 2
- Power Source: Electric (Corded)
- Compatibility: Straight-edge and serrated knives (20-degree class)

Figure 5: Product dimensions of the Chef'sChoice Model 320.
8. Warranty and Support
The Chef'sChoice Professional Electric Knife Sharpener Model 320 is backed by a limited 2-year warranty for home use. This warranty covers defects in materials and workmanship under normal household use.
For warranty claims, technical assistance, or general inquiries, please contact Chef'sChoice Customer Service.
- Manufacturer: Chef'sChoice (EdgeCraft Corporation)
- Customer Service: Refer to the contact information provided in your product packaging or visit the official Chef'sChoice website for the most current support details.
- User Manual (PDF): A digital version of the user manual is available for download at https://manuals.plus/m/b83af4902f6c6098df325f3372b4a646fa27a1e497f47ebaaee295842ebe9ffe.
Related documents320000


Ask a question about this manual
Ask about setup, troubleshooting, compatibility, parts, safety, or missing instructions. Manuals+ will review the question and use this page’s manual context to help answer it.