1. Introduction
The Pentax IQ Zoom 160 is a compact 35mm film camera designed for ease of use and versatility. It features a powerful 38-160mm zoom lens, an advanced autofocus system, and various shooting modes to capture a wide range of photographic situations. This manual provides detailed instructions for the proper operation and care of your camera.

Figure 1: Front view of the Pentax IQ Zoom 160 camera, showing the lens, flash, and viewfinder.
Key Features:
- 38-160mm power zoom lens for versatile framing.
- Five-point passive autofocus system for precise focusing.
- Six-segment multipattern metering system for optimal exposure.
- Automatic backlight compensation.
- Actual-image zoom viewfinder with diopter adjustment.
- Panorama mode for wide-angle shots.
- Multiexposure mode for creative effects.
- Self-timer function.
- Easy-to-read LCD instruction panel with automatic illumination.
2. Setup
2.1. Battery Installation
The Pentax IQ Zoom 160 requires one 3V Lithium battery, type CR123A or SF123A. Ensure the battery is inserted with the correct polarity as indicated inside the battery compartment.
- Locate the battery compartment cover on the bottom of the camera.
- Slide or twist the cover latch to open the compartment.
- Insert one CR123A/SF123A battery, matching the (+) and (-) terminals with the indicators.
- Close the battery compartment cover securely until it clicks into place.
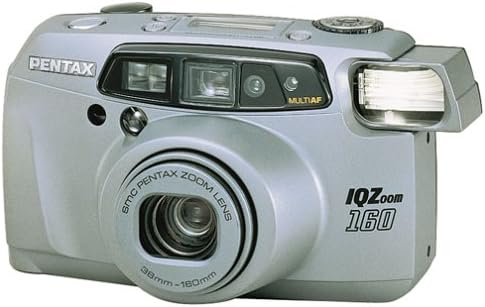
Figure 2: Bottom view of the camera, showing the battery compartment and tripod mount.
2.2. Loading Film
The camera uses standard 35mm film rolls. Always load film in subdued light to prevent accidental exposure.
- Open the camera back by sliding the film door release latch (usually on the side or top of the camera).
- Place a new 35mm film cartridge into the film chamber on the left side.
- Pull the film leader across to the film take-up spool on the right side, ensuring it catches on the spool's teeth.
- Close the camera back firmly until it latches. The camera will automatically advance the film to the first frame. The exposure counter on the LCD panel will display "1".

Figure 3: Rear view of the camera, showing the viewfinder and film door release.
3. Operating the Camera
3.1. Power On/Off and Mode Selection
The user-friendly mode dial allows you to turn the camera on and off, and select various shooting modes.

Figure 4: Top view of the camera, highlighting the mode dial and LCD instruction panel.
- Power On: Rotate the mode dial from "OFF" to any desired shooting mode (e.g., Auto). The lens will extend.
- Power Off: Rotate the mode dial to "OFF". The lens will retract.
- Mode Dial Settings: The dial typically includes modes such as Auto, Red-eye Reduction, Flash Off, Self-timer, and Multiexposure. Refer to the icons on the dial for specific functions.
3.2. Taking Pictures
- Aim the Camera: Look through the viewfinder and frame your subject.
- Zoom: Use the zoom buttons (usually marked 'W' for Wide and 'T' for Telephoto) to adjust the focal length of the 38-160mm lens.
- Focus: Lightly press the shutter button halfway down. The camera's five-point passive autofocus system will focus on the subject. A focus indicator in the viewfinder will confirm focus.
- Shoot: Press the shutter button fully down to take the picture.
3.3. Flash Modes
The built-in flash provides illumination in low-light conditions. The camera features automatic backlight compensation, firing the flash when necessary to properly expose the subject.
- Automatic Flash: The camera automatically determines if flash is needed.
- Red-eye Reduction: Fires a pre-flash before the main flash to reduce red-eye effect.
- Flash Off: Prevents the flash from firing, useful in situations where flash is prohibited or undesirable.
3.4. Special Shooting Functions
- Panorama Mode: Switch to panorama mode via the mode dial or a dedicated button. The viewfinder will adjust to show the panorama framing area. This mode allows for wider aspect ratio images.
- Self-timer: Activate the self-timer (typically 10 seconds) using the mode dial or a dedicated button. The camera will delay taking the picture, allowing the photographer to be included in the shot.
- Multiexposure Mode: This creative mode allows you to combine two or more exposures onto a single frame of film. Consult the LCD instruction panel for guidance on activating and using this feature.
3.5. Viewfinder and LCD Panel
The actual-image zoom viewfinder provides a clear view of your subject and includes a diopter adjustment for users with varying eyesight. The large LCD instruction panel displays essential camera settings and indicators, such as exposure counter, battery exhaustion warning, flash status, and selected mode. It automatically lights up for visibility in any lighting condition.
4. Maintenance
4.1. Cleaning the Camera
- Lens: Use a soft, lint-free cloth or a lens brush to gently remove dust. For smudges, use a specialized lens cleaning solution and cloth. Avoid touching the lens surface with your fingers.
- Camera Body: Wipe the camera body with a soft, dry cloth. For stubborn dirt, slightly dampen the cloth with water. Do not use solvents or abrasive cleaners.
- Viewfinder: Use a soft brush or air blower to remove dust from the viewfinder eyepiece.
4.2. Storage
- When not in use for extended periods, remove the battery to prevent leakage.
- Store the camera in a cool, dry place, away from direct sunlight, high humidity, and extreme temperatures.
- Use a camera bag or case to protect the camera from dust and physical damage.
5. Troubleshooting
| Problem | Solution | |
|---|---|---|
| Camera does not power on. | Dead or incorrectly inserted battery. | Replace battery with a fresh CR123A/SF123A, ensuring correct polarity. |
| Film does not advance. | Film not properly loaded or end of roll. | Re-load film, ensuring the leader catches the take-up spool. Check if the film counter shows 'S' or 'E'. |
| Pictures are blurry. | Camera shake, subject too close, or focus error. | Hold camera steady, ensure subject is within focusing range, or use a tripod. Ensure focus confirmation appears before shooting. |
| Flash does not fire. | Flash is set to "Flash Off" mode or battery is low. | Check flash mode setting. Replace battery if low. |
| Red-eye in photos. | Flash fired directly at subject's eyes. | Use Red-eye Reduction flash mode. Increase ambient lighting if possible. |
6. Specifications
| General | |
|---|---|
| Brand | Pentax |
| Model Name | IQ Zoom 160 |
| Model Number | 10124 |
| Form Factor | Compact |
| Item Weight | 16 ounces |
| Enclosure Material | Plastic |
| Lens | |
| Lens Type | Zoom |
| Minimum Focal Length | 38 Millimeters |
| Maximum Focal Length | 160 Millimeters |
| Minimum Aperture | 4.5 |
| Aperture Modes | 4.5-12 |
| Exposure & Focus | |
| Exposure Control | Automatic |
| Metering Methods | Spot, Multi-pattern |
| Minimum Shutter Speed | 1/400 seconds |
| Maximum Shutter Speed | 2 seconds |
| Auto Focus Technology | Contrast Detection, Multi area, sensor |
| Autofocus Points | 5 |
| Focus Mode | Single-Servo AF (AF-S) |
| White Balance Settings | Auto |
| Expanded ISO Minimum | 100 |
| Flash | |
| Camera Flash | Built-In |
| Flash Modes | Automatic, Red Eye Reduction |
| Flash Sync Speed | 1/400 seconds |
| Other Features | |
| Viewfinder | Optical |
| Display Type | LCD |
| Self Timer | 10 Seconds |
| Shooting Modes | Automatic, Panorama, Multiexposure, Self-timer |
| Special Feature | Panorama |
| Battery Type | 3V Lithium CR123A/SF123A |
| Water Resistance Level | Not Water Resistant |
| Has Image Stabilization | No |
7. Warranty and Support
For specific warranty information, please refer to the documentation included with your purchase or visit the official Pentax website. For technical support or service inquiries, please contact Pentax customer service directly.
You can often find additional support resources, FAQs, and contact information on the manufacturer's official website.