Sony SLV-N50
Sony SLV-N50 VHS VCR User Manual
Model: SLV-N50 | Brand: Sony
Introduction
This manual provides comprehensive instructions for the setup, operation, and maintenance of your Sony SLV-N50 VHS VCR. Designed for ease of use, this Hi-Fi Stereo VCR offers reliable performance for playing and recording VHS tapes. Please read this manual thoroughly before operating the unit to ensure proper function and longevity.
Safety Information
- Power Source: Ensure the VCR is connected to an AC 120V, 60Hz power supply.
- Ventilation: Do not block ventilation openings. Allow adequate space around the unit for proper airflow to prevent overheating.
- Liquid Exposure: Do not expose the unit to rain or moisture. Do not place objects filled with liquids, such as vases, on the apparatus.
- Foreign Objects: Never push objects of any kind into the unit through openings as they may touch dangerous voltage points or short-out parts that could result in a fire or electric shock.
- Servicing: Do not attempt to service this product yourself. Refer all servicing to qualified service personnel.
- Batteries: The remote control requires 2 AAA batteries. Ensure correct polarity when inserting.
Product Overview
Familiarize yourself with the main components and controls of your Sony SLV-N50 VCR.
Front Panel

The front panel features the power button, VHS cassette slot, Eject button, Line-2 In (Audio L/R and Video) jacks, and basic transport controls (Play, Rewind, Fast Forward, Stop, Pause, Record). The "Hi-Fi Stereo" and "Auto Clock Set / Auto Head Cleaner" indicators are also visible.

On the left side of the front panel, you will find the main Power button, the Eject button for removing VHS tapes, and the convenient Line-2 In audio (red and white RCA) and video (yellow RCA) input jacks for connecting external devices like camcorders.

The right side of the front panel houses the essential tape transport controls: Rewind (REW), Play (PLAY), Fast Forward (FF), Stop (STOP), Pause (PAUSE), and Record (REC). These buttons allow for direct control of tape playback and recording functions.
Rear Panel

The rear panel provides all necessary connections for integrating the VCR into your home entertainment system, including Line-1 In/Out and RF Unit connections.

The Line-1 In and Line-1 Out RCA jacks (red for right audio, white for left audio, yellow for video) are standard connections for audio and video signals, allowing the VCR to send and receive signals from other components like televisions or DVD recorders.
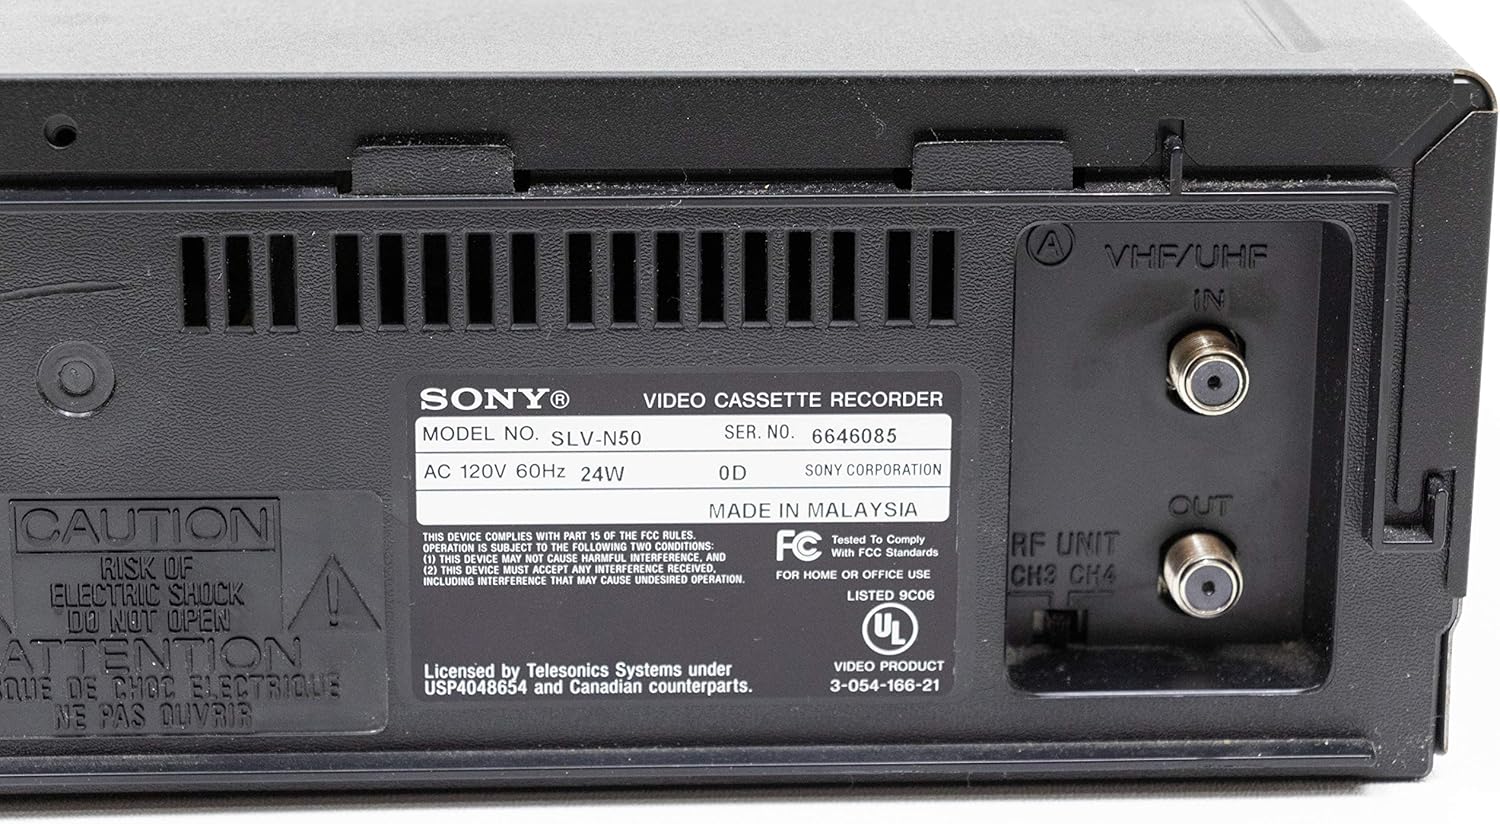
This label provides important product identification, including the model number (SLV-N50), serial number, power requirements, and country of manufacture.
Setup
Connecting to a Television
- Power Off: Ensure the VCR and your television are turned off before making any connections.
- Audio/Video Connection: Connect the Line-1 Out (Audio L/R and Video) jacks on the rear of the VCR to the corresponding Audio/Video Input jacks on your television using RCA cables. Match the colors (yellow to yellow, white to white, red to red).
- Antenna/Cable Connection (Optional): If you intend to record broadcast TV or cable, connect your antenna or cable TV line to the VHF/UHF IN jack on the rear of the VCR. Then, connect the RF UNIT OUT jack on the VCR to the antenna input on your television.
- Power Connection: Plug the VCR's power cord into a wall outlet.
- Initial Setup: Turn on your television and select the correct input source (e.g., Video 1, AV, Line In) that corresponds to the VCR's connection. Turn on the VCR. The VCR may automatically set the clock or prompt for initial setup.
Connecting External Devices (e.g., Camcorder)
To record from an external device, connect its audio/video output to the Line-2 In jacks on the front panel of the VCR.
Operating Instructions
Playing a VHS Tape
- Insert a VHS tape into the cassette slot. The VCR will automatically load it.
- Press the PLAY button on the VCR or remote control.
- To stop playback, press the STOP button.
- To fast forward or rewind, press the FF or REW buttons respectively.
- To pause playback, press the PAUSE button. Press PLAY again to resume.
- To eject the tape, press the EJECT button.
Recording a Program
- Insert a blank or recordable VHS tape into the cassette slot.
- Tune the VCR to the desired channel using the Channel Up/Down buttons or the remote control.
- Press the REC button. Recording will begin immediately.
- To stop recording, press the STOP button.
- For timed recordings, refer to the original Sony manual for detailed programming instructions, typically involving setting start time, end time, and channel.
Maintenance
- Cleaning the Exterior: Use a soft, dry cloth to wipe the exterior of the VCR. For stubborn stains, dampen the cloth with a mild detergent solution and wipe dry. Avoid abrasive cleaners.
- Head Cleaning: The Sony SLV-N50 features an "Auto Head Cleaner" function. If picture quality degrades (e.g., snowy picture, distorted audio), a dedicated VHS head cleaning tape may be used. Follow the instructions provided with the cleaning tape. Excessive use of cleaning tapes can damage the heads.
- Tape Care: Store VHS tapes in their cases, away from direct sunlight, extreme temperatures, and magnetic fields. Rewind tapes fully before storing.
- Ventilation: Regularly check that the ventilation slots are not obstructed by dust or debris.
Troubleshooting
| Problem | Possible Cause | Solution |
|---|---|---|
| No power | Power cord unplugged; power outlet not active. | Check power cord connection. Try a different outlet. |
| No picture or sound during playback | Incorrect TV input selected; A/V cables loose or incorrectly connected; VCR heads dirty. | Select correct TV input (e.g., AV1, Video). Check all A/V cable connections. Use a head cleaning tape. |
| Picture is snowy or distorted | Dirty VCR heads; worn-out tape; tracking issues. | Use a head cleaning tape. Try a different tape. Adjust tracking if available (often automatic on this model). |
| Tape will not eject | Power interruption; mechanical issue. | Ensure power is connected. If problem persists, do not force the tape; seek professional service. |
| Remote control not working | Dead batteries; obstructed sensor; incorrect remote. | Replace batteries (2 AAA). Ensure no obstructions between remote and VCR. Confirm it's the correct remote for the SLV-N50. |
Specifications
- Model: SLV-N50
- Brand: Sony
- Product Dimensions: 14 x 4 x 11 inches
- Item Weight: 8.05 pounds
- Power Requirements: AC 120V, 60Hz, 24W
- Audio: Hi-Fi Stereo
- Video Heads: 19 Micron Head Adaptive Picture Control
- Date First Available: April 15, 2006
- Batteries Required (for remote): 2 AAA batteries
What's in the Box
The original packaging for the Sony SLV-N50 VHS VCR typically includes:
- Sony SLV-N50 VHS VCR Unit
- Remote Control (RMT-V266A, if included with specific purchase)
- RCA Audio/Video Cables
- Power Cord
- User Manual (this document or similar)
Warranty and Support
For information regarding warranty coverage, technical support, or service for your Sony SLV-N50 VHS VCR, please refer to the warranty card included with your original purchase or visit the official Sony support website. Support resources may include FAQs, troubleshooting guides, and contact information for customer service.
You can often find additional support and downloadable manuals on the Sony eSupport website by searching for your model number (SLV-N50).