Introduction
This manual provides comprehensive instructions for the safe and effective use of your Fujifilm Date 70 Zoom 35mm Camera. Please read this manual thoroughly before operating the camera and retain it for future reference. The Fujifilm Date 70 Zoom is a compact 35mm camera featuring a 35mm to 70mm zoom lens, autofocus capabilities, and a built-in flash, designed for easy point-and-shoot photography.
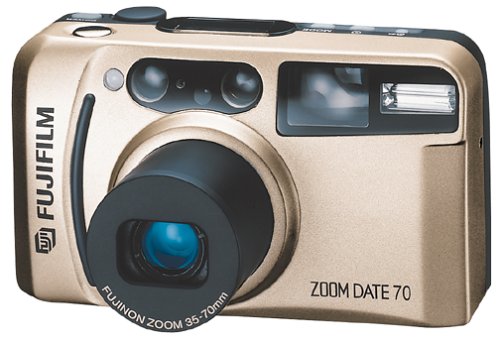
Figure 1: Front view of the Fujifilm Date 70 Zoom 35mm Camera. This image displays the camera's compact design, lens, and flash unit.
Setup
1. Battery Installation
The Fujifilm Date 70 Zoom camera requires one CR123A lithium battery (not included).
- Locate the battery compartment cover on the bottom of the camera.
- Slide the cover latch and open the compartment.
- Insert the CR123A battery, ensuring the positive (+) and negative (-) terminals align correctly with the indicators inside the compartment.
- Close the battery compartment cover securely until it clicks into place.
Note: Incorrect battery insertion can prevent the camera from operating or cause damage. Always use fresh, high-quality batteries.
2. Film Loading
This camera uses standard 35mm film.
- Open the camera back cover by sliding the film door release latch (usually located on the side or bottom).
- Place a new 35mm film cartridge into the film chamber on the left side, ensuring the film leader points towards the take-up spool on the right.
- Pull the film leader across to the take-up spool and align it with the red mark or slot.
- Close the camera back cover firmly until it latches. The camera will automatically advance the film to the first frame. The frame counter should display '1'.
Note: If the frame counter does not display '1' after closing the back, open and re-load the film. Avoid direct sunlight when loading film.
3. Setting Date and Time
The Date 70 Zoom features a quartz date and time imprinting function.
- With the camera powered on, locate the DATE/TIME button (often near the LCD panel).
- Press the button to cycle through display modes (Year/Month/Day, Day/Hour/Minute, etc.).
- Use the adjustment buttons (usually marked with arrows or +/-) to set the correct year, month, day, hour, and minute.
- Press the DATE/TIME button again to confirm and exit the setting mode.
Note: The date and time will be imprinted on your photos if this function is activated.
Operating the Camera
1. Powering On/Off
- To power on the camera, slide the lens barrier open or press the power button (location varies by specific model variant).
- To power off, slide the lens barrier closed or press the power button again. The lens will retract.
2. Taking Photos
- Framing: Look through the viewfinder to compose your shot.
- Zoom: Use the zoom buttons (W for wide, T for telephoto) to adjust the focal length between 35mm and 70mm.
- Autofocus: Gently press the shutter button halfway down. The camera's active infrared autofocus system will focus on the subject, and a focus indicator (usually a green light) will illuminate in the viewfinder.
- Flash Modes: The built-in flash has several modes. Use the flash mode button to cycle through options like Auto Flash, Fill-in Flash, Flash Off, and Red-eye Reduction. The camera will automatically select a flash mode in Auto mode if lighting conditions require it.
- Shutter Release: Once focus is confirmed, press the shutter button fully down to take the picture.
Tip: For landscape shots, ensure the camera is stable. For night portraits, use appropriate flash modes to illuminate your subject.
3. Rewinding Film
When the film roll is complete (the frame counter will show 'S' or blink), the camera will typically rewind the film automatically.
- If automatic rewind does not occur, locate the manual rewind button (often a small recessed button requiring a pen tip to press).
- Press and hold the manual rewind button until the film is fully rewound into the cartridge.
- Open the camera back and remove the film cartridge.
Caution: Do not open the camera back before the film is fully rewound, as this will expose the film to light and ruin your photos.
Maintenance
1. Cleaning the Camera
- Exterior: Use a soft, dry cloth to wipe the camera body. For stubborn dirt, slightly dampen the cloth with water.
- Lens: Use a lens brush or a blower to remove dust. For smudges, use a specialized lens cleaning solution and a microfiber cloth. Avoid touching the lens surface with your fingers.
- Viewfinder: Gently wipe with a soft, dry cloth.
Warning: Do not use organic solvents like alcohol, thinner, or benzene, as they can damage the camera's finish.
2. Battery Care and Replacement
- Replace the battery when the battery indicator appears in the viewfinder or LCD panel, or if the camera fails to power on.
- Remove the battery if the camera will not be used for an extended period to prevent leakage.
- Dispose of used batteries according to local regulations.
3. Film Storage
- Store unused film in a cool, dry place, away from direct sunlight and high temperatures.
- Process exposed film as soon as possible for best results.
Troubleshooting
| Problem | Possible Cause | Solution |
|---|---|---|
| Camera does not power on. | Dead or incorrectly inserted battery. | Check battery orientation. Replace with a fresh CR123A battery. |
| Film does not advance after loading. | Film leader not properly engaged with take-up spool. | Open camera back (in low light), re-seat film leader, and close securely. |
| Photos are blurry or out of focus. | Subject too close/far, camera shake, or autofocus failure. | Ensure subject is within focus range. Hold camera steady. Press shutter halfway to confirm focus before shooting. Avoid shooting through obstructions. |
| Background is in focus, but foreground subject is not. | Autofocus system may have locked onto a background element. | Re-frame the shot, ensuring the main subject is in the center of the viewfinder when pressing the shutter halfway. Re-focus if necessary. |
| Flash does not fire. | Flash is turned off, or battery is low. | Check flash mode settings. Replace battery if low. |
| Date/Time imprint is incorrect or not appearing. | Date/Time not set or imprinting function is off. | Refer to "Setting Date and Time" section to adjust settings and ensure imprinting is enabled. |
Specifications
- Model Name: Fujifilm Date 70 Zoom
- Model Number: 600001310
- Film Format: 35mm
- Lens: Zoom lens, 35mm - 70mm
- Autofocus System: Active infrared autofocus
- Flash: Built-in flash with multiple modes
- Date Imprinting: Quartz date and time imprinting
- Power Source: 1x CR123A lithium battery (not included)
- Item Weight: 8.8 ounces (approx. 249 grams)
- Dimensions: 1.77 x 1.77 x 1.18 inches (approximate package dimensions)
Warranty and Support
For information regarding warranty coverage, service, or technical support for your Fujifilm Date 70 Zoom 35mm Camera, please refer to the warranty card included with your purchase or visit the official Fujifilm website. You may also contact Fujifilm customer service directly for assistance.


