Introduction
The Super Cute Origami Kit is designed to introduce you to the delightful art of origami, allowing you to create charming paper projects that can be personalized in countless ways. This kit provides all the essential materials and clear instructions to guide you through each step, making it suitable for beginners and experienced folders alike. Follow Kami Kami and Orihime, your friendly mascots, as they lead you on a creative journey.
Kit Contents
Your Super Cute Origami Kit includes everything necessary to begin your paper crafting adventure:
- Full-color Instruction Book: This comprehensive book provides detailed folding instructions and creative tips for decorating your finished models.
- 48 Sheets of Colorful Origami Paper: A vibrant assortment of papers to bring your creations to life.
- Over 35 Sticker Accessories: Various stickers to add unique expressions and details to your origami figures.
- 100 Stick-on Pearls: Assorted colors of pearls for elegant embellishments.
- 150 Glittering Sequins: Sparkly sequins to add a touch of glamour.
- 50 Assorted Stick-on Rhinestones: Dazzling rhinestones for extra shine.
- Lace Washi Tape: Decorative tape for borders and accents.

Image: Front of the Super Cute Origami Kit box, showcasing the kit's contents and examples of completed origami projects.

Image: Back of the Super Cute Origami Kit box, illustrating additional origami models and a clear overview of the kit's components.

Image: A complete spread of the Super Cute Origami Kit's contents, showing the book, paper, and various embellishments.
Getting Started: Basic Folding Tips
Before attempting specific projects, it is beneficial to understand the fundamental origami terms and symbols. This section will familiarize you with the basic techniques used throughout the manual.
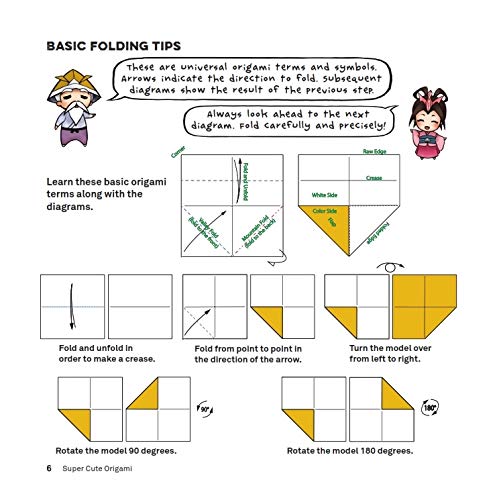
Image: A page from the instruction book detailing basic origami folding techniques, including how to fold, unfold, make a crease, fold from point to point, turn the model over, and rotate the model.
Key terms and actions:
- Fold and Unfold: To create a crease line that will be used as a guide for subsequent folds.
- Fold from Point to Point: Align specific corners or points of the paper as indicated by arrows.
- Turn the Model Over: Flip the paper to the opposite side.
- Rotate the Model: Turn the paper by a specified degree (e.g., 90 or 180 degrees) to orient it correctly for the next step.
- Arrows: Indicate the direction of the fold.
- Dashed Lines: Represent mountain folds (fold away from you).
- Dot-dash Lines: Represent valley folds (fold towards you).
Always look ahead to the next diagram and fold carefully and precisely for the best results.
Origami Projects
This kit features a variety of engaging origami projects. Each project includes step-by-step instructions to help you create your own super cute figures.
Cupcake
Create a sweet cupcake model. You can enhance its appearance by adding stick-on pearls as decorative icing.
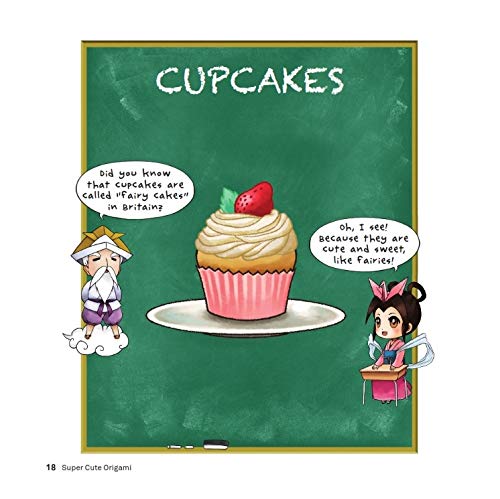
Image: Introduction page for the Cupcake project, featuring a large cupcake illustration and fun facts from the mascots.
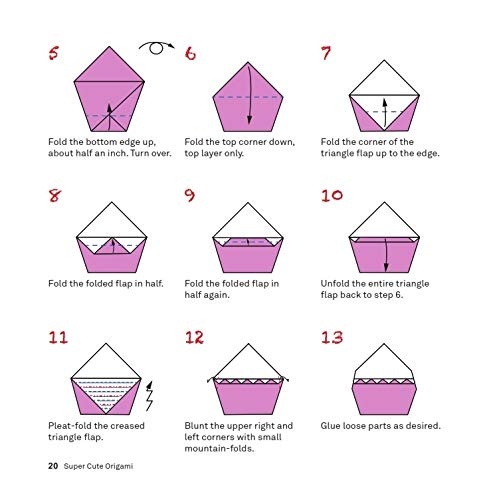
Image: Detailed folding steps for the Cupcake origami, showing sequential diagrams from step 5 to 13.
Crown
Fold a regal crown that can be worn or used as decoration. Embellish it with rhinestones for a truly dazzling effect.
Daruma Doll
Construct a traditional Japanese Daruma Doll, a symbol of good luck and perseverance. Color in one eye when you make a wish, and the other when your wish is granted.
Maneki Neko (The Lucky Cat)
Create the iconic Japanese waving cat, believed to bring good fortune to its owner. Personalize your Maneki Neko for friends or family.
Matryoshka Dolls (Nesting Dolls)
Fold the charming Russian nesting dolls. These models can be decorated to reflect various styles and personalities.
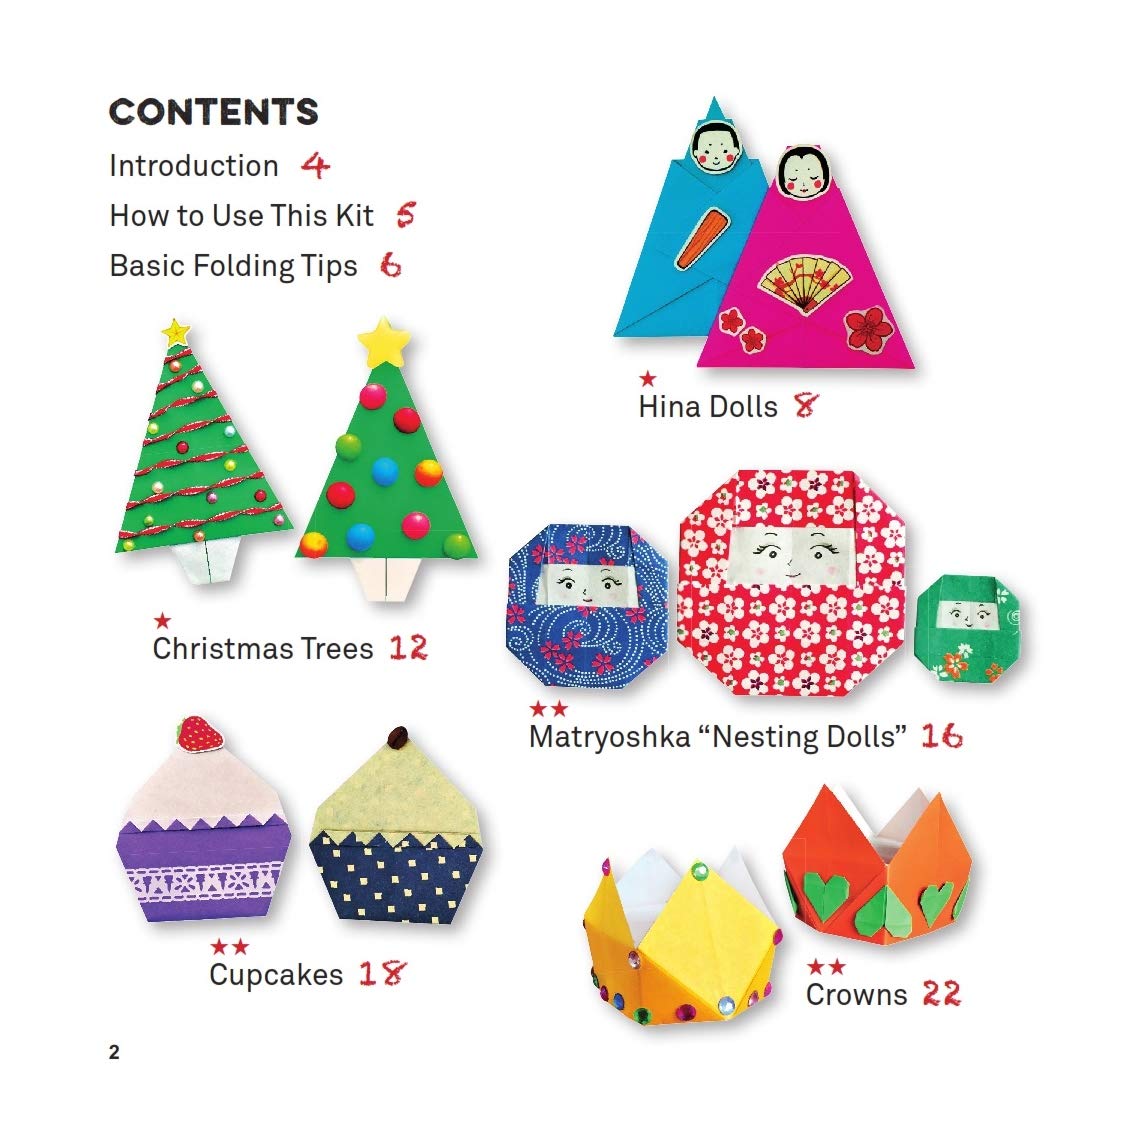
Image: A contents page from the instruction book, displaying a visual overview of several projects like Christmas Trees, Hina Dolls, Matryoshka Dolls, Cupcakes, and Crowns, along with their page numbers.
Additional projects in this kit include a Masquerade Party Mask, Christmas Tree, Hina Dolls, Peacock, and Diya Oil Lamp, offering a diverse range of creative opportunities.
Embellishing Your Creations
The Super Cute Origami Kit provides a rich assortment of accessories to add unique and personal touches to your folded models. Use these items to enhance the cuteness and character of your origami.
- Stickers: Apply stickers to create faces, clothing details, or other decorative elements.
- Sequins: Glue or adhere sequins to add sparkle and texture.
- Rhinestones: Attach rhinestones for a gem-like, glittering effect.
- Pearls: Use stick-on pearls to create elegant or whimsical accents.
- Washi Tape: Apply lace washi tape for decorative borders or patterns.

Image: A sheet of diverse stickers, including faces, animals, and small decorative items, ready for use in personalizing origami.
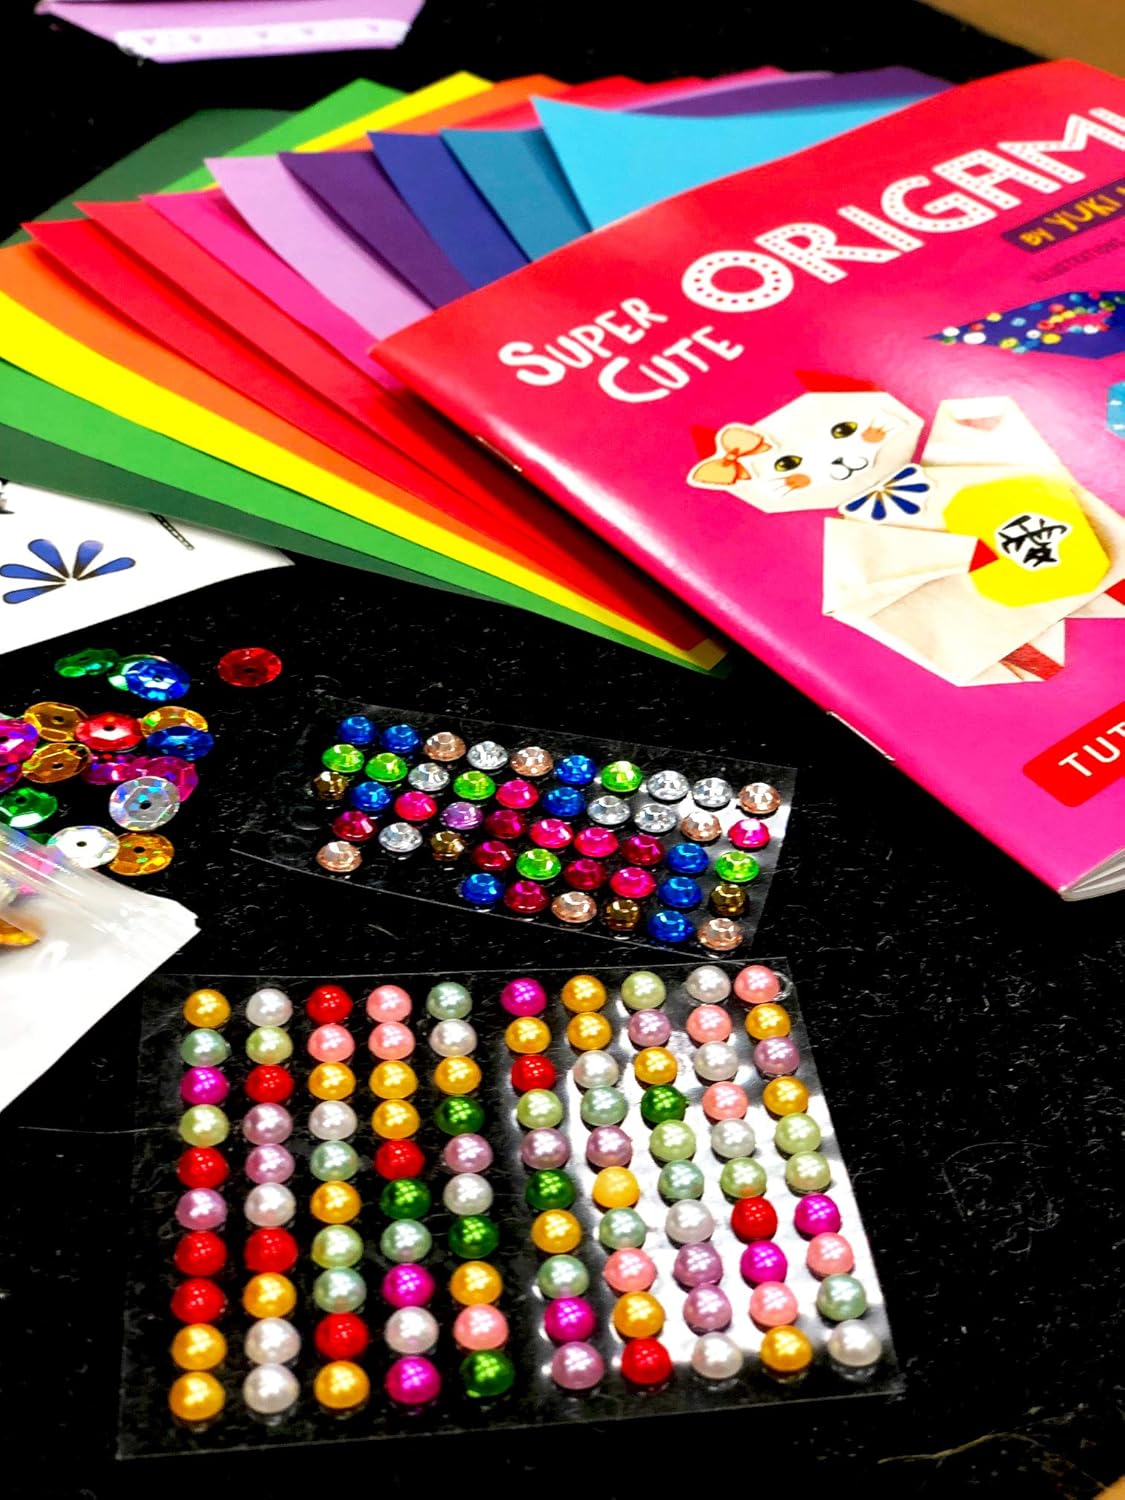
Image: A detailed view of the colorful stick-on pearls and shimmering sequins provided in the kit for embellishment.
Care and Storage
To ensure the longevity of your origami creations and kit components, follow these guidelines:
- Storage: Store unused origami paper and accessories in a dry, cool place away from direct sunlight. This prevents fading of colors and damage to materials.
- Handling: Handle finished origami models with care to avoid accidental creasing, tearing, or bending.
- Cleaning: Do not use water or chemical cleaners on paper models. If dusting is required, use a soft, dry brush or cloth very gently.
Troubleshooting Tips
If you encounter any challenges while working with your kit, consider the following common issues and solutions:
- Diagrams Seem Unclear: Revisit the "Basic Folding Tips" section at the beginning of the book. It explains all common symbols and folding techniques in detail.
- Folds Are Not Aligning Precisely: Ensure you are working on a flat, stable surface. Take your time to align edges and corners perfectly before making a sharp crease. Precision is key in origami.
- Paper Tearing During Folds: Apply gentle, even pressure when creasing. If a fold feels too tight or resistant, re-check the previous steps to ensure correct execution.
- Finished Model Doesn't Hold Its Shape: Ensure all creases are firm and sharp. For some models, especially those with many layers, pressing firmly along the folds can help. If desired, a tiny dot of craft glue (not included) can be used to secure hidden flaps.
Product Specifications
| Attribute | Detail |
|---|---|
| Publisher | Tuttle Publishing |
| Publication Date | April 9, 2019 |
| Language | English |
| Print Length | 47 pages |
| ISBN-10 | 080485078X |
| ISBN-13 | 978-0804850780 |
| Item Weight | 2.31 pounds |
| Dimensions | 8 x 1.25 x 10.25 inches |
Warranty and Support
Information regarding product warranty and customer support is not provided within this manual. For further assistance or inquiries, please refer to the publisher's official website or contact their customer service directly.
Publisher Website: www.tuttlepublishing.com